Baby Bok Choy with Chicken and Shrimp

baby_bok_chix

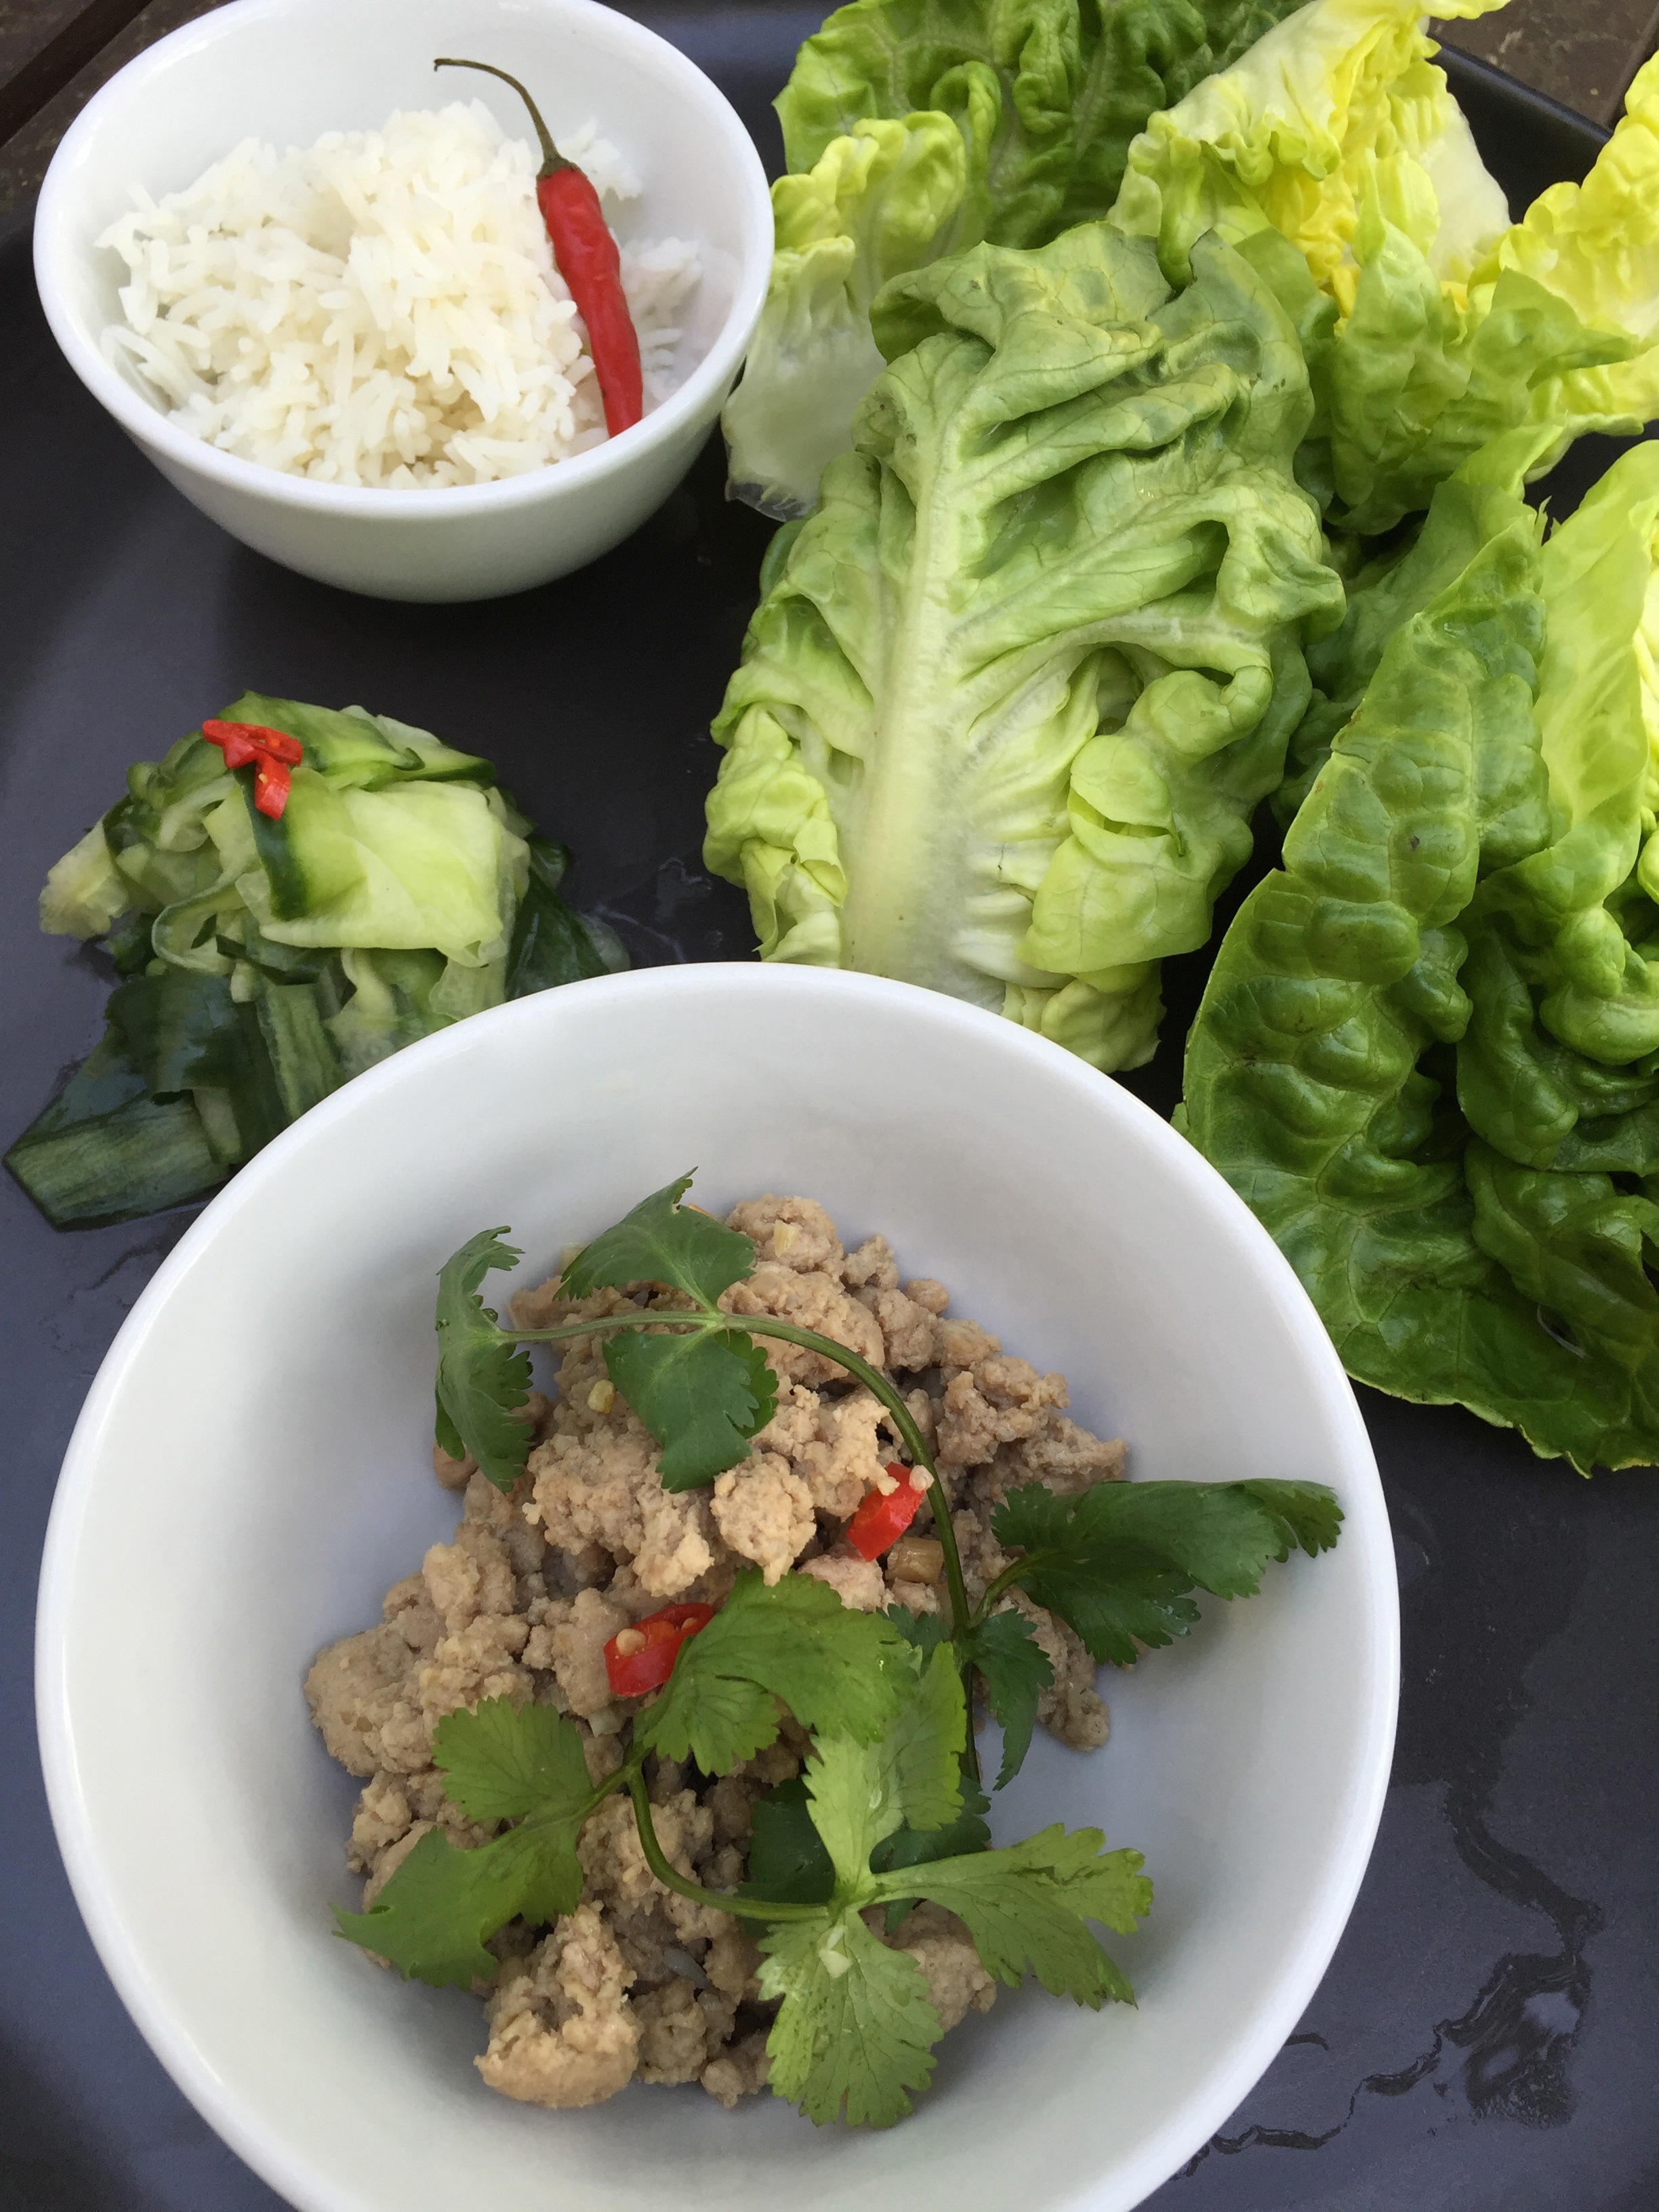
A fast Asian dish elevates midweek dining. photo by: Nancy Duran

Beautiful baby bok choy from Ironwood Farm was the highlight of my CSA basket this week. It helped make a “back to work” Tuesday just a little bit brighter. After weeks of travel and house guests, a quiet night with my husband was just the ticket. This fast and fresh stir fry was the perfect one dish meal for a lazy night in. Feel free to double or even triple this recipe to feed the whole family. The kids will love this one too.

Serves 2

1/4 cup chicken stock
2 tablespoons soy sauce
1 tablespoon dark brown sugar
1 tablespoon Chinese cooking wine (or sherry)
1 tablespoon rice wine vinegar
1 teaspoon sesame oil
1 tablespoon peanut oil
1 boneless, skinless chicken breast, thinly sliced on the diagonal
4 green onions, coarsely chopped on the diagonal, white and light green parts separated from the dark green parts
8 cooked large shrimp
About 2 small bunches baby bok choy

  1. In a medium bowl, combine the stock, soy sauce, sugar, cooking wine, vinegar, and sesame oil. Stir to combine well and set aside.
  2. In a wok, heat the peanut oil over medium-high heat. Add the chicken and the white and light green parts of the green onions and cook about 1 minute on one side of the chicken. Flip the chicken and cook for a further minute. Cook, stirring, for a further minute.
  3. Add the stock mixture to the wok and bring to the boil. Add the shrimp and bok choy. Cover for about 30 seconds to wilt the bok choy then uncover and cook for 2 to 3 minutes to cook the bok choy until crisp-tender and to reduce the sauce slightly. Add the dark green parts of the green onion and serve over rice.

Nutritional analysis based on 2 servings:
Calories 216, Fat 10g, Sodium 1193mg, Carbohydrate 13g, Fiber 4g, Sugar 7g, Protein 18g

Posted in lunch, main | Tagged , , , , , , , , | Leave a comment

Sweet and Sassy Salad Turnips

baby_turnip

Salad Turnips stand apart from their autumn cousins. photo by Nancy Duran

Fall turnips have got nothing on their spring-harvested baby cousins, which are sometimes referred to as salad turnips because they are delicious eaten raw as well as roasted. These turnips are crunchy and peppery, kind of like their other cousins: radishes. To mellow that sharpness, I like to lightly roast these little guys and then serve them with those snappy raw radishes. Topped off with a sweet and sour vinaigrette, this salad hits each of the basic tastes: sweet, sour, bitter, salty, and the elusive umami (at least, I think it does).

I know there are a lot of turnip haters out there but before you take a definitive stand, give salad turnips a try. I think they just might win you over…

Serves 4

Salad
2 bunches salad (baby) turnips, trimmed and halved
2 teaspoons olive oil
Sea salt and freshly ground black pepper to taste
1/2 bunch radishes (4 to 5), thinly sliced
6 cups mixed greens

Sweet Mustard Vinaigrette
2 tablespoons Dijon mustard
2 tablespoons rice wine vinegar
1 tablespoon granulated sugar
3 tablespoons olive oil
Salt and pepper to taste

  1. Preheat the oven to 400°F.
  2. In a medium bowl, toss the turnips with the oil and season to taste with salt and pepper. Slide the turnips onto a roasting pan. Roast for 10 minutes, until easily pierced with a paring knife.
  3. While the turnips cool slightly, make the Sweet Mustard Vinaigrette: In a screw-top jar, combine all the vinaigrette ingredients and shake to combine.
  4. In a large bowl, combine the radishes, mixed greens and turnips. Drizzle with about half the dressing and serve. Serve with more dressing on the side or save the dressing for the next night’s salad.

Nutritional analysis based on 4 servings (does not include salt and pepper to taste):
Calories 156, Fat 13g, Sodium 150mg, Carbohydrate 10g, Fiber 2g, Sugar 6g, Protein 2g

Posted in lunch, salad, side, snack | Tagged , , , , , , | Leave a comment

Vodka-Cured Salmon Gravlax

gravlax

Thinly sliced homemade gravlax can be served on toasted pumpernickel or crisp lavash crackers. photo: Nancy Duran

Sometimes we forget that just as vegetables and fruit have a season, so too do fish. Sure there are farm raised fish available throughout the year, but sustainable, wild caught seafood is definitely the better way to go. Late spring ushers in wild caught salmon season, which is the perfect time to make gravlax.

The classic Scandinavian curing method is the technique I prefer. I figure they’ve been doing this the longest, they’ve probably got it perfected by now. The core ingredients are salt, sugar, dill, and white pepper. Just for good measure, I throw in a couple shots of vodka to aid in the curing process and grated lemon rind for a citrus kicker. (I can’t help messing with success.) And that’s it. It’s ridiculously easy. Seriously, nothing this gorgeous looking and tasting should be that simple.

Gravlax can be served at any time throughout the day. Whether it’s a brunch party or an evening cocktail party, gravlax fits in quite nicely. And if there are leftovers (big if), it’s delicious the next morning on a bagel.

Serves 14 to 16 as part of a finger food selection

11/2 pound wild caught salmon fillet with skin on
1/3 cup granulated sugar
1/3 cup salt
1/2 cup finely chopped fresh dill
1 tablespoon ground white pepper
2 tablespoons finely grated lemon rind
1/4 cup vodka

  1. First, halve the salmon fillet. If you have a center cut of salmon, slice the fillet in half crosswise. If you have a tail end, slice it in half lengthwise. Be sure all pin bones have been removed. You can do this with fish tweezers or just have it done at the market when you buy the fish.
  2. In a small bowl, combine the sugar, salt, dill, pepper, and lemon rind.
  3. In a deep dish, place the salmon halves skin side down. Pour over the vodka. Coat both halves with the sugar mixture, pressing it gently into the flesh. Then place one of the halves over the other so that the flesh sides are touching, like a salmon sandwich. Cover tightly with cling wrap. Place a second smaller dish over the cling wrap and top that with some heavy cans so that you weigh the fish down.
  4. Let sit in the fridge for 48 hours, basting once with the liquid in the bottom of the dish and then flipping the salmon sandwich.
  5. When you are ready to serve the gravlax, rinse off the curing mixture and pat dry (or gently wipe off with a paper towel). Using a very sharp knife, thinly slice the meat off the skin and serve sprinkled with capers and cornichons on rye toasts. Top with dollops of lemony sour cream or sweet mustard.

Nutritional analysis based on 16 servings:
Calories 75, Fat 4g, Sodium 93 mg, Carbohydrate 0g, Fiber 0 g, Sugar 0 g, Protein 9g

Posted in appetizer, brunch, lunch, main | Tagged , , , , , | Leave a comment

Hello Spring!

buerre_blanc

Quintessential spring vegetables with a light lemony beurre blanc. photo: Nancy Duran

My local farmers’ market opens for the season this weekend and I am so ready for it. To honor that occasion, here’s a recipe for a classic French sauce to dress up the lovely greens that I’m eagerly anticipating. While they may not have these exact greens at the market, anything along the lines of asparagus, peas, and fava beans will work beautifully with this light and lemony beurre blanc, or French white butter sauce.

If you know a thing or two about French cooking, then you probably know that beurre blanc can be troublesome to prepare. It’s certainly not something you whip up after work on a weekday. But a few years back when I used to test and edit Jamie Oliver’s recipes for delicious. magazine, I learned a great cheat’s version from him that’s a quick and foolproof way to mimic this grand dame of a sauce. This is my very own version of that awesome cheat.

The trickiest step in making beurre blanc is the emulsion stage. That’s when you add the fat (in this case butter) to the water (in this case wine and lemon juice) and whisk them over heat so that they come together. Unfortunately, fat and water don’t like to mix so you have to trick them into doing so by whisking vigorously over just the right degree of heat, adding the fat in just the right amounts. Suffice it to say, it gets a sweat going.

Enter, the cheat. The emulsion step in this sauce is performed entirely in a warm screw-top jar. By adding the liquid to the jar hot from the stove, then dropping in the cubed butter and shaking vigorously, you can create the same luscious velvet texture with a tenth of the effort. The resulting sauce is impressive enough to serve at a spring dinner party, while the prep involved is effortless enough to make you want to serve it on any given night.

Serves 6

Lemony Beurre Blanc
1/2 cup dry white wine
1/4 cup lemon juice
2 green onions, thinly sliced, white and light green parts separated from the dark green
1/2 stick (1/4 cup) unsalted butter, chopped into small pieces
Salt and white pepper to taste

Vegetables
1 bunch (about 1 pound) asparagus, woody ends snapped off, halved*
2 cups shelled fava beans
1 cup shelled baby peas
1 tablespoon finely sliced fresh basil
Salt and white pepper to taste

  1. First prepare the beurre blanc sauce: In a small saucepan over medium-high heat, combine the wine, lemon juice, and white and light green parts of the green onion. Boil the mixture down until it has been reduced by one third.
  2. Quickly strain the mixture while still hot into a re-sealable jar, discarding the green onion solids. Add the butter, seal the lid, and shake the jar vigorously to melt the butter while the mixture is still hot. If there are still some unmelted chunks of butter after a bit of shaking, use a spoon to break up the rest by stirring vigorously. Add the dark green parts of the green onion and set aside while you prepare your vegetables.
  3. To prepare the vegetables: Lightly blanch the asparagus, fava beans, and peas in a large pot of boiling water. First blanch the asparagus. Depending on their thickness, this should take no more than 2-4 minutes. Remove them from the boiling water using a slotted spoon and add the fava beans. They should need about 2 minutes. Remove them from the boiling water with a slotted spoon and add the peas. After about 1-2 minutes, pour the peas into a colander, discarding the boiling water. Peel the outer layer of the fava beans and discard.**
  4. On a serving plate, combine all the vegetables and drizzle over the beurre blanc while still hot (if the vegetables are cold, the butter in the sauce will solidify so make sure they are warm and ready to serve). Sprinkle over the basil and season to taste with salt and white pepper.

*Always snap off the woody ends of asparagus using your hands. Never cut them off with a knife. Snapping with your hands will cause the spears to break off where the woody section naturally ends.

** Fava beans have a whitish outer layer that is easily peeled after blanching. Simply break the thin outer layer and squeeze out the bright green inner bean.

Nutritional analysis based on 6 servings (does not include salt and white pepper to taste):
Calories 292, Fat 9g, Sodium 11mg, Carbohydrate 37g, Fiber 15g, Sugar 6g, Protein 16g

Posted in appetizer, side | Tagged , , , , , , , , | Leave a comment

New article in Westchester Magazine

Check out my latest article on milk home delivery in the May 2015 issue of Westchester Magazine.

Posted in Uncategorized | Leave a comment

Thai Larb with Quick Pickle

larb

Lemongrass scented Thai larb equals summer on a lettuce leaf. photo Nancy Duran

Continuing on the theme of midweek meals, here’s an example of a quick cook dish I served all the time when I lived in Australia. Thai food is everywhere Down Under and the essential ingredients used in Thai cooking (think lemongrass, kaffir lime, and galangal) can be found in basically every supermarket in every suburb throughout the country. While that’s not quite the case here in the United States, I can sometimes get my hands on a few of these ingredients. And when I do, I like to take a little culinary trip down memory lane.

As it turns out, my local market sells lemongrass quite frequently. It’s usually discreetly tucked in amid the lemons and limes, and I often walk past it. Last week, however, as the weather warmed up and summer food was on my mind, I happened upon the last couple stalks from a recent shipment. The universe seemed to be telling me that a tropical Thai dinner was in order. Thus, larb.

Larb is a quick and simple dish of ground pork, chicken, or turkey that can be flavored with a variety of Thai aromatics. I use lemongrass, garlic, brown sugar, fish sauce, and lime. The result is surprisingly complex and wonderfully refreshing. Served with quick pickled cucumbers or carrots, this dish is, quite simply, the height of summer brightness. I like to pile the whole gorgeous mess into butter lettuce leaves, which provide a lovely crunchy texture.

Serves 4

Quick Pickle
3 tablespoons rice wine vinegar
2 teaspoons salt
2 teaspoons sugar
1 large English cucumber, quartered and thinly sliced with a vegetable peeler*

Larb
1 1/2 pounds ground turkey
2 lemongrass stalks, trimmed, tender inside finely chopped
2 garlic cloves, finely chopped
2 tablespoons vegetable oil
1 tablespoon light brown sugar
2 tablespoons fish sauce
1/4 cup chicken stock
2 tablespoons lime juice
Fresh cilantro, butter lettuce leaves, chopped small red chile, and steamed rice for serving

  1. First, get the cucumbers pickling. In a medium glass bowl, combine the vinegar, salt, and sugar. Add the cucumber slices and stir to coat all over. Let them sit while you make the larb, giving them a stir every once in a while.
  2. In a medium bowl, combine the turkey, lemongrass, and garlic. Using your hands, mix until well combined.
  3. In a large frying pan or wok, heat the oil over medium-high heat. When hot, add the turkey mixture and cook, stirring, until no longer pink, about 7 -9 minutes. Add the sugar, fish sauce, and stock. Reduce the heat to medium and cook until the liquid is almost, but not quite evaporated, about 5 minutes. Remove from the heat and stir in the lime juice.
  4. Serve the larb with the quick pickle, fresh cilantro, rice, and chopped chile all packed into lettuce leaves.

*When peeling the cucumber, peel lengthwise all around the seeded core, turning the cucumber as you go. When I have peeled down to the seed core, I generally stop and discard the off cuts as the seeds are a bit bitter. It’s also very difficult to peel when the stability of the core is compromised.

Nutritional analysis based on 4 servings (does not include cilantro, butter lettuce leaves, chopped small red chile, and steamed rice for serving):
Calories 380, Fat 21g, Sodium 905mg, Carbohydrate 16g, Fiber 0g, Sugar 4g, Protein 32 g

Posted in main | Tagged , , , , , , , , , , | Leave a comment

Midweek Mexican Chicken

mexi_chix

Fresh, fast and full flavored. Everything you need in a midweek meal. photo: Nancy Duran

Now that my kids are a little bit older and just a wee bit more self sufficient, I’m starting to ramp up the work I’m taking on. On the one hand, “Yay!” On the other, “Sigh.” It’s bitter sweet, like most new phases in the growth of a child.

But I digress. My point here is that my added work outside of the household (in addition to all a mom does inside the household), has got me thinking more and more about quick and healthy midweek meals. Time is of the essence! Taste must not be sacrificed! Yes, I want it all. This meal answers that call and then some. After cooking off the onion and garlic, it requires little more than occasionally tossing in an ingredient or two. And the outcome belies its downright easy preparation.

A dish like this is calling out for creative license. While I’ve served it here with haricot vert and couscous, use whatever you’ve got on hand in your pantry. Quinoa and baby spinach are excellent options. I do, however, highly recommend boneless chicken thighs over breasts. Thighs are extremely tender when braised and there’s no need to brown them before adding the stock. One less step, a little less mess, and a superior product in the end. All that and more has moved this dish into my regular midweek meal rotation.

Serves 4

1 tablespoon unsalted butter
1 tablespoon olive oil
1 large yellow onion, thinly sliced
4 garlic cloves, finely chopped
2 teaspoons ground cumin
1 teaspoon ground coriander
1 teaspoon chipotle chile powder
1/2 cup dry white wine
2 cups chicken stock
8 boneless, skinless chicken thighs (about 2 pounds), halved crosswise
1 can black beans, rinsed and drained
1 cup corn kernels
2 tablespoons jarred salsa
Salt to taste
Juice of 1 lime
Steamed green beans, baby spinach or another green vegetable, for serving*
Couscous, for serving*
Fresh cilantro, for serving

  1. In a large Dutch oven or deep saucepan, heat the butter and oil over medium-low heat. When the butter has melted, add the onion and cook, stirring until soft, about 7 minutes. Add the garlic, cumin, coriander, and chile powder and cook, stirring, about 1 minute, until fragrant.
  2. Increase the heat to medium-high, add the wine and cook until almost reduced, about 5 minutes.
  3. Add the stock and chicken, pushing the chicken pieces down into the liquid and bring to a boil. Reduce the heat to medium-low and simmer, covered, 15 minutes.
  4. Uncover, add the beans, corn, salsa, and salt to taste and bring back up to a simmer. Cook, uncovered, 15 more minutes.
  5. Finish with the juice of 1 lime and serve with veggies, couscous and fresh cilantro.

* For 4 people, I used 1/2 pound haricot vert and 2 cups cooked couscous.

Nutritional analysis based on 4 servings (does not include salt to taste, steamed greens, couscous, or cilantro):
Calories 452, Fat 14g, Sodium 758mg, Carbohydrate 39g, Fiber 9g, Sugar 4g, Protein 39g

Posted in main | Tagged , , , , , , | 2 Comments

The Perfect Pork Chop

pork_chop

Crisp on the outside, tender on the inside — the perfect pork chop. photo: Nancy Duran

In my opinion, pork is the king of meats. And the humble pork chop cooked to perfection is the ultimate expression of all that’s good and tasty about putting pork on your fork. But cooking this cut can prove tricky. Without the proper care, you can easily wind up with a dried out, tasteless piece of meat. To help you avoid that fate, I’ve developed this simple recipe that delivers a crisp-on-the-outside, moist-on-the-inside chop, consistently. Even if your cooking skills are minimal, this formula should prove pretty much fool-proof. My secret is twofold: brining for tenderness and a sugar accented spice rub for an awesome caramelization. If you have one, I highly recommend using a cast iron pan to cook your chops. It’ll provide the high intensity heat that you need to develop a beautiful crust.

Serves 4

1/4 cup granulated sugar
1/4 cup kosher salt
4 center-cut bone-in pork chops, about 1 1/2 inches-thick
1 tablespoon light brown sugar
2 teaspoons ground cumin
1 teaspoon ground coriander
1 teaspoon onion powder
1 teaspoon dried oregano
2 tablespoons canola oil
Freshly cracked black pepper to taste

  1. In a medium saucepan, combine the sugar and salt with 2 cups of water. Over medium heat, stir until the sugar and salt have dissolved. Pour into a casserole dish and let cool. When cool, add the pork chops, making sure they are submerged. (If you cannot fully submerge the chops, flip them halfway through the brining time. Let the chops sit in the brining liquid for at least 1 hour, or up to overnight.
  2. Meanwhile, in a small bowl, combine the brown sugar, cumin, coriander, onion powder, and oregano.
  3. Remove the chops from the brine and rinse them off under cold water then pat dry with paper towels (if you like your food on the saltier side, skip the rinsing and just pat dry). Place the chops on a cutting board and rub both sides with the spice mix.
  4. In a large frying pan (preferably cast iron) heat 1 tablespoon of the oil over medium heat. When the oil is hot, add two of the chops and cover with a lid. Cook on one side for about 3 minutes, until browned (feel free to peek to make sure they don’t brown too quickly due to the sugar). Flip and cook, covered, for a further 3 or 4 minutes, depending on how well-cooked you like your pork. Remove from the pan and let rest. Repeat with the remaining oil and chops. Let rest for 2 minutes and serve sprinkled with pepper to taste.

Nutritional analysis based on 4 servings (does not include pepper to taste):
Calories 307, Fat 14g, Sodium 687mg, Carbohydrate 4g, Fiber 0g, Sugar 3g, Protein 39g

Posted in main | Tagged , , , , | Leave a comment

Mussels in Coconut and Beer Broth

mussels

Mussels in coconut and beer broth. photo: Nancy Duran

I read an article in the New York Times a few weeks ago about the shortage of mussels on the US Eastern seaboard this winter. It wasn’t the usual sad story of overfishing. Instead, the heavy ice caused by the brutal winter simply made them difficult to harvest. The fisherman just couldn’t get to them. Luckily, the thaw has brought them back to market shelves in their usual numbers.

The article got me thinking about two things. First thing was, I am so glad those waters have thawed, along with the ice dams clogging up my gutters, the street plow-imposed glacier blocking my driveway, and all twenty of my fingers and toes.

The second thing the article got me thinking about was how much I love mussels. To celebrate, I decided to make myself a bowl for lunch. While this may sound like it was extravagant and time consuming, I assure you it was not. Belgian style mussels (or the Thai influenced version I have created here) are actually super easy to prepare. Now I know you’ve heard that before from many a food writer, but this time I really mean it. There’s hardly any chopping prep involved and the whole thing needs to cook for no more than 12 minutes, tops.

And don’t forget, mussels are “the poor man’s oyster.” That is, they are very inexpensive to buy, usually around 3 to 4 dollars per pound. And they are plentiful. This is not a seafood that presents an ecological dilemma for you at the fish market. You can feel guilt-free purchasing this bivalve.

For that kind of time and monetary investment, I think the return is pretty darn good. If this is not exactly midweek lunch fare for you, try it out on a Friday night for a romantic dinner in, or whip it up for a really fine looking appetizer when you’ve got friends coming round for dinner.

Serves 2 as a main or 4 as an appetizer

2 tablespoons olive oil
1 large shallot, finely chopped
2 garlic cloves, thinly sliced
1 small fresh red chile, (deseeded if you like), thinly sliced
1 stalk lemongrass, smashed, optional*
1 bottle (1 1/2 cups) light beer (such as Corona)
2 teaspoons light brown sugar
2 pounds fresh mussels, rinsed, scrubbed, and debearded
1/4 cup light coconut milk
2 tablespoons fresh lime juice
1-2 teaspoons fish sauce (depending on the saltiness of the broth from the mussels)
1/2 cup coarsely chopped fresh cilantro

  1. In a large wok or deep saucepan, heat the oil over low heat. Add the shallot, garlic, chile, and lemongrass (if you are using). Cook, stirring, for about 5 minutes, until softened. Increase the heat to medium and add the beer and sugar. Bring just to the boil. Pour in the mussels, reduce the heat to medium-low, cover, and cook for about 5 minutes, until the mussels have opened.
  2. Using a slotted spoon, remove the mussels to a large bowl, discarding any that have not opened. Remove the lemongrass stalk.
  3. To the broth in the wok, add the coconut milk, lime juice, fish sauce, and cilantro. Cook, without boiling, for 2 minutes. Pour the mussels back into the broth and serve with rice, crusty bread, or glass noodles.

*Lemongrass can be found in specialty markets. It will lend a slightly floral, citrus flavor to your broth. If you can’t find it, don’t sweat it. This broth will have plenty of flavor without it.

Nutritional analysis based on 4 servings:
Calories 289, Fat 9g, Sodium 791mg, Carbohydrate 19g, Fiber 0g, Sugars 2g, Protein 29g

Posted in appetizer, lunch, main | Tagged , , , , , , | Leave a comment

Asian Flavored Mini Meatloaves

asian_meatloaf

Mini meatloaves accented with ginger and soy make for a great make-ahead midweek meal. photo by: Nancy Duran

Unlike a lot of Americans, I didn’t grow up eating meatloaf. In fact, I didn’t even try it until I was eleven years old. I do, however, remember that day clearly. I was having dinner over at a friend’s house and they were serving meatloaf. I was the type of kid who was open to trying new foods (surprise, surprise) so I eagerly dove in. It was love at first bite. Something about the concoction spoke to my carnivorous heart. To this day, I absolutely love meatloaf.

A basic meatloaf recipe is a bit of a blank canvas, ripe for creative inspiration. And yet, do a search for meatloaf recipes on the internet, and you’ll mostly turn up variations on the same theme. Practically every culture in the world has their own way of flavoring ground meat, whether it be kofta in the Middle East, larb in Thailand, or meatballs in Italy. I like to take those flavors and use them to change up my meatloaf, giving it a different spin depending upon the cuisine I feel like visiting that day.

I’ve been making an Asian meatloaf for years. I think I may have perfected it here. Fresh ginger, pungent cilantro, and a sweet and salty sauce come together in just the right balance in this mix. And I use a combination of ground beef and pork for a beautiful texture, richness, and depth of flavor.

Serve these mini meatloaves with a crisp vegetable dressed up with Asian flavors, such as Orange and Ginger Scented Broccoli or Sesame and Soy Baby Bok Choy. I think you’ll find that there’s a lot to love about this humble midweek meal.

Makes 8 (1/2-cup) meatloaves

Cooking spray for greasing the muffin tin
1 pound ground beef
1/2 pound ground pork
2 garlic cloves, finely chopped
1 tablespoon finely chopped fresh ginger
1 small red onion, finely chopped
1 small carrot, coarsely grated
2 tablespoons chopped fresh cilantro
1/4 cup old-fashioned oats
1 large egg, lightly beaten
1 tablespoon light brown sugar
1 tablespoon low-sodium soy sauce
1 tablespoon oyster sauce

  1. Preheat the oven to 375°F. Grease 8 (1/2 cup) muffin cups with cooking spray.
  2. In a large bowl, combine all the remaining ingredients. Using your hands, mix thoroughly. Divide the mixture evenly among the muffin cups.
  3. Cook, uncovered, for about 20 minutes, until the meatloaves are beginning to pull away from the sides of the tin. Dab with a paper towel to remove any excess grease and serve.

Nutritional analysis per individual meatloaf:
Calories 206, Fat 12g, Sodium 195 mg, Carbohydrate 5g, Fiber 1g, Sugar 2g, Protein 17g

Posted in main | Tagged , , , , | Leave a comment