Orange and Ginger Scented Broccoli

broc_asian

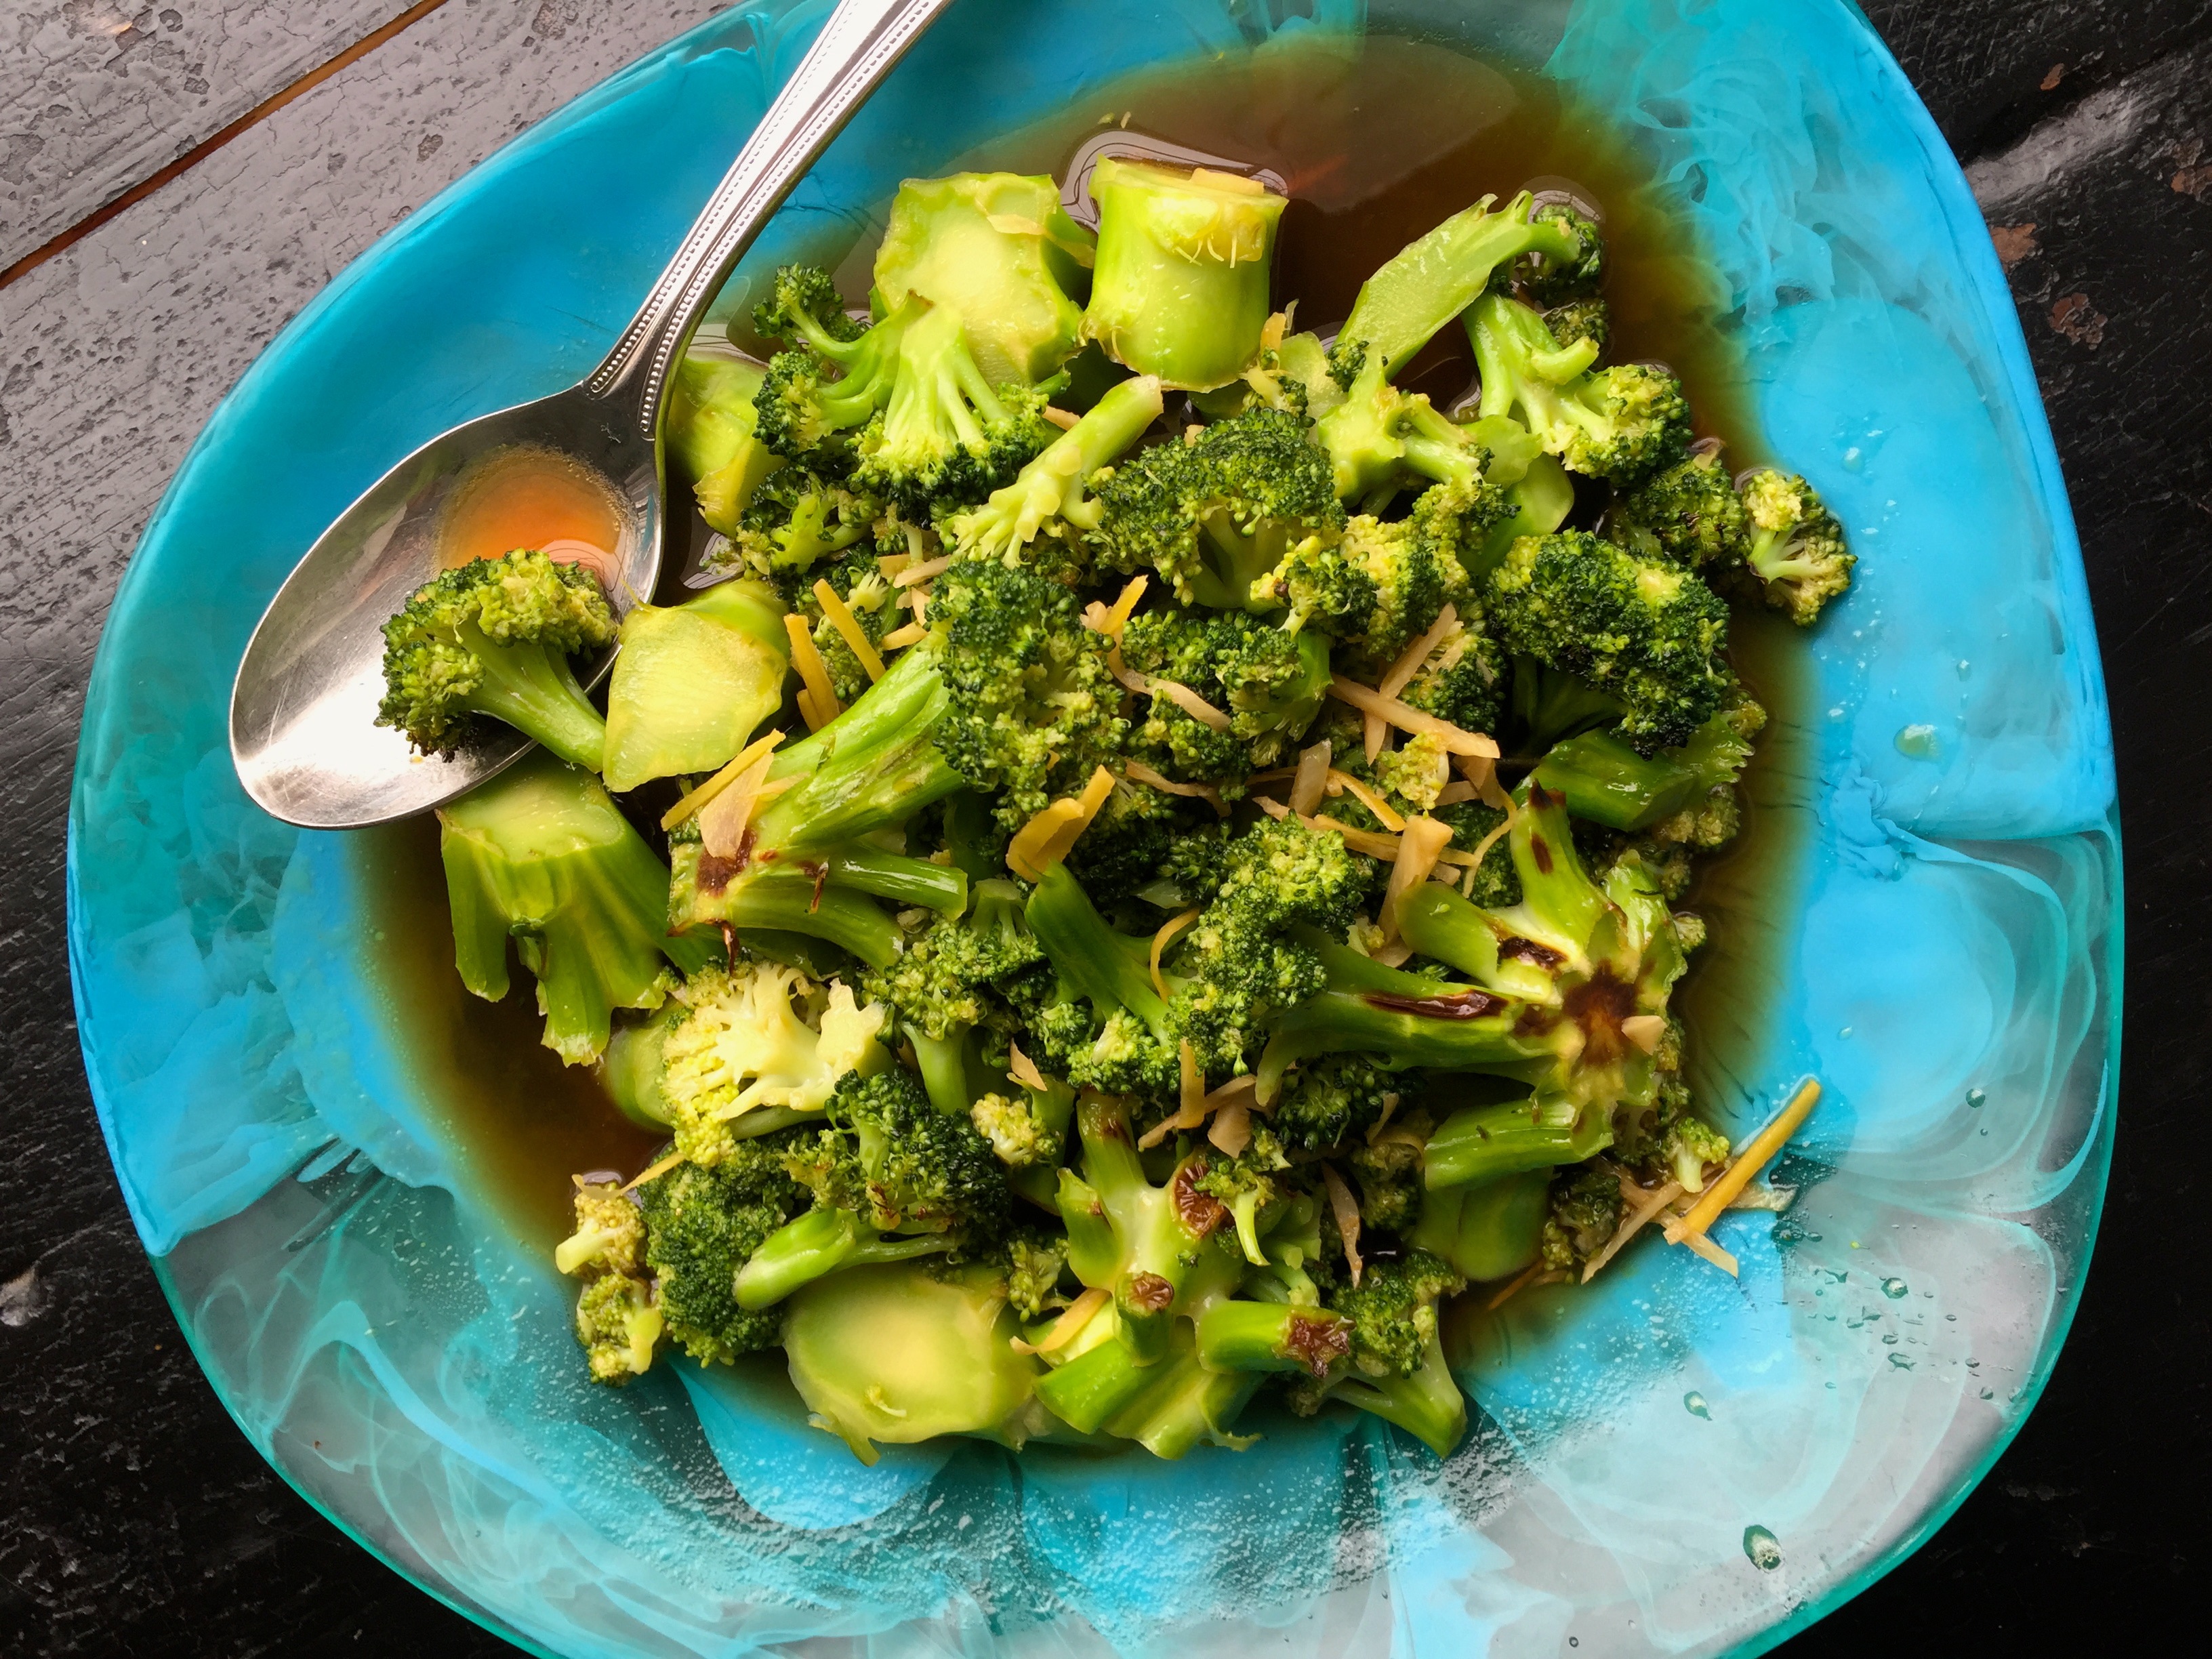
An Asian twist on broccoli. photo by: Nancy Duran

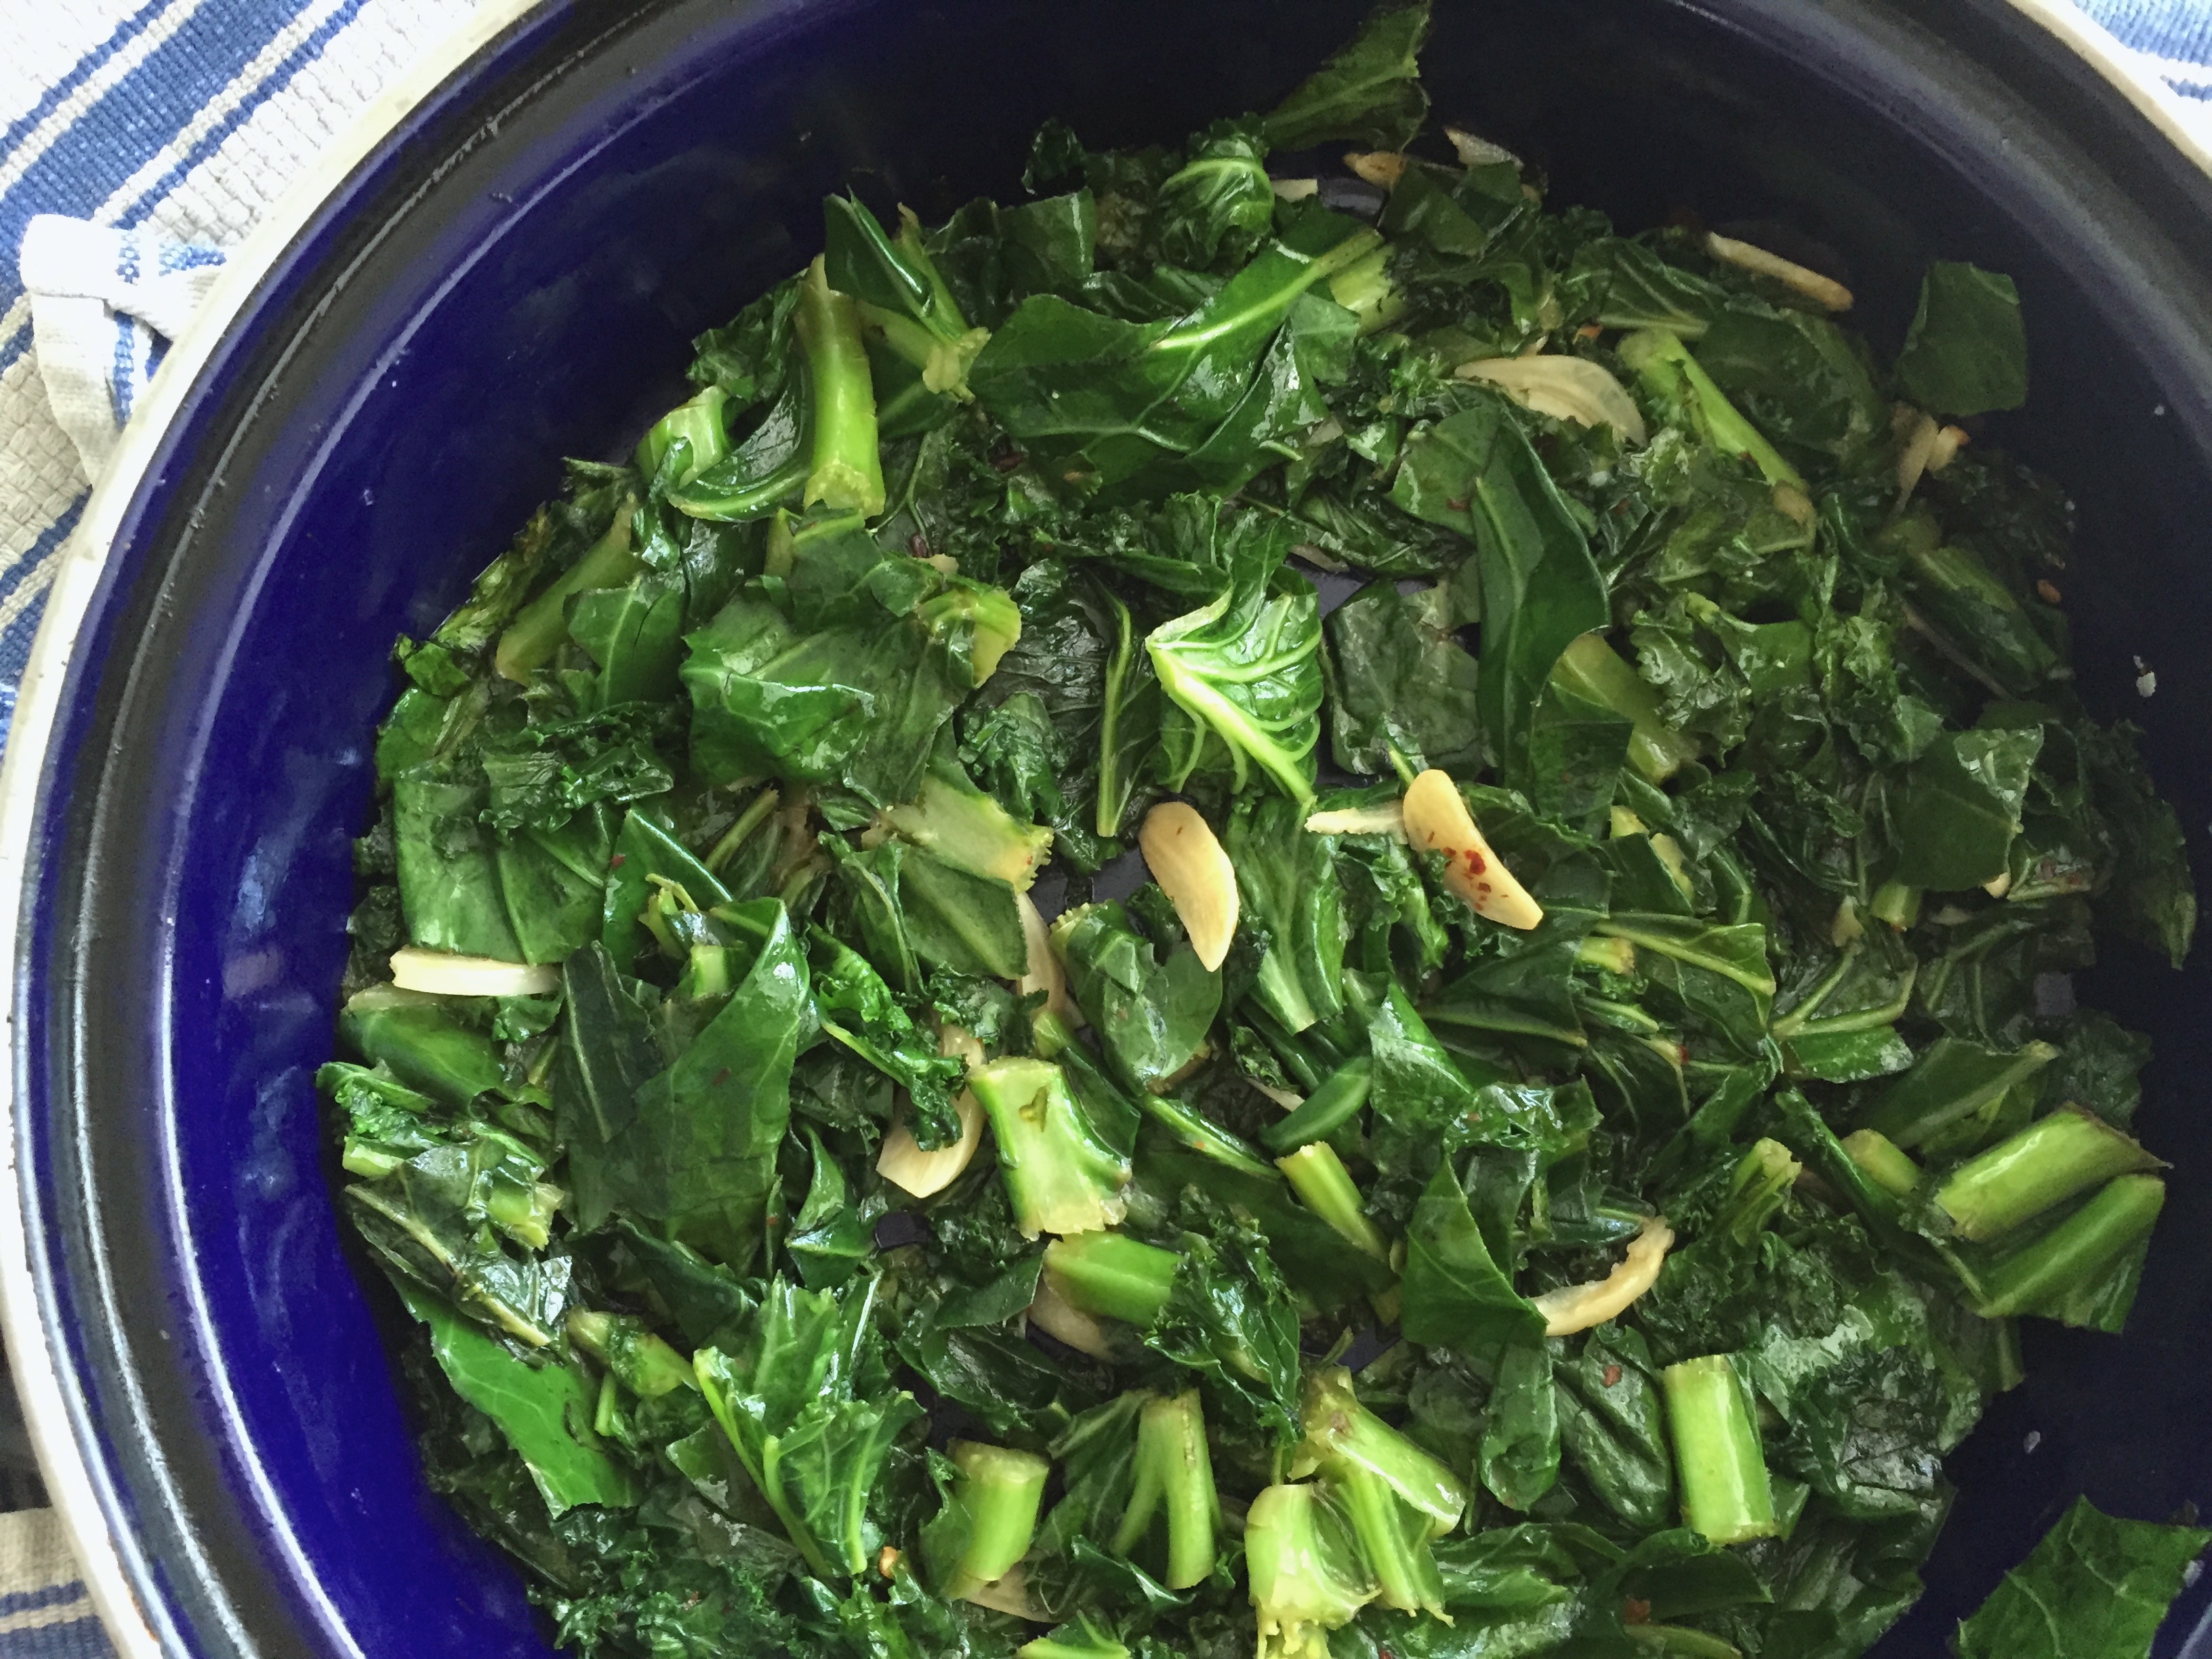
I write this post as I actively ignore the snow piled high outside my window and the single digit upon which my thermometer continues to hover. And so, I continue my quest to keep it green this cold, cold winter.

Here, I’ve dressed up that old workhorse, broccoli, with lively Asian flavors. Ginger, soy, and sesame help to perk up a vegetable that doesn’t exactly light a fire in me. A finish of fresh orange juice brings brightness and light, something we are in sore need of in the dark days of winter. Enjoy the spring forward time change this weekend and all the extra light that too will bring!

Serves 4 as a side

1 large head broccoli, sliced thickly on the diagonal from the stem up to the florets
1 tablespoon light brown sugar
1 tablespoon peanut oil
2 teaspoons sesame oil
1 tablespoon thinly sliced fresh ginger
2 garlic cloves, thinly sliced
2 tablespoons reduced-sodium soy sauce
Juice of 1 large orange

  1. Preheat the oven to broil.
  2. In a large pot of boiling, salted water, cook the broccoli until bright green and crisp-tender, 3-5 minutes depending on how small you’ve cut the slices. Drain the broccoli and immediately place on a baking tray large enough to hold it in one layer. Sprinkle over the sugar, toss, and broil for 3-4 minutes, until beginning to brown.
  3. Meanwhile, in the same pot in which you cooked the broccoli, heat the peanut and sesame oils over low heat. When hot, add the garlic and ginger and cook, stirring, about 11/2 minutes, until fragrant and softened. Be careful not to burn the garlic and ginger! Add the soy sauce and orange juice, stir, and remove from the heat.
  4. Pour the broccoli into the pot with the orange sauce and stir to coat all over. Serve immediately or at room temperature.

Nutritional analysis based on 4 servings:
Calories 127, Fat 6g, Sodium 318 mg, Carbohydrate 16g, Fiber 4g, Sugar 7g, Protein 5g

Posted in side | Tagged , , , , , | 1 Comment

Grilled Cheese with Leftover Greens

grilled_green

Gooey Gruyere and garlicky greens, grilled. photo by: Nancy Duran

As promised, I’ve put those leftover kale greens to good use. Absolutely yummy lunch made by foraging in my fridge. It smelt and tasted like victory.

Makes one sandwich

2 slices wholewheat bread
1 teaspoon mustard
1 teaspoon mayonnaise
2/3 cup shredded Gruyere cheese
1/3 cup leftover garlicky greens
1 tablespoon unsalted butter

  1. Spread one slice of bread with the mustard (I use Maille Dijon). Spread the other with the mayonnaise. Top one of the slices with 1/2 the cheese. Place the greens on top of the cheese and then top with the remaining cheese. Place the other slice of bread on top.
  2. In a medium cast iron frying pan or on a stovetop grill, melt the butter over medium-low heat. When the butter has melted, carefully place the sandwich in the pan. Cook, covered for 2 minutes. Remove the lid and, with a spatula, press down hard on the sandwich, then flip. Cover again and cook for 2 more minutes. Uncover, press down hard with the spatula on this side of the sandwich and remove from the heat. Serve immediately.

Nutritional analysis based on one sandwich:
Calories 747, Fat 55g, Sodium 780mg, Carbohydrate 28g, Fat 4g, Sugar 4g, Protein 35g

Posted in brunch, lunch, main, snack | Tagged , , , , , | 1 Comment

A Little Side of Green

kale_greens

It ain’t easy being green in the middle of winter. photo by: Nancy Duran

It is quite a challenge getting enough green veg into your diet during the winter months. Frozen peas anyone? Luckily hearty kale and chard can still be found floating around at the markets here and there. This kale greens saute cannot be simpler. It will take you no time flat to pull together and the payoff is pretty grand. When I’m feeling especially unmotivated on a cold and dark winter night (which is pretty much a description of the past 40 or so nights round these parts), this is a welcome bit of freshness on my dinner plate. And as you’ll see in a follow up recipe this week, it’s pretty fantastic in leftovers. So go ahead and double up this recipe and stay tuned…

Serves 4 as a side

2 tablespoons olive oil
4 garlic cloves, thinly sliced
1 teaspoon (or more to taste) crushed red pepper flakes
8 ounces roughly chopped kale greens
Salt to taste
Juice of 1/2 lemon

  1. In a large deep saucepan, heat the oil over medium-low heat. Add the garlic and red pepper flakes and cook, stirring until the garlic slices are fragrant and softened, about 2 minutes. Be very careful not to burn the garlic.
  2. Add 1/4 cup of water and the kale greens in two batches, stirring the first batch of greens into the pan so that they begin to wilt before you add the second batch. Cover and cook for 5 minutes.
  3. Uncover the pan, stir, and add salt to taste. Cook uncovered a further 2 minutes, until the greens have softened but are still bright in color. Remove from the heat and add the juice of 1/2 lemon. Stir and serve.

Nutritional analysis based on 4 servings (does not include salt to taste):
Calories: 95, Fat 7g, Sodium 25 mg, Carbohydrate 7g, Fiber 1g, Sugar 0g, Protein 2g

Posted in salad, side | Tagged , , , , , | 1 Comment

In the News

Check out my latest article about artisanal apres-ski cocktails in the February 2015 issue of Westchester Magazine!

Posted in Uncategorized | 2 Comments

Roasted Fennel and Leek Soup

fennel_soup

Warm up with this Roasted Fennel and Leek Soup. photo credit: Nancy Duran

Brrr. It’s cold out there.

As temperatures plummet and the snow piles high, I recommend retreating indoors for some good old-fashioned soup making. Here’s the product of my last snow day: a roasty, toasty fennel and leek puree soup. Actually, this recipe is a good guide for using just about any winter vegetable in a soup. I chose fennel, garlic, and leek, but you could just as easily follow this recipe using carrot and scallion, cauliflower and shallot, or parsnip and onion.

Sometimes I think pureed vegetable soups taste like little more than stock and cream. Roasting vegetables before throwing them into a soup pot brings a smoky, earthy flavor to the table and helps to enhance the flavor of the vegetable that comes through in the finished product. In this case, the anise flavor of the fennel is front and center, with the sweet buttery leek coming in as the finish. And the potato adds creaminess so you can get away with using a lot less cream or milk. In fact, I add only 1/2 cup of 2% milk to give it a bit of a velvet texture.

Next time you feel like hunkering down to wait out the winter, give this soup a try. It’s guaranteed to steam up your windows and your insides as well.

Makes about 9 cups / Serves 4 as a main course

2 medium fennel bulbs, fronds reserved, coarsely chopped
5 garlic cloves, unpeeled, lightly smashed with the side of a chef’s knife
3 tablespoons plus 2 teaspoons of olive oil
1 tablespoon unsalted butter
2 medium leeks, thinly sliced
2 teaspoons fennel seeds
1 large potato, peeled and finely chopped
1/4 cup dry white wine
4 cups chicken or vegetable stock
Salt to taste
1/2 cup 2% milk
Cracked black pepper for serving

  1. Preheat the oven to 400°F.
  2. In a large roasting pan, place the garlic and fennel. Add the 3 tablespoons of oil and toss to coat. Roast 30-35 minutes, until the fennel is tender and browned.
  3. Meanwhile, in a soup pot, heat the remaining 2 teaspoons of oil with the butter over medium-low heat. When the butter has melted, add the leek and cook, stirring, until soft but not browned, 5 to 8 minutes. Add the fennel seeds and potato and cook, stirring, another 2 minutes.
  4. Remove the garlic cloves from the fennel roasting pan and set aside for a minute. While still hot, pour in the wine and scrape up any browned bits on the bottom of the pan. Pour everything in the pan into the soup pot. Remove the garlic from their skins and add them to the soup pot as well.
  5. Into the soup pot, pour the stock and 2 cups water. Increase the heat to medium-high to bring to a boil. Reduce heat to medium-low, cover, and simmer for 15 minutes. Uncover, and continue to simmer for a further 10 minutes.
  6. Let the soup cool slightly before adding, in batches, to a blender. (If you try to do this while the soup is piping hot, you will wind up with soup exploded all over your kitchen. I’ve been there.) Puree until smooth then pour back into a clean soup pot. Add the milk, season to taste with salt and warm, without boiling. Serve in soup bowls topped with reserved fennel fronds and plenty of black pepper over top.

Nutritional analysis based on 4 servings (does not include salt and pepper to taste):
Calories 385, Fat 19g, Sodium 433, Carbohydrate 43g, Fiber 7g, Sugar 8g, Protein 11g.

Posted in lunch, main, side, soup | Tagged , , , , , , | Leave a comment

Winter Potato Salad

russian_potato

This Russian potato salad proves that potato salad is not just for summer picnics. photo credit: Nancy Duran

Recently, our very own Jeanne McLaurin (resident Ripe Earth nutritionist) had the distinct pleasure of visiting Russia. She brought back with her hundreds of amazing photos, wild and enchanting stories, and awesome vodka. But more importantly, she returned with tons and tons of recipe inspiration. Russian cuisine is still pretty exotic here in the United States and it wasn’t a big part of my culinary training so I loved learning from her experiences. While there’s so much to explore, I thought I’d offer something simple and approachable with which to start. Hopefully it whets your appetite to know more. It certainly did mine.

This St. Petersburg style potato salad makes for a great winter side. It pairs really nicely with the heartier cuts of meat we tend to prefer in cold weather and the ingredients are all readily available during the winter months. It’s also a great option for large party entertaining for, oh, I don’t know, something like an important sporting event (go Hawks!). The salad can be made way in advance (two days before is just fine) and is best served at room temperature.

In its traditional form, all the ingredients are chopped really finely, making it somewhat onerous on the prep side. I, however, like my salads with bigger bite-sized pieces because the dish looks more modern and you can taste the individual ingredients better. So this adapted version is a breeze to prep.

Enjoy the game tomorrow night everyone. And happy comfort food eating!

Serves 8

3 medium carrots, peeled
3 pounds fingerling potatoes (as uniform in size as you can get)
1 cup finely chopped ham steak
1 cup frozen baby green peas (petit pois), blanched or steamed
3/4 cup cornichons, sliced on the diagonal
2 scallions, dark green parts thinly sliced, white and light green parts finely chopped
1/4 cup finely chopped fresh dill
2 tablespoons finely chopped fresh flat leaf parsley
1/3 cup mayonnaise
3 tablespoons lemon juice
2 tablespoons creme fraiche
1 tablespoon olive oil
Salt and cracked black pepper to taste

  1. Place the carrots in a large pot of salted water. Bring to the boil over high heat, reduce the heat to medium and simmer for about 15 minutes, until tender but not overcooked. Remove from the pot with a slotted spoon.
  2. Return the water to the boil and add the fingerling potatoes. Cook for 12-15 minutes, until they are just tender but not overcooked (you should be able to smoothly pierce them with a paring knife). Drain and run under cold water to stop them from cooking.
  3. When the vegetables are cool enough to handle, slice them on the diagonal and place them in a large bowl. Add the ham, peas, cornichons, scallions, dill, and parsley to the bowl.
  4. In a small bowl, combine the mayonnaise, lemon juice, creme fraiche, and olive oil. Stir well to combine the ingredients.
  5. Pour the dressing over the potato salad and stir gently (so that you don’t break up the potatoes) to coat and combine. Season to taste with salt and pepper and serve at room temperature.

Nutritional analysis based on 8 servings (does not include salt and pepper to taste):
Calories 267, Fat 11g, Sodium 551mg, Carbohydrate 35g, Fiber 6g, Sugar 5g, Protein 10g

Posted in salad, side, Uncategorized | Tagged , , , , , | Leave a comment

Middle Eastern Beet and Lamb Pizzas

beetlamb_pizza

Make these personal pizzas for lunch or a light dinner. Or cut them into thin slices and serve them as finger food. photo credit: Nancy Duran

I’ve made variations of this lamb pizza for years now. It’s inspired by the exotic flavors of the Middle East that I came to know and love when I lived in, wait for it… Brooklyn, NY. I’d spend my carefree weekends exploring the many Middle Eastern groceries and restaurants along Atlantic Avenue and farther beyond. (That’s right, I had no kids at the time.) This type of lamb pizza was one of my favorite treats.

While I normally balance the cumin scented, grassy flavor of the lamb topping by stirring in golden raisins or craisins, in this version, I’ve turned to roasted beets. The sugary, earthy flavor of this winter stalwart brings just the right amount of sweetness to keep all the flavors in harmony with each other.

These pizzas are lovely at lunchtime or served with a green salad for dinner. Or if you are having guests over, you can slice them up and serve them as hors d’oeuvres.

Serves 4

1 tablespoon olive oil, plus more for brushing the pita
1 small onion, finely chopped
1 garlic clove, finely chopped
3/4 pound ground lamb
2 teaspoons ground cumin
1/4 teaspoon cinnamon
2 tablespoons tomato paste
Salt and cracked black pepper to taste
1/4 cup toasted pine nuts
1 tablespoon finely chopped fresh mint
4 x 8-inch round whole wheat pitas
1/2 cup packaged hummus
1/2 large roasted and peeled beet, sliced thinly
1/4 cup crumbled feta
Greek yogurt, for serving

  1. Preheat the oven to 425°F.
  2. In a medium frying pan, heat the oil over medium-low heat. Add the onion and cook, stirring until softened, about 5 minutes. Add the garlic and cook, stirring, for 1 minute, until fragrant. Increase the heat to medium-high, add the lamb, and cook, stirring for 3 to 4 minutes, until the meat is no longer pink.
  3. Reduce the heat to medium-low and stir in the cumin, cinnamon, and tomato paste. Season with salt and pepper to taste. Pour in 1/4 cup of water. Cook, uncovered, until the water has evaporated, 2 to 3 minutes. Remove from the heat and stir in the pine nuts and mint.
  4. Meanwhile, brush one side of the pitas all over with olive oil. Place in the oven, directly on the oven rack. Bake for about 5 minutes, until crisped and lightly browned.
  5. To assemble the pizzas, spread each pita with 2 tablespoons of the hummus, top with 1/4 of the meat mixture and 1/4 of the beet slices. Sprinkle over 1 tablespoon of the feta. Bake in the oven for about 2 minutes, until all the ingredients are warmed. Serve with dollops of yogurt.

Nutritional analysis based on 4 servings (does not include salt and pepper to taste or yogurt for serving):
Calories 599, Fat 36g, Sodium 686mg, Carbohydrate 47g, Fiber 8g, Sugar 4g, Protein 26g

Posted in appetizer, lunch, main, snack | Tagged , , , , , , | Leave a comment

Kung Pao Chicken Lettuce Wraps

kung_pao

Quick Chinese-style lettuce wraps. photo: Nancy Duran

Please don’t be intimidated by the list of ingredients in this recipe. I know it looks time-consuming, but truly, this dish comes together very quickly. Actual cooking time is just over 15 minutes. And the results are well worth the time involved in gathering the bits and pieces.

This recipe is based on the Chinese take-out classic Kung Pao Chicken, which is one of my favorites. Sadly, take-out Chinese doesn’t tend to be the best option for the waistline. So for a healthier take, I make it myself and then serve it in lettuce cups. As a bonus, my kids think it’s more fun to eat it that way. Fun, healthy, and less than 20 minutes cooking time equals win-win-win. And the January healthy reset continues!

Serves 4

1 1/4 pounds boneless, skinless chicken thighs, cut into 1-inch pieces
4 tablespoons soy sauce
1 tablespoon hoisin
1 tablespoon Chinese cooking wine (or cooking sherry)
1 tablespoon honey
1 tablespoon rice wine vinegar
1 teaspoon sesame oil
1 tablespoon cornstarch (dissolved in 1 tablespoon water)
2 tablespoons peanut oil
2 celery stalks, sliced thinly
1 large carrot, sliced thinly
1/3 cup shelled unsalted peanuts
1 garlic clove, finely chopped
1-inch piece fresh ginger, finely chopped
4 scallions, chopped, white and light green parts separated from dark green parts
1/2 teaspoon crushed red pepper flakes (optional)

  1. In a medium bowl, combine the chicken, 2 tablespoons of the soy sauce, and the hoisin. Combine to coat all over. Let sit while you prepare the rest of the ingredients.
  2. To make the sauce, in a small bowl, combine the remaining 2 tablespoons of soy sauce with the Chinese cooking wine, honey, vinegar, sesame oil, and dissolved cornstarch. Set aside.
  3. In a wok or large frying pan, heat 1 tablespoon of the peanut oil over high heat. When very hot, add 1/2 the chicken and cook for about 4 minutes, until just cooked through. (For a nice sear, I like to let the chicken sit for about 1 minute, then flip the pieces and leave them for about 1 minute, then cook stirring for an additional 2 minutes.) Remove to a plate and repeat with the remaining chicken. Remove the second batch of chicken to the plate.
  4. Reduce the heat to medium and add the remaining 1 tablespoon of peanut oil. Add the celery, carrot, and peanuts and cook, stirring for about 5 minutes, until starting to soften.
  5. Reduce the heat to medium-low and add the garlic, ginger, scallion, and the crushed red pepper flakes if using. Cook, stirring, for about 1 minute, until fragrant.
  6. Return the chicken and any accumulated juices to the pan and add the sauce. Cook, stirring, for about 2 minutes until the sauce boils and thickens. Serve with rice or in lettuce cups.

Nutritional analysis based on 4 servings, including crushed red pepper flakes (does not include lettuce and rice serving options):
Calories 371, Fat 19g, Sodium 1245 mg, Carbohydrate 17g, Fiber 2g, Sugar 8g, Protein 33g

Posted in main | Tagged , , , , , , , | 2 Comments

Celeriac Winter Slaw

cel_slaw

A cold weather slaw. photo: Nancy Duran

Well hello there, Earthies. It’s been a while. Sorry for the prolonged absence but the holidays and other work took over for a bit. It’s good to be back!

And back to reality it is. Sigh. As I’m sure many of you do, I find this first full week in January a challenge. After the indulgence and anticipation of December, it’s time to pare down, take stock, and forge ahead. When really I’d rather take a nap, curl up with a book, and continue eating and drinking like I did over the holidays. In the spirit of paring down, here’s a fresh and light winter slaw that can help get you back on track to healthy eating.

It’s funny how slaw is such a summer thing. Hearty winter vegetables are actually better suited to this type of pickled dish. My favorite winter vegetable to serve in a slaw is celeriac, or celery root as it’s otherwise known. It may sound exotic but just about every supermarket I know will carry it. It sure looks ugly and knobby at the market but once you get it on the plate, it’s sublime. Its flavor profile is a combination of celery and parsley and it pairs nicely with the sweetness of apple and honey and the pungency of lemon juice and caraway.

Last night I served this salad piled on top of crisp skin arctic char. But it would be just as nice sitting next to a seared pork chop or with silky poached chicken piled on top.

Serves 8

Buttermilk Dressing
1 cup buttermilk
1 tablespoon olive oil
2 tablespoons lemon juice
1 tablespoon apple cider vinegar
1 teaspoon honey
1 small garlic clove, finely grated
1/4 teaspoon salt

Slaw
1 celeriac bulb (about 1 pound), peeled and coarsely grated*
1 large or 2 medium firm red apples, cored and coarsely grated
3 cups thinly sliced green cabbage (from about 1/2 small cabbage)
1/2 teaspoon caraway seeds
1/2 cup fresh flat leaf parsley leaves
Freshly cracked black pepper to taste

  1. First, make the dressing: In a screw-top jar, combine all the ingredients and shake well to combine. Pour the dressing into a large bowl.
  2.  To assemble the slaw: Add the grated celeriac to the bowl with the dressing just as soon as you finish grating it and toss to coat so that the celeriac does not discolor. Do the same with the apple once you have finished grating it. Add the cabbage and caraway seeds, toss to coat all over. Cover the bowl and let sit for at least 30 minutes to soften the celeriac and cabbage and to infuse the flavors.
  3. Add the parsley to the slaw and toss again. Finish with black pepper and serve.

*Once it’s peeled, celeriac discolors quite quickly. To be safe, I like to rub the bulb all over with a cut lemon just after I’ve peeled it.

Nutritional analysis based on 8 servings, does not include black pepper to taste:
Calories 96, Fat 2 g, Sodium 82 mg, Carbohydrate 18 g, Fiber 3 g, Sugar 8 g, Protein 3 g

Posted in salad, side | Tagged , , , , , , , | Leave a comment

Maple-Pecan Sweet Potato Pie

sweet_potatopie

A little Southern style comfort for the cold weather months. photo: Nancy Duran

Note to self: you will receive lots of sweet potatoes if you join a winter vegetable share. Unfortunately, my husband absolutely does not accept this vegetable in a savory dish. No way, no how. And if I’m being perfectly honest, I’m happy to give it a miss as well. But mash it up with bourbon, sugar, and maple syrup and things start looking up for this humble tuber.

Because I’m not a huge fan of pie crust, I make this with my classic shortcrust pastry. However, a traditional pie crust is perfectly acceptable as well. In fact, if you want a quick and easy dessert that looks like you spent loads of time on it, get yourself a good quality pre-made frozen pie crust and whip up this filling. It’s pretty foolproof.

This is a wonderful pie to serve at a holiday dinner. The festive flavors of bourbon and nutmeg practically scream out for a traditional turkey feast to precede them. And it’s just a little unexpected. Where most would turn to pumpkin pie, you can stand out by showing up with this boozy little Southern charmer. Now I ask you, isn’t that exactly what every party needs?

Serves 8 to 10

Shortcrust Pastry
1 cup all-purpose flour, plus extra for dusting
1/4 teaspoon salt
3/4 stick (6 tablespoons) cold unsalted butter, cut into cubes
2 tablespoons confectioners’ sugar
1 large egg yolk
1 teaspoon finely grated lemon zest
2 to 4 tablespoons ice water

Sweet Potato Filling
1 1/2 cups cooked and mashed sweet potato (from about 1 pound)
1/2 cup brown sugar
1/4 cup creme fraiche
2 tablespoons bourbon
2 tablespoons unsalted butter, melted and cooled
1 tablespoon maple syrup
2 large eggs
1/2 teaspoon ground nutmeg
1/4 teaspoon salt

Topping
1 cup chopped pecans
1 tablespoon unsalted butter, melted
1 tablespoon brown sugar
1 tablespoon maple syrup

  1. First, make the pastry: In the bowl of a food processor, add the flour, salt, and butter. Pulse just until the ingredients come together and resemble coarse meal. Add the sugar, egg yolk, zest, and 2 tablespoons of the water and process to combine. Add more water, a tablespoon at a time, just until the dough comes together into a ball. Be careful not to over-process or your dough will become tough.
  2. Turn the dough out onto a surface that has been lightly dusted with flour and give it a turn through the flour. Using the balls of your fingers, gently press the dough into a 9-inch round removable-base fluted tart tin. Press up the sides and around the entire base of the tin to create an evenly covered surface with no holes in the dough. Place on a baking tray in the refrigerator for at least 30 minutes to chill.
  3. Preheat the oven to 375°F.
  4. Remove the pastry from the fridge to blind bake it. This will set the crust so that it doesn’t become soggy when you add the filling. Cover the crust with parchment paper and line the top of the parchment paper with pie weights (or if you don’t have pie weights use dried beans). This will weigh down the crust and decrease shrinking and puffing. Bake, covered, for 10 minutes. Remove from the oven and remove parchment and pie weights. Reduce oven temperature to 350°F.
  5. Meanwhile, to make the filling: In a medium bowl, stir together the sweet potato, sugar, creme fraiche, bourbon, butter, syrup, eggs, nutmeg, and salt. When throughly combined, pour into the par-baked pastry.
  6. To make the topping: In a medium bowl, combine the pecans, butter, sugar, and syrup.
  7. Pour the nut topping over the pie and bake for 35 minutes, until set. Cool slightly then slice and serve with ice cream or whipped cream.


Posted in dessert | Tagged , , , , , | Leave a comment