Ham and Black-Eyed Pea Soup

blackeye_ham

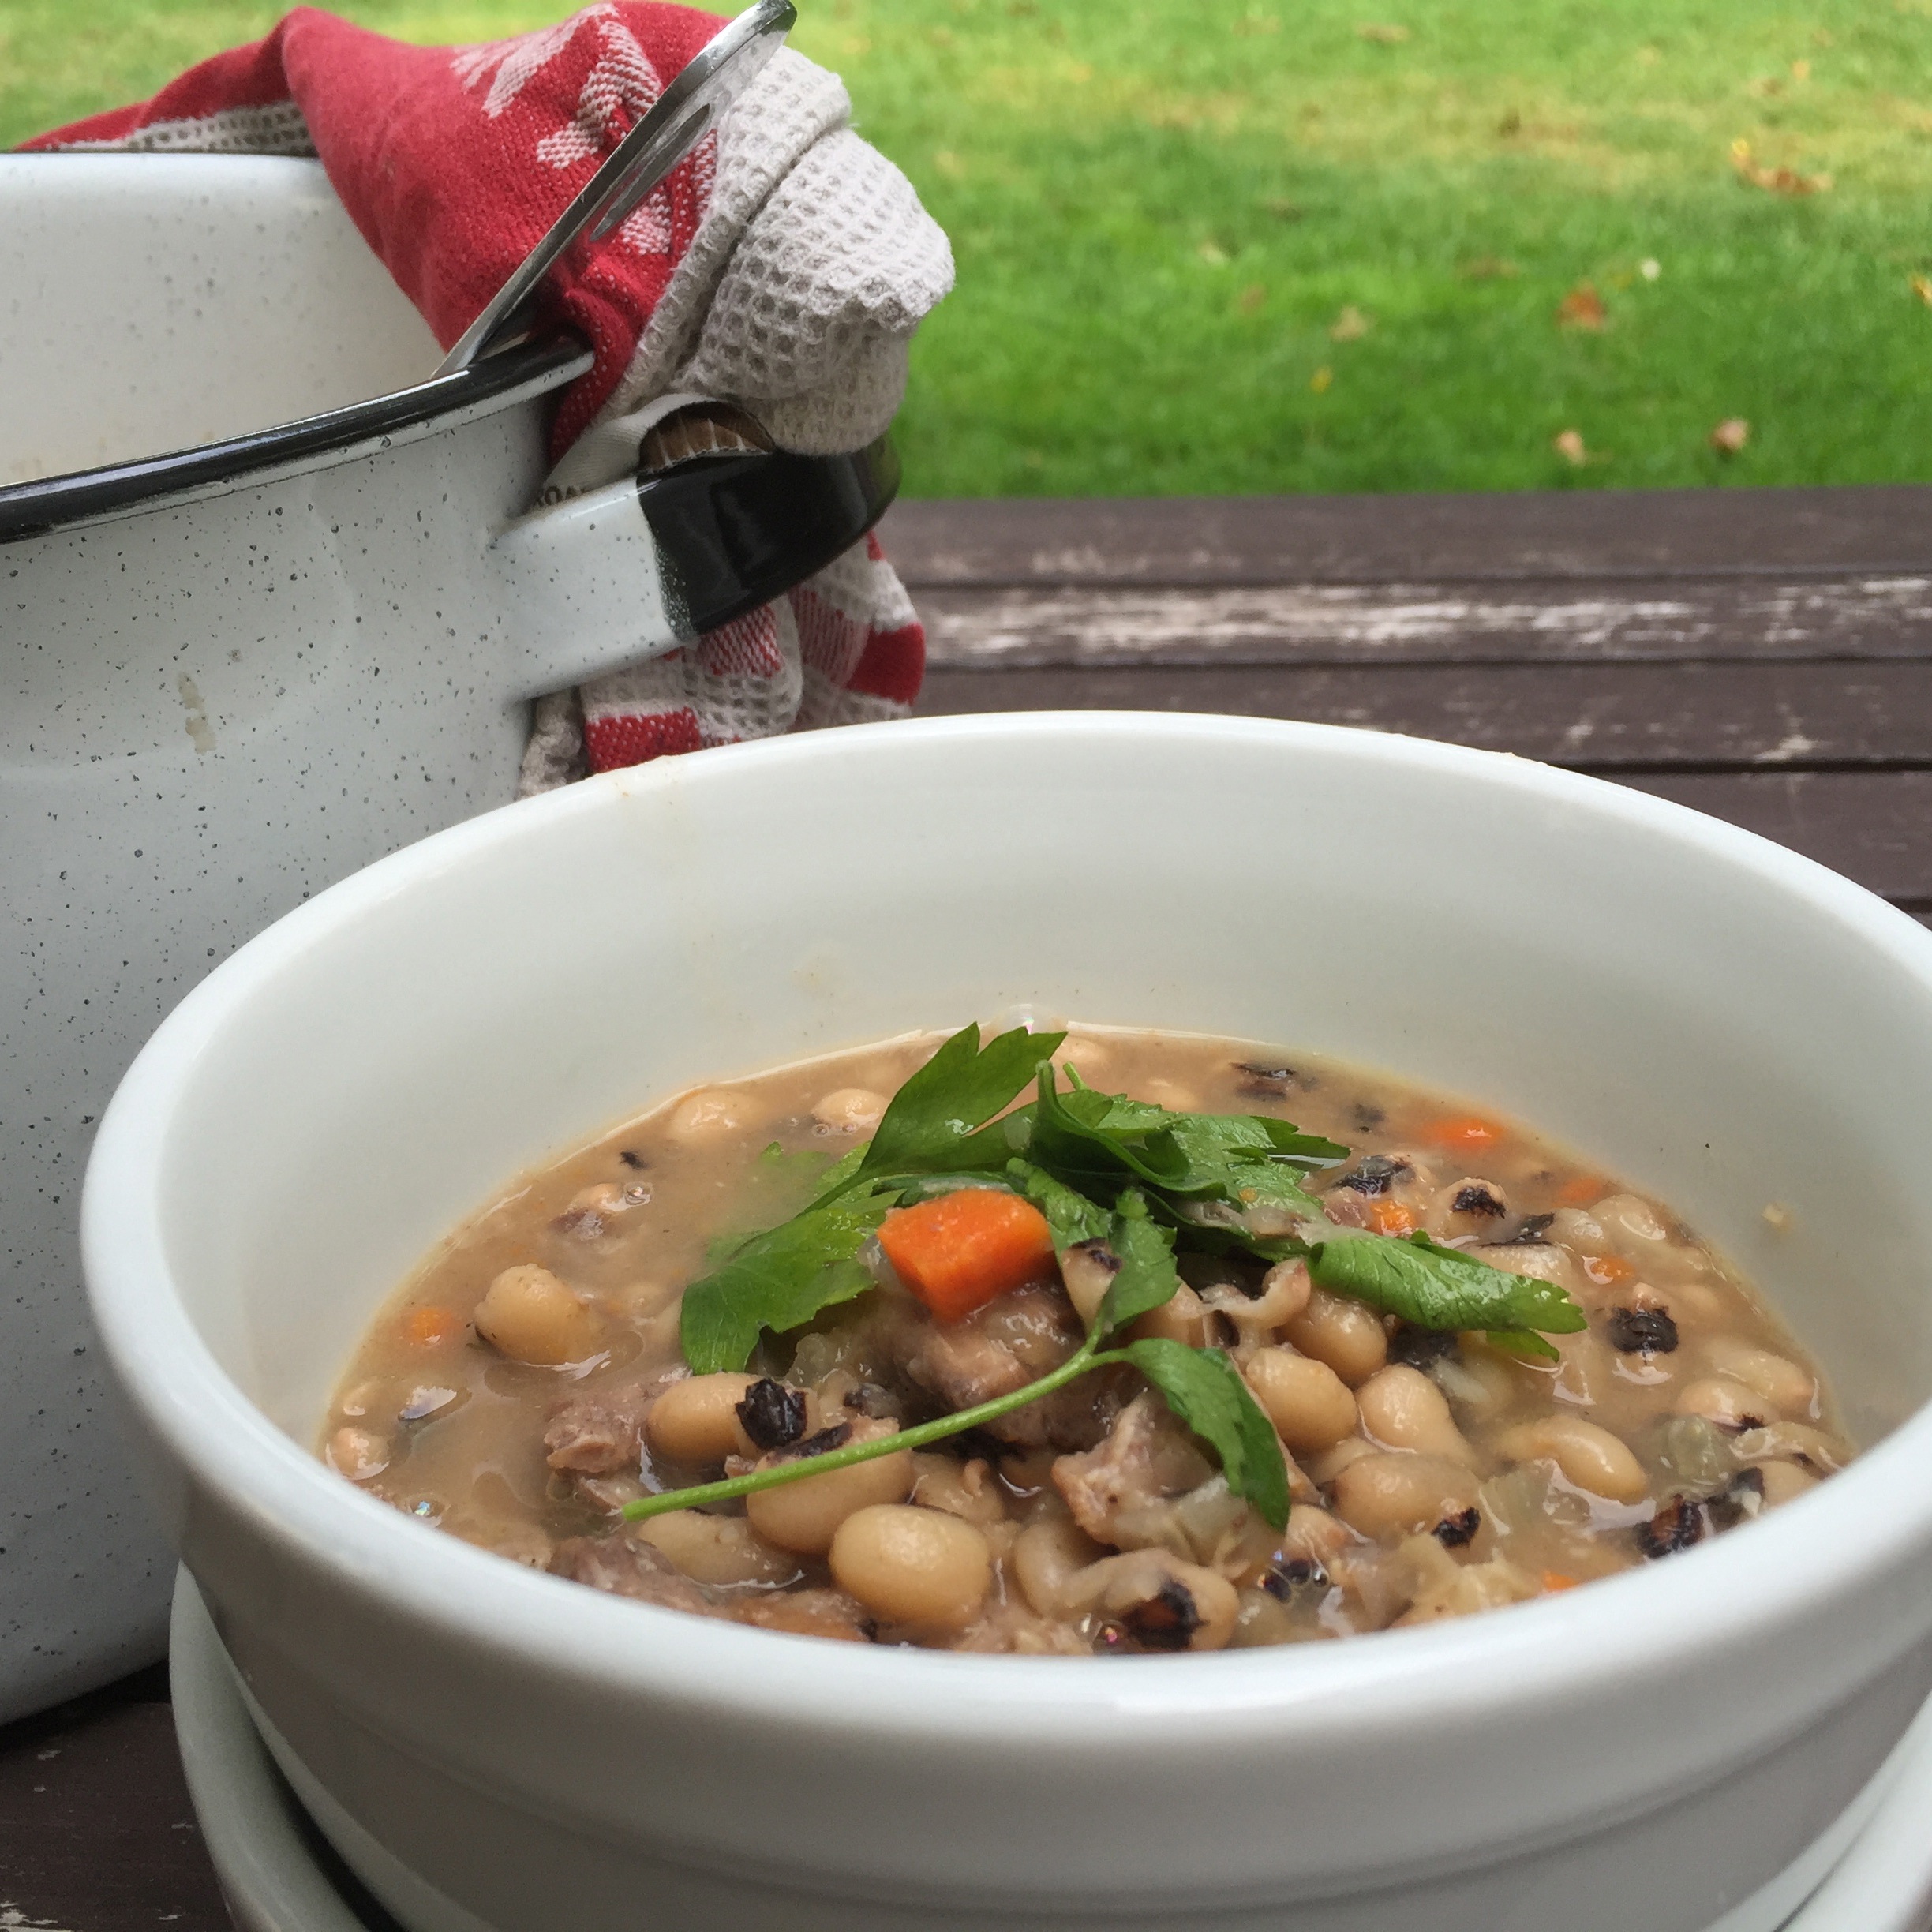
This thick, hearty soup is a meal in itself. photo: Nancy Duran

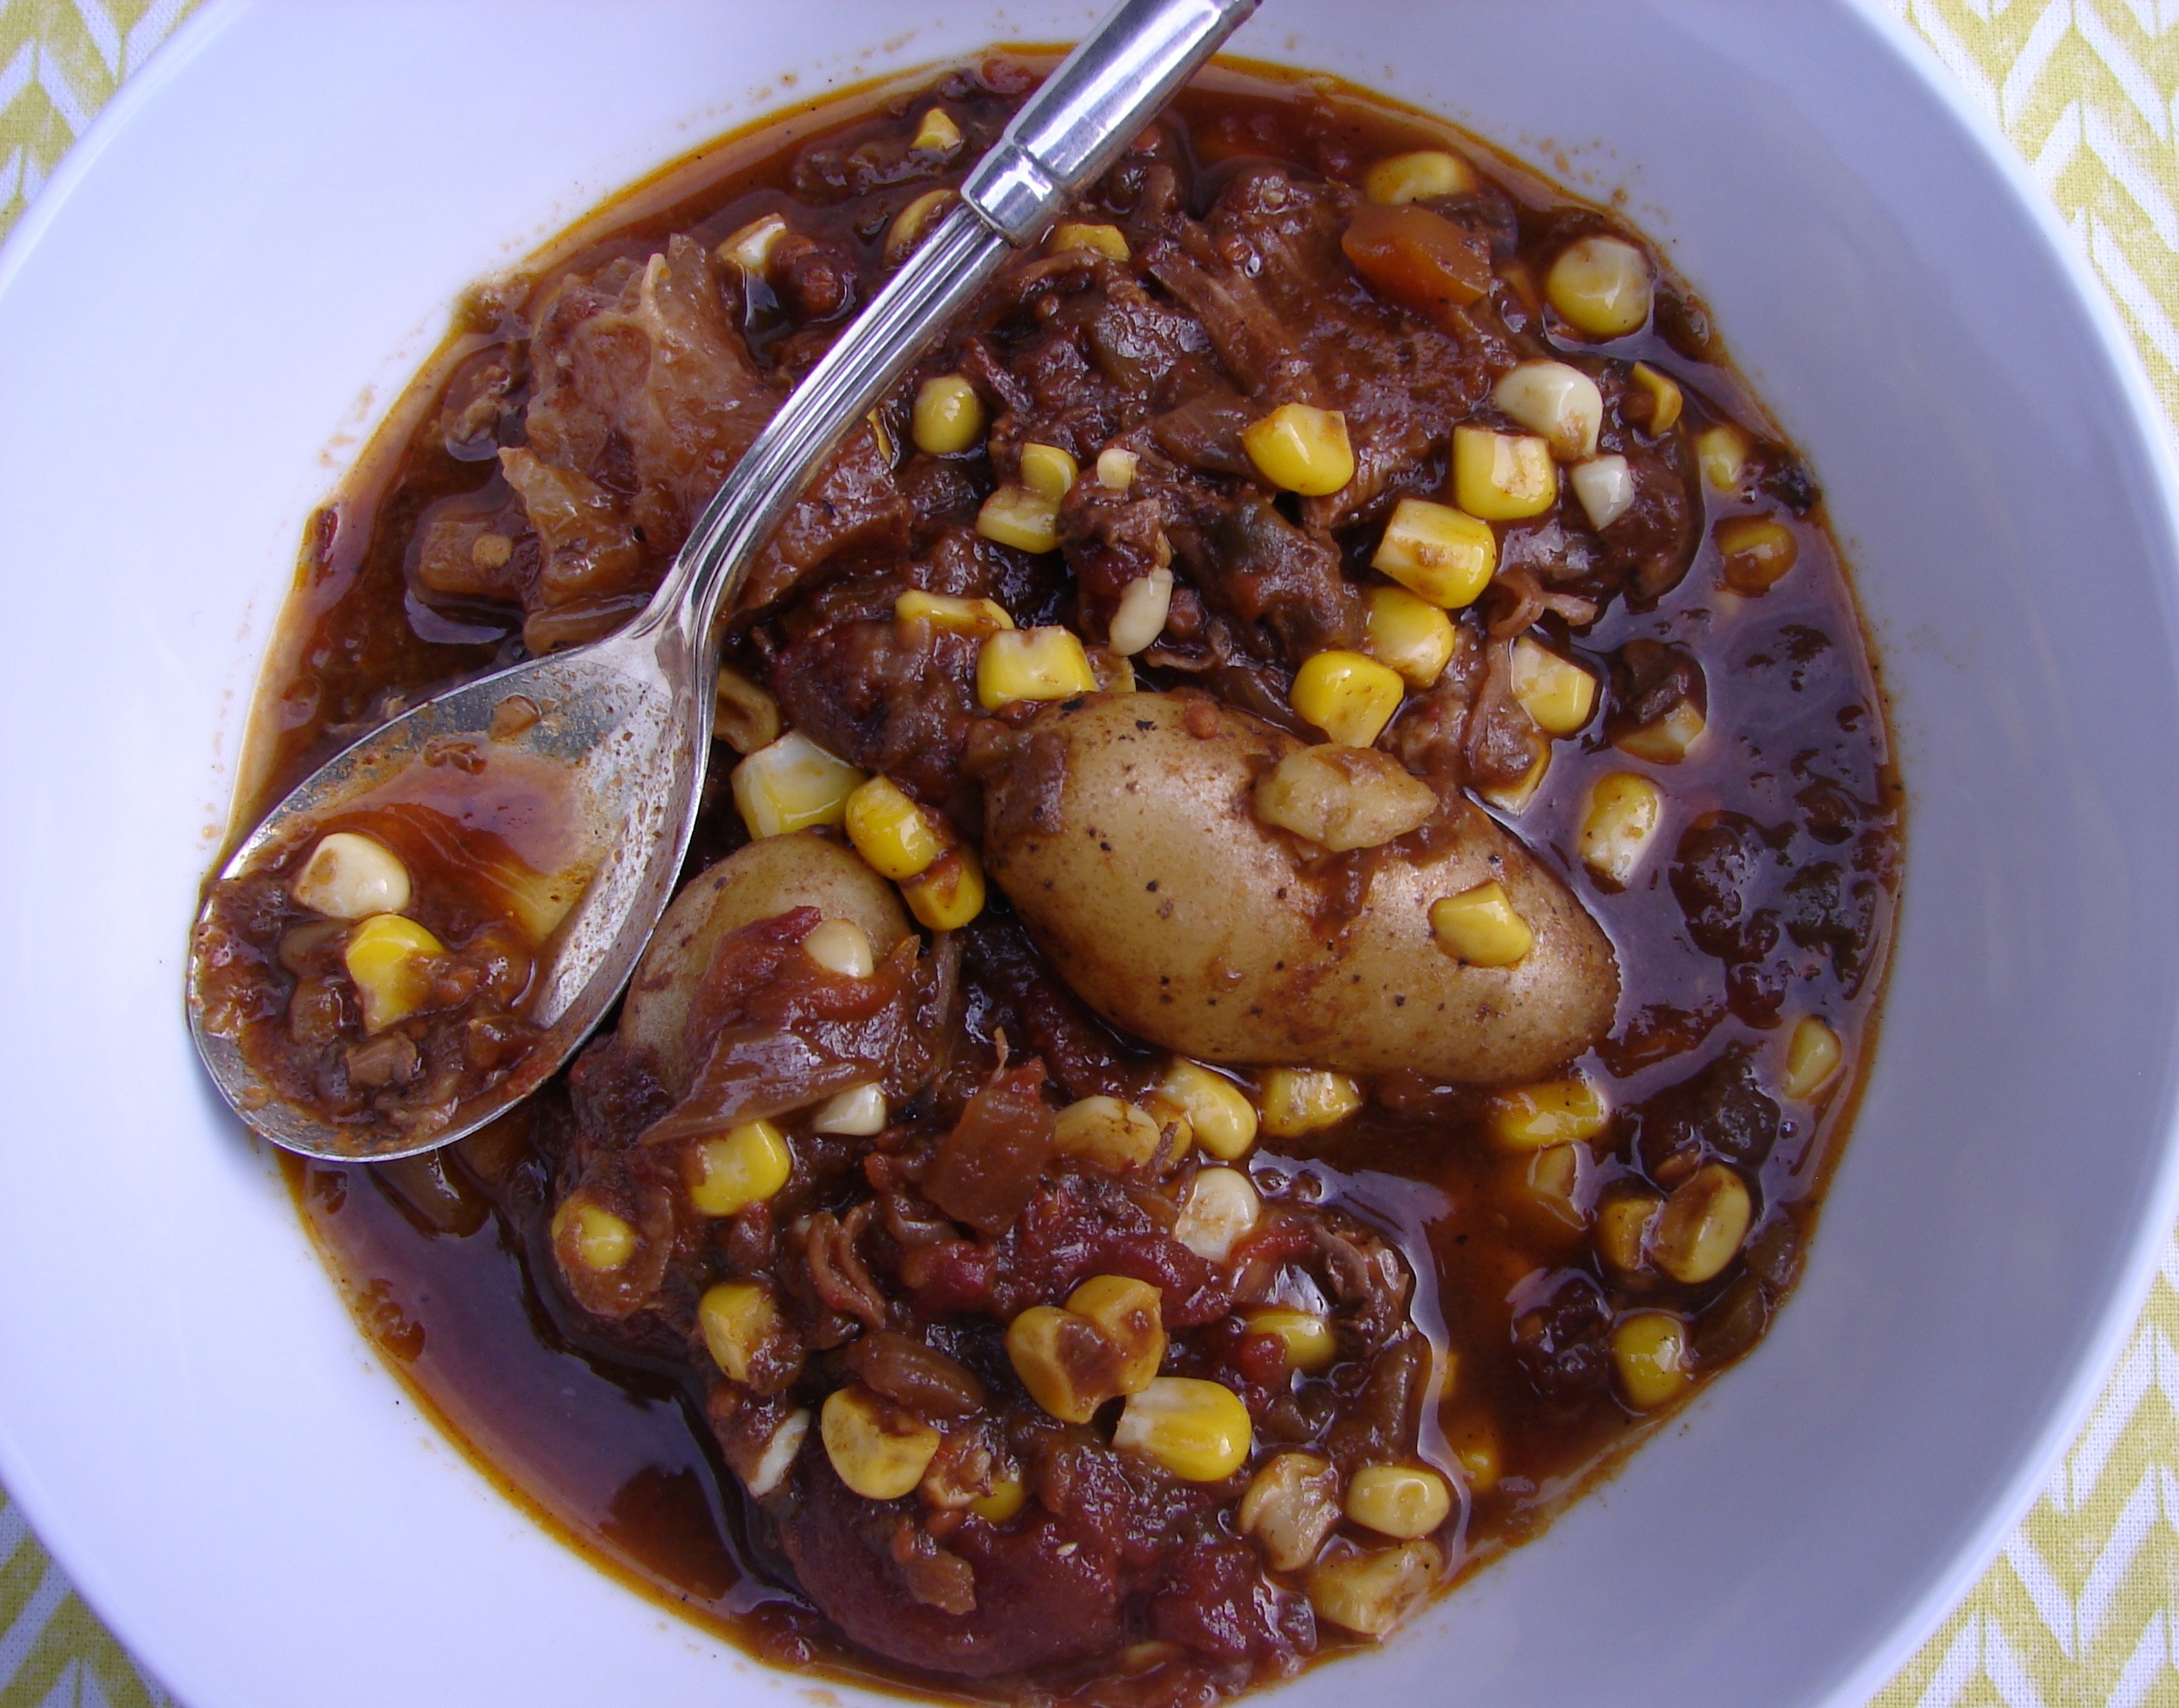
I learned a thing or two about Southern cooking during my time working on the Deen family cookbooks. Most significantly, I learned that even though I’m a Northerner through and through, I sure do like me some down home cooking from time to time. From stewed collards to chicken and dumplings, my food universe grew exponentially on those projects. So while cleaning out my meat freezer to make room for this year’s meat share I came across a ham hock I’d somehow missed and I knew immediately that I’d be cooking up a pot of Southern comfort food.

What makes soup so easy is that it is best made in the “kitchen sink” cooking style. That is, raid the kitchen and throw everything except the kitchen sink straight into the pot. I had some straggling carrots and celery in my fridge and my onions were starting to pile up in the pantry. Then I found an ancient packet of black-eyed peas sitting around collecting dust. And so my Whistling Dixie soup was born. It was delicious served with hunks of crusty bread. And it did the job of cleaning out the fridge to make room for my next batch of meat and veg. Win-win-win.

Serves 8

2 tablespoons olive oil
1 large white onion, finely chopped
3 medium carrots, finely chopped
2 celery stalks, finely chopped
3 garlic cloves, finely chopped
3 fresh thyme sprigs
2¾ pound fresh ham hock, cut into large chunks (you can have your butcher do this)
1 pound dried black-eyed peas, rinsed and drained
4 cups chicken stock
Salt and freshly cracked black pepper to taste
Chopped fresh flat leaf parsley for serving

  1.  In a large deep pot, heat the oil over medium-low heat. Add the onion, carrot, and celery and cook, stirring, about 10 minutes, until very soft but not browning. Add the garlic and thyme and stir 1 minute, until the garlic is fragrant.
  2. Add the ham and peas to the pot and cover with stock and 4 cups water. Increase the heat to medium-high to bring to a boil. Then reduce the heat to medium-low, cover, and cook for about 1½ hours, until the meat and beans are tender.
  3. Remove the ham from the pot and place on a cutting board. When cool enough to handle, separate the meat from the bone, fat, and gristle. Discard the bone, fat and gristle and break the meat into bite-sized chunks. Add the meat back into the soup.
  4. Season the soup with salt and pepper to taste. Serve sprinkled with chopped parsley.

Recipe note: A few people have asked me where they can get fresh ham hock. I realize it’s much easier to find smoked ham hock so I figured a quick note on this would be helpful. Thanks to Laurissa Michael who tipped me off that she’s gotten fresh ham hock from Fresh Direct. Also note that you can use other slow cooking cuts of pork with the bone-in if you absolutely can’t find a ham hock.

Nutritional analysis based on 8 servings (does not include salt, pepper, and parsley):
Calories 376, Fat 22g, Sodium 160mg, Carbohydrate 20g, Fiber 7g, Sugar 1g, Protein 30g

Posted in appetizer, lunch, main, soup | Tagged , , , | Leave a comment

Roasted Squash and Bell Pepper Pasta

squash_pasta

Fresh pasta tossed with ricotta and roasted vegetables. photo: Nancy Duran

Move over summer squash, because your winter cousin has entered the picture. I’m so happy that butternut squash is back in season because it is my absolute favorite variety from this large and diverse botanical family. Sweet and nutty and comfortingly hearty, butternut squash is as versatile as it is tasty. It can be pureed into soups, mashed like potato, and even baked into sweet treats. But what I mostly like to do with it is simply coat it with olive oil, sprinkle it with sea salt, and roast it in the oven. Having roasted squash on hand has so many benefits. I like to add it to salads to bulk them up into a proper meal. Or for lunch, I pile it onto toast with some feta cheese sprinkled over. And if truth be told, sometimes I just eat it right off the oven tray. This pasta dish is one I’ve been making for years and years. It’s good midweek eating with a minimum of fuss. And the leftovers are always a welcome sight in the fridge.

Serves 4

2 large red bell peppers, thickly sliced
1 1/2 pounds butternut squash (about 1/2 small),thinly sliced (around 1/4-inch thick)
5 tablespoons extra virgin olive oil
1 pound fresh fettuccine
1 garlic clove, finely grated
2 tablespoons lemon juice
3 cups firmly packed baby spinach leaves
2 teaspoons finely grated lemon zest
1/2 cup fresh ricotta cheese
Small fresh basil leaves, salt, and freshly cracked black pepper to taste

  1. Preheat the oven to 400°F.
  2. On a rimmed baking sheet, toss the peppers with 1 1/2 tablespoons of the oil and place in the oven. On a separate rimmed baking sheet, toss the squash with 1 1/2 tablespoons of the oil and set aside.  After 10 minutes of cooking time for the peppers, place the squash in the oven. Continue roasting the vegetables for about another 15 minutes, until tender.
  3. In a large pot of boiling, salted water, cook the pasta according to the package instructions. Drain, reserving about 1/4 cup of pasta cooking water.
  4. Meanwhile, in a screw top jar, combine the garlic, lemon juice, and remaining oil. Shake to combine. When the pasta has been drained, add about 1 tablespoon of the pasta cooking water to the dressing.
  5. While the pasta is still hot, add the spinach leaves and dressing and toss to wilt the leaves and coat the pasta with the dressing.
  6. Add the roasted vegetables, zest, and ricotta and toss gently to coat and combine. Add more pasta cooking liquid if you think it needs it.
  7. Season the pasta to taste with salt and pepper, scatter with baby basil leaves, and serve.

Nutritional analysis based on 4 servings (does not include basil, salt, and pepper to taste):
Calories 459, Fat 23g, Sodium 61mg, Carbohydrate 56g, Fiber 6g, Sugar 8g, Protein 12g.

Posted in main, side | Tagged , , , , , | Leave a comment

Beets, Beet Greens, and Tomato Salad

beet_greens

Beets and beet greens team up with tomatoes for a delicious salad. photo: Nancy Duran

I’m fairly certain no one will ever charge me with excessive frugality. But every once in a while, I manage to create a recipe that demonstrates a real “snout to tail” or “roots to leaves” approach to cooking that makes me feel very proud indeed. This here is one such recipe. You see, when I buy beets, like most people, the first thing I do is snip off the greens and stems and toss them straight into the bin. So wasteful! This week, when beets arrived in my CSA box, I vowed to change my profligate ways.

My usual approach to a salad like this is to add lots of lettuce leaves to bulk it up. Instead, I chose to use the beet greens I already had staring up at me on my cutting board. I lightly blanched the greens, tossed them with a tangy, oniony dressing, and layered them into the salad with the tomatoes and beetroot. The greens, which have a similar flavor to collards or kale, added contrasting texture and some solid earthiness to the dish. This salad certainly illustrates the maxim “waste not want not”, for I was wanting of nothing more after digging into this beautiful plate of food.

Serves 4

Dressing
2 scallions, thinly sliced into rounds
1 tablespoon seeded mustard
3 tablespoons red wine vinegar
3 tablespoons extra virgin olive oil

Salad
4 cups shredded beet greens (from 4 medium beets)
4 medium beets, roasted (see Summertime Beet Relish for roasting instructions), cooled to room temperature, and sliced into rounds
2 small yellow tomatoes, sliced into rounds
2 tablespoons coarsely chopped fresh dill
1 tablespoon coarsely chopped fresh flat leaf parsley
1/4 cup toasted walnuts, roughly chopped
1/4 cup Greek yogurt
Salt and cracked black pepper to taste

  1. First make the dressing so that the scallions have time to pickle. After slicing the scallions, set aside about half of the dark green slices. Place the remainder of the scallion in a screw top jar and add the rest of the dressing ingredients. Shake well to combine.
  2. To make the salad, in a large pot of boiling water, add the beet greens. Cook for 1 minute, until just wilted. Drain and to cool to room temperature. Add 1 tablespoon of the dressing to coat the greens.
  3. Toss the sliced beets with 1 tablespoon of the dressing. Layer the beet greens, beet slices, and tomatoes on a large platter. Scatter over dill, parsley, and walnuts and top with a dollop of yogurt. Scatter over the set aside dark green scallion slices. Drizzle over another 1-2 tablespoons of dressing, depending on how zinging you like your salad. Season to taste with salt and pepper.

Nutritional analysis based on 4 servings (does not include salt and pepper to taste):
Calories 215, Fat 15g, Sodium 223mg, Carbohydrate 16g, Fiber 5g, Sugar 9g, Protein 6g

Posted in appetizer, lunch, salad, side | Tagged , , , | 2 Comments

Balsamic Glazed Cipollini Onions and Tomatoes

cipollini3_balsamic

This comforting side smells almost as good as it tastes. photo: Nancy Duran

After summer’s glorious return last weekend, it now feels that we have settled into an autumnal groove. There’s a slight chill in the air and the leaves are beginning to gently fall to the ground. You know what that means. It’s time for slow cooking in the oven. This comforting side dish is just the ticket if your plan is to putter around the house on a lazy weekend afternoon. It makes an excellent accompaniment to steak, lamb, or pork. And it fills the house with the most amazing aromas: smoky bacon, caramelizing balsamic, and pungent garlic. Your house will smell so inviting with this dish in the oven, you’ll find every excuse to stay put.

There are loads of plum tomatoes around this time of year. Traditionally they are used to make homemade tomato sauce that can be jarred for the coming winter months. But I like to set aside a box of these hearty tomatoes for slow roasting. They are amazing on egg sandwiches in the morning or tossed into salads (they hold up especially well next to peppery baby arugula). And they are especially delicious roasted with other hearty fall vegetables, including mushrooms or cipollini onions. I served this dish with pork tenderloin that I marinated in lemon juice, seeded mustard, garlic, and thyme and then grilled on my stove top grill. I rounded out the meal with a lightly dressed green salad and a glass of red wine to wash it all down. Not too shabby for a Thursday night in.

Serves 4

1 pound small cipollini onions, hairy root end trimmed but still intact
1 pound plum tomatoes (4 to 6), cored and quartered lengthwise
3 strips bacon, chopped
3 garlic cloves, sliced
1/2 cup balsamic vinegar
1/4 cup olive oil
2 teaspoons fresh thyme leaves
Salt and cracked black pepper to taste

  1. Preheat the oven to 400°F.
  2. To peel the onions, place a large pot of water over high heat and bring to the boil. Add the onions and boil for 3 minutes. Drain, and when cool enough to handle, pinch the stem end of the onion and pull the skins off. If your onions are big or uneven in size, take a layer of skin off to make them smaller and more consistent.
  3.  In a baking dish, combine the peeled onions, tomatoes, bacon, garlic, vinegar, oil, and thyme leaves. Season to taste with salt and pepper. Roast for 30 minutes. Remove from the oven and add 1/4 cup water to deglaze the pan, stirring and scraping up any solid bits from the base. Return to the oven and roast for another 20 minutes, until the onions are tender and glazed.

Nutritional analysis based on 4 servings (does not include salt and pepper to taste):
Calories 306, Fat 23g, Sodium 191mg, Carbohydrate 20g, Fiber 3g, Sugar 12, Protein 5g

Posted in side | Tagged , , , | Leave a comment

Chocolate Hazelnut Pear Tart

pear_hazelnut

After drizzling the tart, serve more of the luxurious nutella glaze on the side for ultimate decadence! photo: Nancy Duran

pear_tart_full

The tart before drizzling the Nutella glaze. photo: Nancy Duran

And here is yet another example of my favorite type of dessert: one that provides maximum pleasure but requires minimal effort. This beautiful, gluten-free tart will have people thinking you are a highly trained pastry chef while all you really need to know how to do is push the button on your food processor. If you are a dark chocolate lover, this is the tart for you. The flour-less filling is rich and textural thanks to the hazelnut meal. But the tart as a whole is lightened by the mellow sweetness of the juicy pears. This is the perfect tart to serve if you are throwing a small dinner party. It looks beautiful, tastes even better, and can be made well in advance. And if you feel like pushing the envelope on decadence, serve the tart with a dollop of whipped cream perched on top. You’ll thank me later.

Serves 6

Tart
6 tablespoons unsalted butter (3/4 stick), cut into cubes and softened
1/2 cup brown sugar
2 large eggs
1 cup hazelnut meal
1/3 cup unsweetened cocoa powder
1 teaspoon pure vanilla extract
1/2 teaspoon salt
1 1/2 Bartlett pears

Nutella Glaze
1/4 cup nutella
1/2 cup confectioners’ sugar, sifted
1/3 cup 1 % milk

  1. Grease a 13 x 3 3/4-inch rectangular removable base tart tin with cooking spray or butter. Preheat the oven to 350°F.
  2. In the bowl of a food processor, combine the softened butter and sugar. Process until smooth. Add the sugar, eggs, hazelnut meal, cocoa powder, vanilla, and salt and process until smooth. Scrape the sides of the bowl and process again until fully combined. Spoon the mixture into the prepared tart tin and smooth the top.
  3. Peel, core and quarter the pears. Press the pear quarters into the chocolate batter at even intervals. Bake the tart for 40 to 45 minutes, until the sides of the tart can be gently and cleanly pulled away from the tin.
  4. Meanwhile, make the Nutella Glaze: In a medium bowl, combine all ingredients and whisk until smooth.
  5. Let the tart cool in the tin for 10 minutes, then gently lift out of the tin, leaving the base intact under the tart. Let the tart cool completely before drizzling with the glaze just before serving. Serve extra glaze on the side.
Posted in dessert | Tagged , , , , , | 3 Comments

Middle Eastern Style Braised Carrots

braised_carrots

Serve these carrots warm or at room temperature. photo: Nancy Duran

One of the most amazing (and exhausting) experiences of my culinary career was, without a doubt, working at the restaurant Rockpool in Sydney, Australia. I was fresh out of culinary school and ready to soak up anything and everything food related. I couldn’t have asked for a better mentor than chef-owner Neil Perry. While I was fairly low on the totem pole, there were a few complete dishes that I had the pleasure of cooking and feeling ownership over. This recipe is a take on one of my favorites from that lot.

Though I made this dish almost every day I worked there, I have to admit I was working in a sort of fog the whole time due to extreme fatigue and stress (working in a fast paced upscale restaurant kitchen was definitely a heightened experience). The version that I made in the restaurant probably had about ten more steps than this version and undoubtedly included some highly specialized ingredients that I can’t seem to summon up from the memory banks. This version, however, is more suited to the home cook, who isn’t usually looking for a 25-step side dish recipe. Happily, this three-step recipe achieves very much the same effects. Braising the carrots in carrot juice is the real trick here. While we freshly juiced our carrots for the restaurant version, I opted to buy a small bottle of Bolthouse Farms carrot juice and streamline the process just a little bit. I wasn’t disappointed. This braise is bursting with rich, earthy flavor, complemented by the fragrant, exotic spicing of the Middle East. Though exotic, chances are you’ll have most of the ingredients on hand. In fact, a quick look over the ingredients reads almost like a cooking from the pantry dish. And the real kicker? It took about 10 minutes of prep time and just 25 minutes of cooking time. Add this to your repertoire and you’ll have proof that you too can cook like a chef.

Serves 4

1 tablespoon unsalted butter
1 tablespoon olive oil
2 small shallots, finely chopped
1/2 teaspoon cumin seeds
1/2 teaspoon coriander seeds
1/2 teaspoon sea salt
1/8 teaspoon cracked black pepper
1 tablespoon honey
1 pound carrots, cut into big chunks
1 cup carrot juice
1/4 cup golden raisins
2 tablespoons coarsely chopped fresh cilantro

  1. In a wide, deep frying pan over medium-low heat, melt the butter with the oil. Add the shallots, cumin seeds, coriander seeds, salt, and pepper and cook, stirring, until the shallot has softened, about 1 1/2 minutes. Be very careful not to burn the shallots. Add the honey and cook, stirring, 1 minute.
  2. Add the carrots and toss to coat all over with the honey glaze. Pour in the carrot juice, increase the heat to medium-high and bring to a simmer. Then reduce the heat to medium-low, cover, and cook for 10 minutes.
  3. Uncover, add the raisins and continue to simmer for about 10 minutes, until the carrots are tender and the liquid has reduced to a syrup consistency. Remove from the heat, sprinkle with cilantro and serve warm or at room temperature.

Nutritional analysis based on 4 servings:
Calories 176, Fat 7g, Sodium 388mg, Carbohydrate 30g, Fiber 4g, Sugar 18g, Protein 2g

Posted in salad, side | Tagged , , , | 1 Comment

Sayonara Summer Succotash

succotash

Goodnight summer. photo: Nancy Duran

There’s a slight melancholy that always hits me at this time of year as we transition into a new season. I’m not sure why, really, because I absolutely love autumn, not to mention winter ski season. But saying good-bye to summer leaves me feeling just a little bit blue. So it was with great feeling that I surveyed my CSA haul this week and thought, this too must come to an end. Then I picked myself up and did the thing I do. I created a dish to celebrate summer and send it on its way.

The late harvest succotash comes to us from the Native Americans of the Northeast and it makes delicious use of all the vegetables that are overflowing farms and gardens at this time of year. While there are many variations on the succotash theme, corn and lima beans are generally the stars. I’m totally down with corn, but, unfortunately for me, lima beans are a vegetable for which I simply cannot find a place in my heart. Luckily, I always have frozen edamame beans on hand and they just happen to be the perfect stand in for limas. I’ve used a mix of summer squash and zucchini in this succotash but either/or would do just fine. And if you have other favorite summer veggies you’d like to throw in there, go for it. Whatever you do, though, don’t skip the tomatoes. The real magic of this dish is in the way they break down, providing the sweet sauce in which the veggies cook to snappy perfection. As the days shorten and the evenings cool down, this ode to summer marks a beautiful way to say thank you and good-bye to the carefree lazy days of August.

Serves 6

1 1/2 cups frozen edamame beans
1 tablespoon olive oil
1 tablespoon unsalted butter
1 small onion, finely chopped
1 medium red bell pepper, finely chopped
2 garlic cloves, thinly sliced
2 large plum tomatoes, finely chopped
2 cups corn kernels (from about 2 ears of corn)
2 cups finely chopped summer squash and zucchini
Salt and cracked black pepper to taste
Zest and juice of 1 lime
2 scallions, dark green parts only, thinly sliced

  1. Remove the edamame from the freezer to partially thaw while you prep the rest of the ingredients.
  2. In a deep frying pan over medium-low heat, add the oil and butter. When the butter has melted, add the onion and bell pepper and cook, stirring, about 8 minutes, until the onion has softened. Stir in the garlic and cook for 1 minute.
  3. Increase the heat to medium and add the tomatoes. Cook for 5 minutes, until they have mostly broken down.
  4. Add the corn, squash, and zucchini and toss to coat all over with the tomato-onion mixture. Cover and cook 5 minutes, lifting the lid once to stir.
  5. Stir in the edamame and cook, uncovered and stirring, 2 more minutes, until the edamame are just cooked and still snappy. Season to taste with salt and pepper. Remove from the heat and sprinkle with the lime zest and juice and scatter over the scallions.

Nutritional analysis based on 6 servings (does not include salt and pepper to taste):
Calories 143, Fat 6g, Sodium 11mg, Carbohydrate 20g, Fiber 4g, Sugar 4g, Protein 6g

Posted in side | Tagged , , , , , , | Leave a comment

Pear and Prosciutto Salad

pear_prosciutto

This salad can be served family style on a platter but for a more elegant presentation, you can serve it as a composed salad. photo: Nancy Duran

Here’s my deep thought for the day: apples are great, but pears are divine. I think they go a long way toward making up for the loss of freshly picked strawberries, blueberries, and peaches, which are exiting the stage at this point in the summer. Sure, I’ll miss my summer fruit, but I’m turning my mind to all the goodies in store for me with the hearty fruits of autumn and winter.

This salad makes great use of my favorite cooler weather fruit. I’ve featured Bartlett pears with some classic accompaniments: maple syrup, prosciutto, and gorgonzola cheese. The syrup in the dressing adds a subtle sweetness, balancing out the tangy vinegar and salty prosciutto. If you can, I recommend making the dressing in advance. That way the shallots can have time to properly pickle. If you don’t have a chance to make it ahead of time, however, shallots are plenty sweet enough to be enjoyed even when they are raw. A sharp and peppery baby arugula is what this salad wants so look for the freshest stuff you can find. Or, if you prefer, substitute watercress instead.

Serves 4

Maple Vinaigrette
2 teaspoons maple syrup
1 tablespoon very finely chopped shallot
2 tablespoons malt vinegar
3 tablespoons extra virgin olive oil

Salad
2 Bartlett pears
1 tablespoon lemon juice
1/4 pound thinly sliced prosciutto
3 cups baby arugula
2 medium heads endive, halved lengthwise, trimmed, leaves separated
3 tablespoons crumbled gorgonzola cheese
Salt and cracked black pepper to taste

  1. To make the vinaigrette: Place all ingredients in a screw-top jar. Shake to combine. Let the vinaigrette sit to pickle the shallots while you prepare the salad.
  2. To make the salad: Slice each pear into 8 wedges. Drizzle the wedges with the lemon juice to prevent browning. Tear the sliced prosciutto into 16 similar sized lengths. Wrap each pear wedge in a piece of prosciutto. Either on a platter or on individual serving plates, combine the prosciutto-wrapped pears with the arugula and endive. Sprinkle over the cheese and season with salt and pepper. Just before serving, give the vinaigrette jar another shake and drizzle over the salad. Serve immediately.

Nutritional analysis based on 4 servings (does not include salt and pepper to taste):
Calories 260, Fat 16g, Sodium 335mg, Carbohydrate 26g, Fiber 11g, Sugar 12g, Protein 8g

Posted in appetizer, lunch, main, salad, side | Tagged , , , , | 1 Comment

New Mexican Red and Green Chile Stew

green_chile

New Mexico chiles come in mild, medium, and hot varieties. For just the right balance between spice and flavor, I like a mix of medium and hot chiles. photo Nancy Duran

This past weekend, the pungent, smoky smell of roasting chiles filled the air in Sleepy Hollow. That’s because a little piece of New Mexico made its way out East. Each September my father-in-law ships us two huge burlap bags filled with New Mexico chiles. And, in keeping with the custom all throughout New Mexico, and with the help of some good friends, we roast our chiles on the barbecue, then sweat them, peel them, chop them, bag them, and freeze a supply to get us all through the cold dark winter. It’s a tradition that my New Mexico-born husband has so lovingly nurtured for his East Coast family and friends. Over the course of the year, we use our chiles in everything from egg dishes and salsas, to stews and stir-fries.

Even if you like your salsa mild and prefer your peppers from the bell family, I recommend you give New Mexico chiles a whirl. Their beauty lies not only in heat, but in their great flavor, which is at the heart of Southwestern cuisine. Their spiciness is a mellow, warming spiciness, as opposed to the ear-whistling, tongue burning scorch of the jalapeno or habanero.

This stew features a mix of medium and hot chiles, probably a little hotter than most would prefer, but perfect for my family’s taste buds. I used an arm roast from my meat share but the more commonly found beef chuck will work just as well. After over 4 hours in the oven, the resulting dish delivered melt-in-your-mouth meat, a deep and zinging flavor, and a homey comforting warmth that helped us usher in the first autumnal days of the year.

Serves 8

8 garlic cloves
3 pounds arm roast or beef chuck
Salt and cracked black pepper for seasoning the meat, plus more to taste
2 tablespoons vegetable oil
1 tablespoon unsalted butter
1 large onion, finely chopped
2 large carrots, finely chopped
1 tablespoon ground cumin
2 teaspoons dried oregano
2 tablespoons all-purpose flour
1 can (28 ounces) whole peeled tomatoes
2 cups mild to spicy (depending on your taste) New Mexico green chiles*
2 bottles (12 ounces each) dark beer
3/4 pound fingerling potatoes (halved if large)
2 cups corn kernels, from about 2 ears of corn
Tortillas, for serving

  1. Preheat the oven to 325 °F.
  2. Peel the garlic cloves and cut them in halve or into quarters, depending on their size. Using a small sharp knife, make 1-inch slits all over the beef and insert the garlic pieces. Make sure that they are pushed well into the beef so that they don’t pop out and burn while you are searing the meat. Season the beef all over with salt and pepper.
  3. In a large Dutch oven, heat the oil over medium-high heat. Add the beef and brown all over until a deep crust forms. This should take about 10 minutes. Remove the beef from the pan.
  4. Add the butter to the pan and reduce the temperature to medium-low. Add the onion and carrot and cook, stirring, about 7 minutes, until the onion has softened. Add the cumin, oregano, and flour. Stir for one minute, then return the beef and any accumulated juices back to the pan with the tomatoes, chilies, and beer. Bring to a boil, cover, and place in the oven to braise for about 4 hours, until the meat is falling apart tender. Check the meat occasionally and baste it with the cooking juices.
  5. Add the potatoes to the pan with a 1/2 cup water. Return the pan, covered, to the oven and cook for 20 to 25 minutes, until the potatoes are tender. Stir in the corn to cook for the final 5 minutes of the potato cooking time.
  6. Serve the stew with warm tortillas.

* Here’s a link for ordering New Mexico chiles online: http://diazfarms.com/. However, you can also use canned green chiles. Many local supermarkets carry the Hatch brand.

Nutritional analysis based on 8 servings (does not include salt and pepper or tortillas for serving):
Calories 430, Fat 19g, sodium 336mg, Carbohydrate 31g, Fiber 4g, Sugar 5g, Protein 42g

Posted in main, soup | Tagged , , , , | 2 Comments

Duck Breast with Chinese Style Plums

plum_compote_duck

A plum compote inspired by the iconic taste of Chinese plum sauce. photo: Abigail Weber

I developed this recipe quite a few weeks ago and then promptly forgot all about it. Forgot about it, that is, until I went to dinner with my brother and sister last night and my brother ordered a delicious-looking crispy skinned duck breast that had me filled with food envy! Now, while my brother is a very good cook, beef reigns supreme for him (he still claims he’s allergic to seafood). Recently though, he’s been consciously branching out in his food choices. As it turns out, he’s got a great palate. He absolutely loved the duck and devoured it before I was able to steal a bite. And so, this recipe here is a little shout out to my brother. Hopefully he’ll give it a whirl and find he likes Chinese-style plum compote too. Or, perhaps he’ll just enjoy it with a fine pinot noir.

While I developed this back in August when plums were abundant, you should be able to find them for another few weeks yet so I don’t think I’ve missed my window for this one.

Serves 4

1 tablespoon vegetable oil
1 medium shallot, finely chopped
2 teaspoons finely chopped fresh ginger
2 whole star anise
2 tablespoons brown sugar
2 tablespoons soy sauce
1 tablespoon rice wine vinegar
1 tablespoon Chinese cooking wine (Shaoxing), or substitute cooking sherry
1 pound medium firm black plums, pitted and cut in eighths
4 boneless skin-on duck breasts (about 6-ounces each)
1 teaspoon Chinese 5-Spice
1/2 teaspoon salt
Spray oil for cooking the duck

  1. In a wide, shallow pan, heat the oil over medium-low heat. Add the shallot, ginger, and star anise and cook, stirring, until the shallot is softened, about 3 minutes.
  2. Add the sugar, soy sauce, vinegar, and cooking wine to the pan. Stir to dissolve the sugar. Add the plums and stir to coat all over with the sugar mixture. Bring to a simmer.
  3. Reduce the heat slightly and cook, covered, about 8 minutes, checking to see that the plums are beginning to break down but don’t fall apart completely (this will depend upon the ripeness of your plums). Uncover and cook for a further 3 to 5 minutes, until the liquid has reduced to a syrupy coating on the plums. When you are finished with the compote, cover it and set it aside to keep warm.
  4. Using a small, sharp knife, score the skin of the duck by making 3 or 4 diagonal slashes across. Season the skin with the Chinese 5-spice and salt. Lightly grease a medium frying pan with spray oil (because the duck skin is so fatty, you only need a thin coating of oil). Heat the frying pan over medium-high heat. When hot, add two of the breasts skin side down and cook for about 5 minutes, until the skin is crispy all over but not burnt. Pour off most of the fat from the pan (You can save this duck fat. It is delicious to cook with.) and flip the breasts. Reduce the heat to low and cover. Cook for about 5 minutes, until cooked through but still quite pink inside. Duck is best cooked medium-rare. Keep the cooked duck breasts warm by tenting them with foil while you finish up with the remaining breasts. Serve the duck with the plum compote and a steamed green vegetable of your choice.

Nutritional analysis for plum compote based on 4 servings:
Calories 110, Fat 4g, Sodium 527mg, Carbohydrate 19g, Fiber 2g, Sugar 16g, Protein 2g

Nutritional analysis for duck based on 4 servings:
Calories 356, Fat 26g, Sodium 386mg, Carbohydrate 0g, Fiber 0g, Sugar 0g, Protein 24


Posted in condiment, main, side | Tagged , , , | Leave a comment