Tzatziki (aka What do I do with all these cucumbers?)

tzatziki

The little hands in my house love dipping just about anything into zesty tzatziki. Try pita, carrots, tomatoes, celery, snap peas, or just about any other vegetable! photo: Abigail Weber

Chances are, at this point in the summer, you’ve got plenty of cucumbers rolling around your vegetable crisper. In my home, that is a very good thing. My two boys cannot get enough of cucumber. I don’t think there is any preparation of this prolific veggie that they’d turn down. I use it pureed in cold summer soups (see Cool Cucumber and Purslane Soup), chopped in salads, tossed into stir-fries, and sliced up to dip into just about anything. I also happen to use it in a classic dip of its very own, Greek tzatziki. This creamy, cooling dip makes for a lovely appetizer or satisfying mid-afternoon snack. I even go so far as to use cucumber tzatziki to dress cucumbers themselves. For this easy salad, I toss sliced cucumbers in salt, let them drain in a colander for 20 minutes or so, then dress them with a few shakes of rice wine vinegar and a healthy dollop of tzatziki. I serve this salad next to just about any grilled meat or fish.

Makes 2 1/2 cups

1 1/2 cups grated cucumber (from about 2 Lebanese or 3 Kirby cucumbers)
1 1/2 cups 2% Greek yogurt
1 small garlic clove, finely grated*
1/4 cup lemon juice
1 tablespoon extra virgin olive oil
1 teaspoon salt
1 tablespoon finely chopped fresh mint
Sumac, optional, to garnish
Pita, to serve

  1. In a colander set in the sink, place the grated cucumber. Using your hands, squeeze out the cucumber until most of the water from the cucumber has been extracted.
  2. In a medium bowl, mix together the cucumber, yogurt, garlic, lemon juice, oil, salt, and mint. Stir until thoroughly combined. Serve sprinkled with sumac.

Nutritional analysis based on 1/4 cup serving:
Calories 39, Fat 2 g, Sodium 259 mg, Carbohydrate 4g, fiber 0g, Sugars 3g, Protein 2g

microplane

Use a Microplane to grate raw garlic into dips and dressings.

* When I use raw garlic in a dressing or dip, I turn to my Microplane to finely grate it. That way I can be sure to achieve garlic flavor without the sharpness associated with raw garlic.


Posted in appetizer, condiment | Tagged , , | Leave a comment

Zucchini Blossom Quesadillas

zucchini_flower_quesadilla

Zucchini Blossom Quesadillas wrapped and ready for a picnic. photo: Abigail Weber

Beautiful squash and zucchini blossoms are examples of nature’s finest handiwork. And unlike most edible flowers, which are lovely to look at but fairly nondescript in a dish (think nasturtiums on that beautifully composed restaurant salad), these pretty blossoms are absolutely, positively delicious to cook with. There’s so much more to them than the stuffed and fried versions we know so well. Don’t get me wrong, I love this traditional preparation, I just find it a bit fiddly. For that reason, I tend to leave the battering and frying to restaurants. If you haven’t tried blossoms in other preparations, let me introduce you to a wonderful Mexican dish. I first tried squash blossom quesadillas in my husband’s native New Mexico. Oh my goodness did I fall in love with this simple plate of food! I look forward to making it every year about this time. I’ve changed things up a little from the traditional recipe, most notably by adding red onion for sweetness and corn for both its sweet taste and crunchy texture. Rest assured, if you haven’t gotten your hands on squash or zucchini blossoms this summer, this quesadilla is equally lovely with the zucchini or squash fruit that grows from the flower.

roasted_poblanos

Sweat roasted chiles in a paper bag after roasting them so that the skins slip off easily. photo: Abigail Weber

Roasted poblanos are an important element in this quesadilla. You can substitute Anaheim chiles if you can’t find poblanos. Just make sure you roast and peel them first. They can be roasted either under the broiler or on the grill. These are mild chiles that will add flavor, not heat.


Makes 4 quesadillas

1 tablespoon olive oil
1 small red onion, thinly sliced
2 garlic cloves, thinly sliced
1 cup corn kernels (from about 1 ear)
1 large roasted and peeled poblano chile, thinly sliced
1 1/4 cups Mexican queso fresco (or substitute ricotta)
1 teaspoon Tabasco, optional
12 zucchini blossoms, cleaned and trimmed*, and coarsely chopped into large pieces
1/4 cup chopped fresh cilantro
Salt and cracked black pepper to taste
4 burrito size flour tortillas (about 9-inch diameter)
4 tablespoons grated Cheddar cheese
2 tablespoons unsalted butter

  1. In a medium frying pan, heat the oil over medium-low heat. Add the onion and cook until softening, about 5 minutes. Add the garlic and corn and cook, stirring, until the corn is tender, 3 to 5 minutes.
  2. Stir in the chile, queso fresco, Tabasco (if using), zucchini blossoms, and cilantro and mix until well combined. Season to taste with salt and pepper and remove from the heat.
  3. Lay the tortillas out on a cutting board and divide the filling evenly among them, piling the filling onto one half of the circle so that you can enclose the quesadillas by folding half the tortilla over the filling. Use about 3/4 cup of filling per tortilla. Before folding the tortilla over the filling, sprinkle each tortilla with 1 tablespoon of the grated Cheddar. The Cheddar will act as the glue to the quesadilla and add a tangy sharp note to the filling. Now fold over each tortilla.
  4. In a medium frying pan, heat 1/2 tablespoon of the butter over medium heat and swirl it around to coat the pan. When it begins sizzling, add a quesadilla and brown on one side for about 1 minute, then flip and brown on the other side for about 30 seconds. Slide out of the pan onto a plate and wipe out the pan with a paper towel. Repeat with the remaining butter and quesadillas. If you like, drizzle each quesadilla with Crema Mexicana and serve.

* To clean the zucchini blossoms, trim the stems, remove the stamen inside the flowers and wash out the flowers under lightly running water. Gently shake dry.

Nutritional analysis based on 4 servings:
Calories 509, Fat 27g, Sodium 564mg, Carbohydrate 50g, Fiber 4g, Sugars 3g,
Protein 18g

Posted in lunch, main | Tagged , , , , , , | Leave a comment

Squash Ribbons with Prosciutto

zucchini_prosciutto

Try this fresh salad topped with sliced grilled chicken breast. photo: Abigail Weber

Squash and zucchini season has commenced! In about three weeks I’ll probably reach my saturation point but for now, I’m reveling in its essential “summerness.” There’s really no end to the recipes you can create with these versatile veggies. Think, ratatouille, zucchini bread, chilled soups, and gorgeous grills. It’s been mighty humid here of late so I’ve been loathe to fire up the stove or oven. In light of that, here’s a great no-cook recipe for a sultry summer evening. Enjoy this as-is or add sliced grilled chicken to round out the meal. The prosciutto is nice and salty so you shouldn’t need to add extra salt. Just  finish the dish with cracked black pepper and baby basil leaves. So pretty, so tasty, and so refreshing.

Serves 6 as a side dish or 8 as an appetizer

1/4 cup lemon juice
2 teaspoons Dijon mustard
1/2 teaspoon granulated sugar
1/4 cup olive oil
1 1/4 pounds mix of zucchini and squash, sliced into thin ribbons*
1/3 pound thinly sliced prosciutto
1/4 cup fresh basil leaves
Cracked black pepper to taste

  1. In a small measuring jug, combine the lemon juice, mustard, sugar, and oil. Whisk to combine.
  2. In a large bowl, combine the zucchini and squash slices and the prosciutto. Drizzle over the dressing and toss to coat. Sprinkle over basil leaves and pepper and serve.

*I used my trusty Japanese mandoline for these thin slices.

Nutritional analysis based on 6 servings:
Calories 198, Fat 19g, Sodium 203 mg, Carbohydrate 4g, Fiber 1g, Sugar 2g, Protein 4g

Posted in lunch, main, salad, side | Tagged , , , , , | 2 Comments

Strawberry Mint Granita

straw_granita

Fresh mint and a drizzle of balsamic glaze add a sophisticated touch to this granita. photo: Abigail Weber

Enjoying an icy cold popsicle on a hot summer day is undoubtedly one of the great joys of youth. What child of the seventies doesn’t recall fondly the electric kaleidoscope of
Fla Vor Ice and Bomb Pops? Alas, we all grow up sometime. And to that I say, why should children have all the fun? Keep the good times rolling with granita, the adult’s version of the popsicle. All you really need to make this refreshing treat is fresh fruit, a hit of sugar, a blender, a freezer, and a fork. I chose to use the wild strawberries from my CSA share this week, along with garden grown mint. After blending it all together with sugar syrup, I simply froze it and fluffed with a fork periodically throughout the morning. The result was a deeply flavored, and utterly cooling dessert. Pour in a shot or two of booze to make this a truly adult concoction, a hit at summer parties. Or top it off, as I did, with a drizzle of balsamic glaze to give it a tangy high note and a sophisticated finish.

Makes about 4 cups

1/2 cup granulated sugar
1 1/4 cups water
1/4 cup loosely packed finely chopped fresh mint
5 cups small wild strawberries (about 1 1/2 pounds), trimmed and hulled
Juice of one lime
Balsamic glaze, for serving

  1. In a small saucepan over medium heat, stir together the sugar and water until the sugar has dissolved. Pour into a blender and add the mint while the sugar syrup is still hot. This will infuse the syrup with the minty flavor. Let cool to room temperature.
  2. Add the strawberries and lime juice and blend until smooth.
  3. Pass the strawberry mixture through a sieve into a bowl, using the back of a wooden spoon to push as much of the liquid through the sieve, while leaving the seeds behind. Make sure the sieve is not too fine, or you will be there all day. You should wind up with between 3 1/2 to 4 cups of liquid after straining. Discard the seeds.
  4. Pour the mixture into a non-reactive (that is, not metal) shallow dish and place in the freezer for 45 minutes. Remove from the freezer and, using a fork, scrape the granita to break up and distribute the ice crystals that have formed in that time. Return immediately to the freezer. Continue to freeze the granita for 2 more hours, removing it from the freezer to scrape the ice crystals every 30 minutes (four more times). Remove from the freezer about 15 minutes before serving, re-fluff with a fork and serve with mint leaves and balsamic glaze. Keep, covered, in the freezer.

Nutritional analysis based on 8 servings, does not include balsamic glaze:
Calories 81, Fat 0g, Sodium 2mg, Carbohydrate 20g, Fiber 2g, Sugar 17g, Protein 1g

Posted in dessert | Tagged , , , | Leave a comment

5-Spice Beef and Broccoli Stir-Fry

broccoli_stirfry

A quick cooking midweek stir-fry packed with veggies. photo: Abigail Weber

In addition to belonging to a vegetable and fruit cooperative, I also happen to be a member of a meat share. A friend of mine has a family farm in Minnesota and a few years back he hit upon the idea of buying in on some cattle each season and dividing it up amongst a group of friends. It’s brilliant. So when I received broccoli in my veggie basket this week, I immediately thought of the classic: beef and broccoli. While I love a good stir-fry, they can be a bit tricky to get right if you don’t know what you’re doing. A few helpful hints can go a long way to increasing your odds of success. To help you make a winning stir-fry, I’ve compiled a rundown of some important dos and don’ts.

A well-executed stir-fry demands high heat. For many of us in our home kitchens, that can be a challenge. On top of that, who doesn’t want to cook their stir-fry in a wok? It’s more authentic, right? Wrong choice. The wonderful and informative magazine Cook’s Illustrated has this to say about woks. If you are cooking your stir-fry in your home kitchen, scrap the wok and go with a simple deep skillet with a wide bottom (cast iron is preferable but not compulsory). The wide bottom will place more food in direct contact with the heat of the burner. A wok leaves a good portion of the food in the pan up the curved edges and thus further away from the more intense heat. So, simple tip number one: use a wide bottom skillet and make sure your pan is good and hot before any of your ingredients hit it.

Do not crowd your food! I’m sure you’ve been told this again and again. And i’m sure you’ve disobeyed this command over and over. But, seriously, don’t crowd the pan. Your end result will be light years better. So when cooking the lean meat used in a quick cook stir-fry, go with two, three, even four batches depending on the amount of meat and the size of the pan. That way you’ll get a nice sear and the meat won’t stew. And if you’ve marinated your meat beforehand, be sure to drain it thoroughly so that it’s not too wet when it goes into the pan.

Mise en place. It may be a French term but it’s crucial to good Asian cooking. Basically, have everything in its place. Chop and organize your meat, vegetables, and aromatics before you start cooking and have your sauce mixed and ready to pour in. I even go so far as to arrange my ingredient bowls in the order in which I will add them to the pan. That way I can methodically reach for the next ingredient without having to stop to think. Cooking a stir-fry is a quick business so be ready to roll as soon as you turn up the heat.

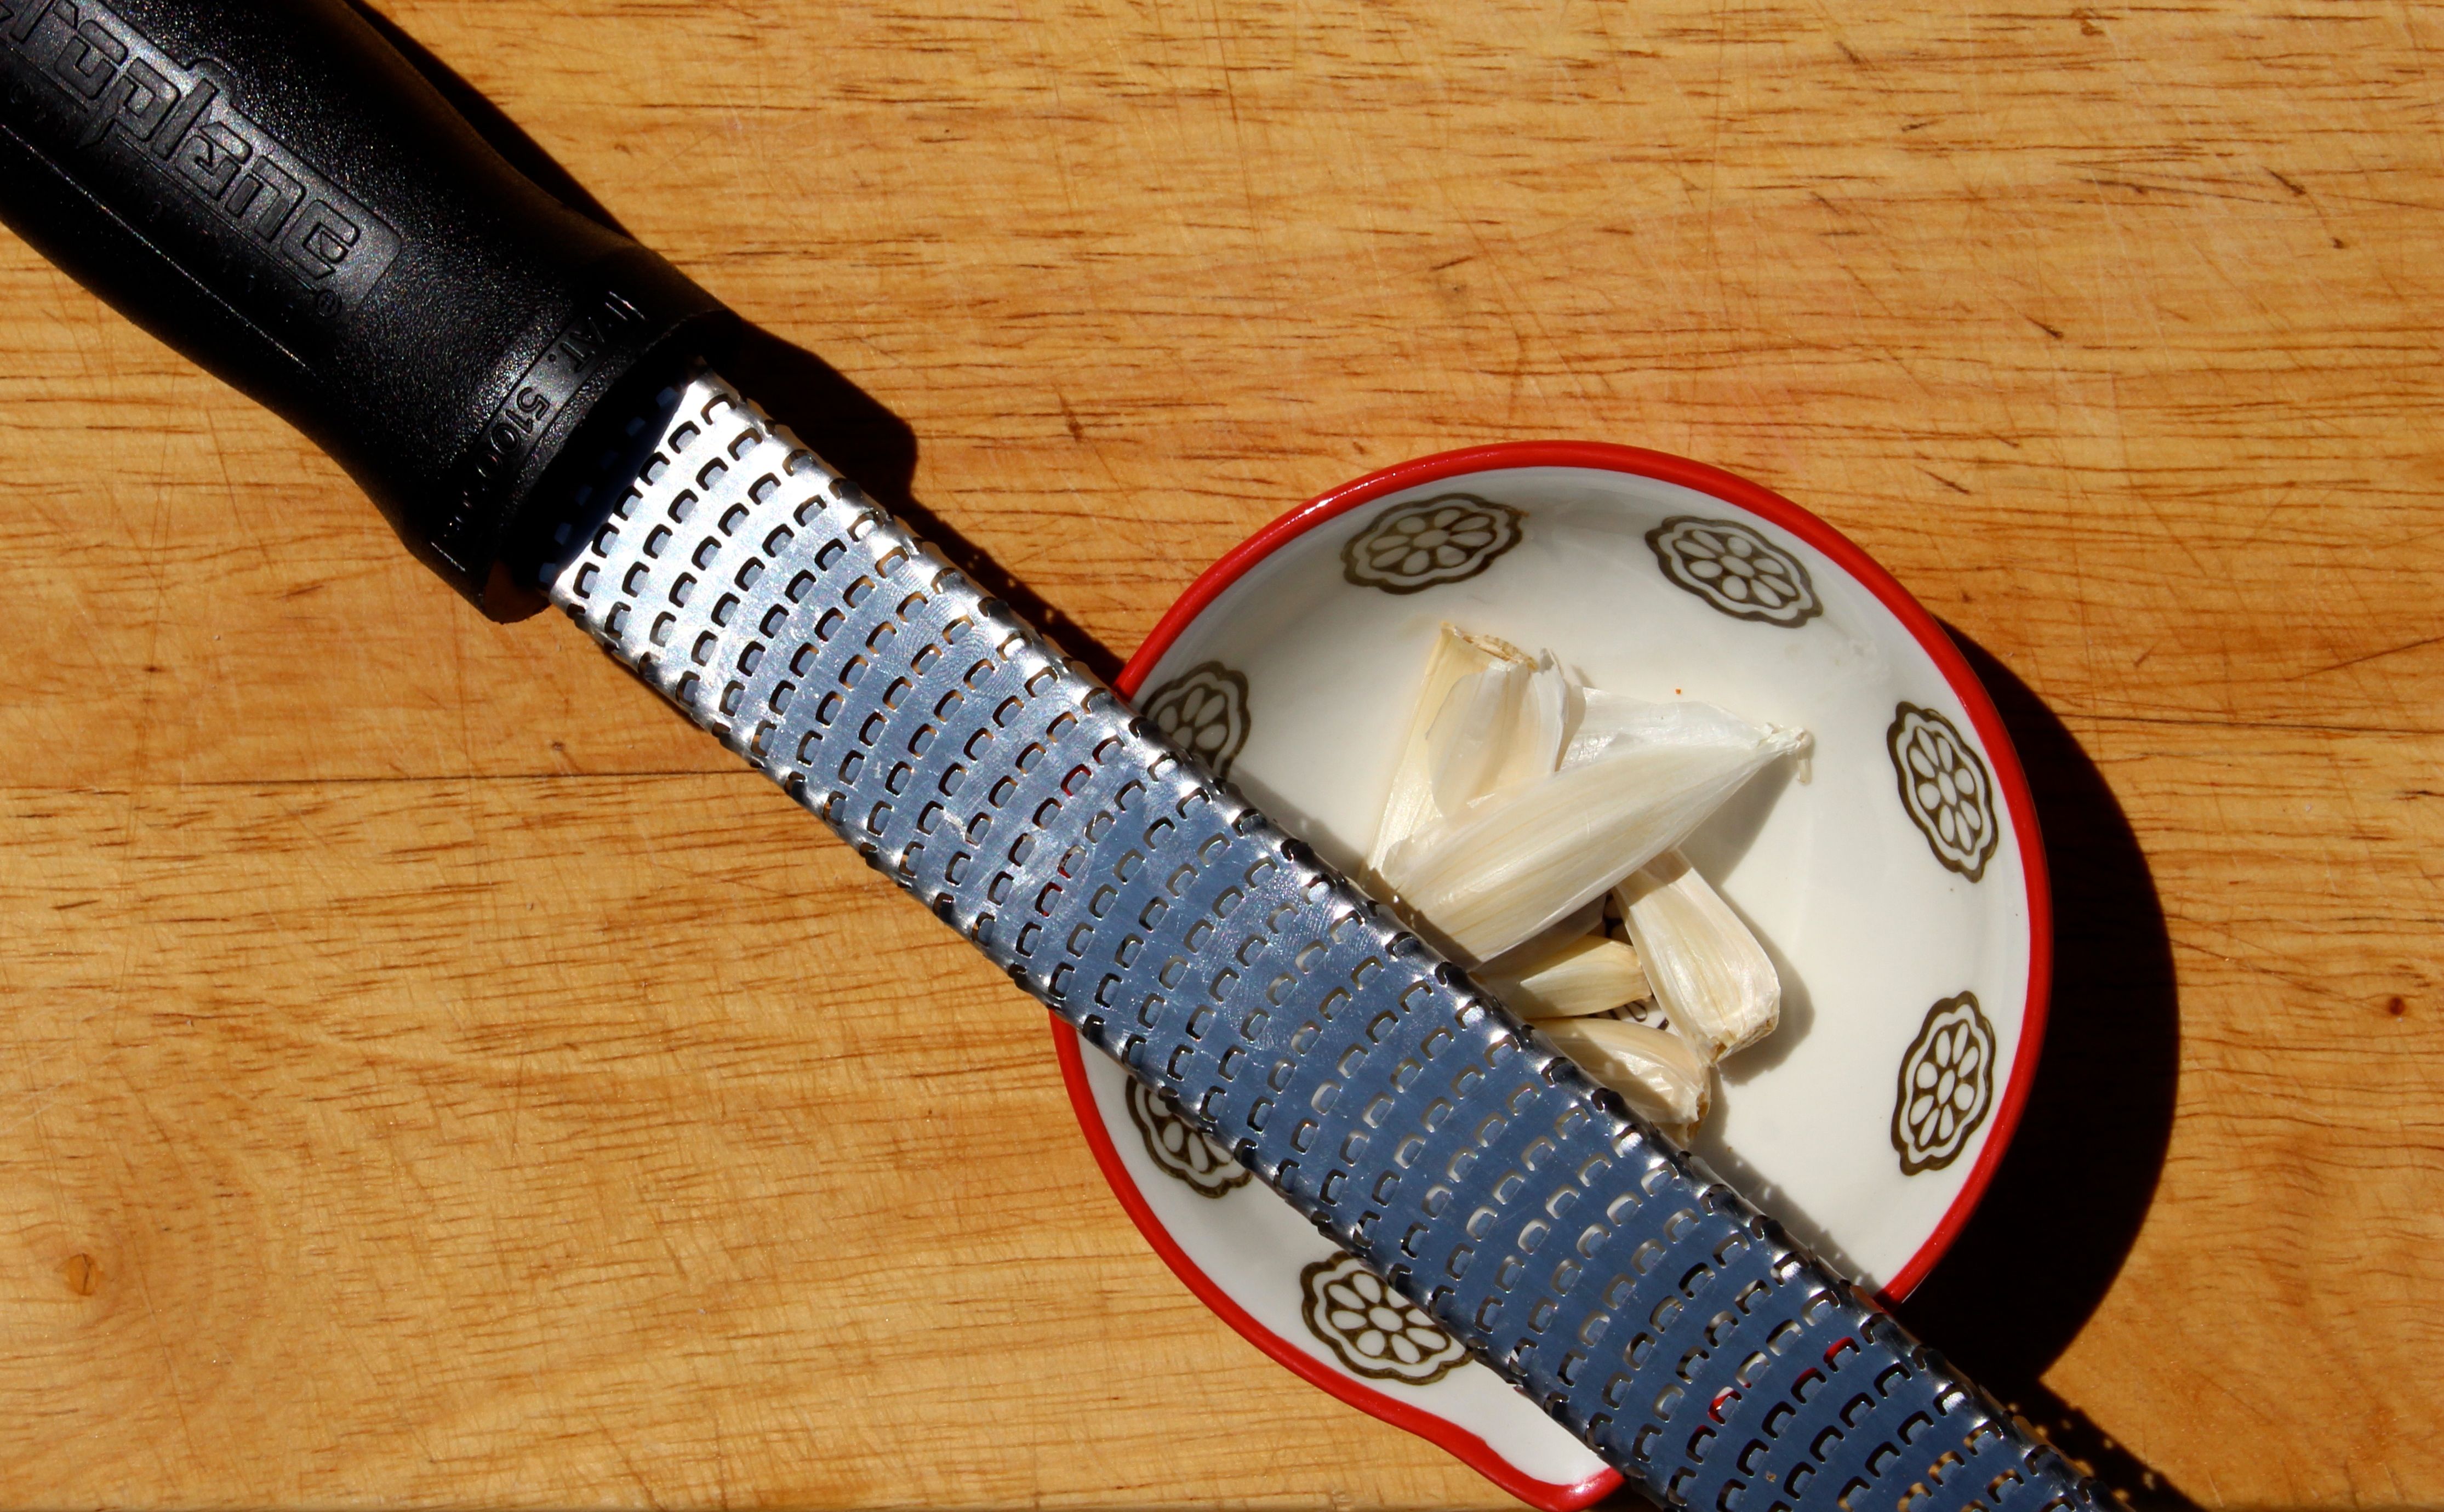
Last, but in no way least, add your aromatics toward the end of cooking time. Mainly I’m referring to ginger and garlic here. I like to clear a space for them toward the end of cooking time and add a teaspoon or so of oil so that they cook just until they are fragrant. If you add them earlier, you’ll probably end up scorching them over the high heat.

Serves 4

Marinade
3 tablespoons soy sauce*
2 teaspoons brown sugar
1 teaspoon Chinese 5-Spice

Stir-Fry
1 1/4 pounds lean beef (ie sirloin), sliced 1/8-inch thick
3 tablespoons soy sauce
1 tablespoon ShaoShing Chinese cooking wine**
2 tablespoons brown sugar
1/4 cup chicken stock, plus more for wetting the pan
1 teaspoon cornstarch
2 tablespoons vegetable oil, plus more to cook aromatics
1 small red onion, thinly sliced
1 large head or 4 small heads broccoli, stem trimmed
4 ounces shiitake mushrooms, stems removed, caps sliced
2 garlic cloves, finely chopped
1 tablespoon finely chopped ginger
2 green onions, dark green parts only, thinly sliced
Rice, for serving

  1. In a medium bowl, stir together the marinade ingredients. Add the beef and stir to coat. You can marinate the beef for 10 minutes or 1 hour, depending on your schedule. Just make sure that you have it out at room temperature for at least 15 minutes before you start cooking. That way it won’t be too cold when it hits the pan.
  2. In a medium bowl, whisk together the soy sauce, cooking wine, sugar, stock, and cornstarch until combined.
  3. In a large wide bottomed skillet, heat 1 teaspoon of the oil over high heat. Add the meat in three batches, adding a teaspoon of oil between each batch, and cook for about 1 minute each batch. Remove to a plate.
  4. Lower the heat to medium-low and add the remaining oil to the pan. Add the onion and cook, stirring, until softening, about 5 minutes. Add the broccoli with 1/3 cup water and cook, covered for 3 to 4 minutes, until crisp tender. Add the mushrooms and cook until softened, about 2 minutes. When cooking the mushrooms, add 2 or 3 tablespoons of stock to the pan to keep it wet and to help deglaze the pan.
  5. Push the vegetables to the side and add the garlic, ginger, and a teaspoon or so of oil to cook the aromatics for about 30 seconds, until fragrant.
  6. Add the meat and any accumulated juices back in to the pan along with the sauce and the green onion and stir to combine. Bring to a simmer and cook for 1 to 2 minutes to thicken slightly.
  7. Serve over rice immediately.

*My preferred brand is a Chinese soy called Pearl River Bridge Superior Light. You can get it at Asian grocers.

**You can get this at Asian grocers. Or you can substitute cooking sherry.

Nutritional analysis based on 4 servings:
Calories 409, Fat 14g, Sodium 1,652 mg, Carbohydrate 23g, Fiber 4g,
Sugar 11g, Protein 50g

Posted in main | Tagged , , , , | Leave a comment

World Cup Shrimp

worldcup_shrimp

World Cup fever celebrated in a dish! photo: Abigail Weber

Futbol fever has taken over my household and the gorgeous images of the World Cup host country Brazil have ignited our imaginations. To complement our viewing of the beautiful games, I’ve developed this spicy shrimp dish based on the Brazilian recipe for coconut shrimp. They call it Moqueca and it’s a delicious stew of onion, garlic, green bell pepper, tomatoes, coconut milk, and of course, shrimp. The dish is traditionally made with palm oil (called dende in Brazil). That’s not the easiest thing to find around my parts so I’ve left it out of my version. I have, however, added in red amaranth from my CSA. Not to worry if you don’t have red amaranth on hand, baby spinach provides a fine substitution. Go on ahead and cook up this summer stew, steam some rice on which to serve it, open a frosty cold beer, and kick back and enjoy the games. Go USA!

Serves 4

1 pound large shrimp, peeled and deveined
2 garlic cloves, finely chopped
3 tablespoons lemon juice
1 teaspoon sweet paprika
1/2 teaspoon cayenne pepper
1/2 teaspoon salt, plus more to taste
2 tablespoons olive oil
1 medium onion, finely chopped
1 medium green bell pepper, finely chopped
1 can (10 ounces) diced tomatoes and green chilies*
1 cup unsweetened light coconut milk
1 bunch red amaranth, leaves picked from stems (about 4 cups packed)
1/4 cup fresh cilantro leaves
Cracked black pepper to taste
Rice, for serving

  1. First, marinate the shrimp. In a medium bowl, place the shrimp, garlic, lemon juice, paprika, cayenne, and 1/2 teaspoon salt and toss to coat. Cover and refrigerate while you prepare the rest of the ingredients.
  2. Meanwhile, in a large deep saucepan, heat the oil over medium-low heat. Add the onion and pepper and cook for 8 to 10 minutes, until softened. Add the diced tomatoes and green chile and simmer for about 5 minutes, until slightly reduced.
  3. Add the shrimp with marinade into the pot and stir to coat with the sauce. Cook, covered, about 3 minutes, until the shrimp is just pink all over. Uncover and stir in the coconut milk and amaranth. Cook until the amaranth is wilted, about 1 minute.
  4. Remove from the heat and stir in the cilantro. Season to taste with black pepper and more salt, if you like. Serve over rice.

Nutritional analysis based on 4 servings:
Calories 270, Fat 13g, Sodium 735mg, Carbohydrate 11g, Fiber 2g, Sugar 3g, Protein 25g

*I used the Rotel brand of diced tomatoes and chilies. You can, however, switch out Rotel and use diced tomatoes instead. If you do, use only about 3/4 of the can since diced tomatoes generally come in larger sized cans. This substitution will also cut down on the heat of the dish. I’m not kidding, it’s pretty spicy.

Posted in main | Tagged , , , , | 1 Comment

Curried Deviled Pullet Eggs

pullet_egg

Two small brown pullet eggs next to one large egg. photo: Abigail Weber

You may not realize this, but even chickens have a learning curve. Apparently they are not born expert egg layers. Hence, pullet eggs, the small eggs produced by young hens just entering the family egg laying business. Because of their diminutive stature, I thought they’d make a nice one-bite deviled egg. Back in Australia, I used to love curried egg salad sandwiches. Here I’ve adapted that salad into a deviled egg. These make for a wonderful cocktail party appetizer. Because they are one-bite, your guests can easily pop them into their mouths without ever having to set down their drink. How civilized.

deviled_egg

One-bite deviled eggs. photo: Abigail Weber

Makes 12 deviled egg halves

1/2 dozen hard-boiled pullet eggs, peeled and chilled
3 tablespoons mayonnaise
2 teaspoons dijon mustard
1 teaspoon white wine vinegar
1 1/2 teaspoons curry powder
Salt to taste
Snipped chives, for garnish
Coriander chutney, for serving (optional)

Slice the chilled eggs carefully in half lengthwise. Into a medium bowl, gently pop out the yolks. Using a fork, mash the yolks well. Add the mayonnaise, mustard, vinegar, curry powder, and salt to taste. Stir well to combine, until smooth. Garnish the eggs with chives and serve with chutney, if you like. This also makes a delicious accompaniment to the Indian-spiced Kohlrabi Salad.

Nutritional analysis based on one deviled egg half, does not include chutney:
Calories 59, Fat 5g, Sodium 59mg, Carbohydrate 0g, Fiber 0g, Sugar 0g, Protein 3g

Posted in appetizer | Tagged , , | Leave a comment

Indian-spiced Kohlrabi Salad

kohlrabi_salad

Kohlrabi is best served raw. photo: Abigail Weber

I was happy to find that krazy kohlrabi had arrived in my CSA basket this week. In my humble opinion, this freaky looking veggie is the oft-overlooked gem of the cabbage family. When the weather heats up, I love a no-cook salad (ok, no-cook if you don’t count the toasting of the cumin seeds). And kohlrabi is a dish best served raw. I learned somewhere along the line that kohlrabi featured prominently in North Indian cooking. That little tidbit way back in the recesses of my mind provided the Indian inspiration for this recipe. And the cantaloupe, well, that just seemed like a good flavor match. Let me tell you, it was. A delightful summer salad this turned out to be.

Serves 4

Lime Dressing

1/4 cup lime juice
1 small shallot, sliced very thinly
1 teaspoon toasted cumin seeds
2 tablespoons extra virgin olive oil

Salad

4 cups watercress sprigs
1 large or 2 small green or purple kohlrabi, peeled and sliced very thinly*
1/4 cantaloupe, peeled, seeded, and sliced thinly
2 tablespoons fresh cilantro leaves

  1. To make the lime dressing: Place all the ingredients in a measuring jug and whisk well to combine. Let the dressing sit while you prepare the salad ingredients so that the shallot can pickle lightly.
  2. To prepare the salad: In a large bowl, toss the watercress with a couple teaspoons of the dressing in order to coat the leaves. Add in all the salad ingredients except the cilantro. Pour in the remainder of the dressing and toss to coat. Plate the salad and garnish with cilantro leaves.

*To slice the kohlrabi paper thin, I recommend using a Japanese mandoline. I generally try to keep it simple when it comes to kitchen appliances but this particular appliance is really great to have on hand. It’s compact, lightweight, and makes quick work of slicing. I use my mandoline when slicing potatoes for gratins, onion that will be served raw, or for veggies in pretty salads like this one.

Nutritional analysis based on 4 servings:
Calories 98, Fat 7g, Sodium 31mg, Carbohydrate 9g, Fiber 2g, Sugar 4g, Protein 2g

Posted in salad | Tagged , , , , , | Leave a comment

Chickpea and Purslane Salad with Sumac-Scented Lamb

chickpea_purslane

Middle Eastern flavors are perfect for lamb. photo: Abigail Weber

This recipe features a few ingredients with which most people are not terribly familiar. But rest assured, they are all pretty accessible and they each add something unique to the mix. First off, there is purslane, a green that I hadn’t come across myself until a few years ago when I started seeing it in my CSA pick ups. It’s a peppery, lemony, crisp addition to any summer salad. And it just happens to be a weed! I found this great article on purslane in the Chicago tribune. That’s where I learned that purslane is packed with Omega-3’s, making it a real nutritional powerhouse that gives you one more delicious way to “green-up” your diet.

Also on the little known list is sumac. Every time I mention this spice people assume I’m talking about poison sumac. The truth of the matter is that ground sumac is a zingy, lemon-flavored spice used most often in Middle Eastern cooking. It’s beautiful in salads, on dips, and on meat and fish. I get mine at the fine food market at Grand Central terminal in New York City but you can also order it online or purchase it from Middle Eastern food stores.

Lastly, there’s haloumi. It’s most closely associated with Cyprus but versions of it can be found around the Mediterranean. It’s a semi-hard cheese that is brined and usually made from goat or sheep’s milk. Be aware that it’s quite salty. Best to salt your salad after adding the haloumi. I pan-fry it very quickly before adding it to the salad. That way the cheese develops a lovely light brown crust that provides a crunchy contrast to the creamy middle.

Serves 8

Chickpea and Purslane Salad

1 pound dried chickpeas
1 bunch purslane, leaves picked, small leaves whole, larger leaves roughly chopped
1/3 cup small mint leaves
2 green onions, finely chopped
1/4 cup lemon juice
2 tablespoons olive oil
1 teaspoon sumac
8 ounces haloumi cheese
Salt and cracked black pepper to taste

Sumac-Scented Lamb

1/4 teaspoon sumac per lamb chop
Salt and cracked black pepper to taste

  1. To make the chickpea and purslane salad: Soak the chickpeas overnight then cook according to the package directions. Let cool to room temperature. Add the purslane, mint, and green onion and stir gently to combine.
  2. In a measuring jug, whisk together the lemon juice, oil, and sumac until well combined. Add to the chickpea mixture and toss gently to coat. Let sit at room temperature for at least 3o minutes to allow the flavors to blend.
  3. Just before serving, slice the haloumi into 1/2-inch thick slices and pat dry with a paper towel. Grease a large frying pan with spray oil and heat to medium-high heat. Add the haloumi in two batches and cook on each side about 20 seconds, until lightly browned on the outside but not melting. Remove from the pan and chop into small squares. Add to the chickpea salad and serve.
  4. To make the sumac-scented lamb: Coat each lamb chop on both sides with sumac, salt, and pepper. Grill or pan-fry in a lightly oiled frying pan until medium-rare, about 1 minute per side depending on thickness. Serve with the chickpea and purslane salad.

Nutritional analysis for chickpea and purslane salad based on 8 servings:
Calories 317, Fat 13g, Sodium 333gm, Carbohydrate 37g, Fiber 10g, Sugar 7g, Protein 15g

Posted in main, salad | Tagged , , , | 2 Comments

Cool Cucumber and Purslane Soup

cuke_purslane

A cool summer soup. photo: Abigail Weber

Chilled cucumber soup on a hot summer day is such a refreshing treat. But to be honest, it can be a bit one note. In mulling over new and interesting ways to use the lovely purslane I received from my CSA, my thoughts immediately drifted to this classic summer soup. Would the purslane add texture and complexity? I’m happy to report that it did indeed. Purslane brought a peppery highlight to the soup that worked so well with the mellow cucumber. This recipe is based on a cucumber soup that was floating around the test kitchen at a past employer of mine, The Australian Women’s Weekly. Everything I learned there made me the recipe writer I am today and I find myself returning to those old reliable recipes time and time again. If you are making this for a larger crowd, go ahead and double or triple it. I didn’t have enough purslane to test a big batch but I don’t see any reason why it wouldn’t scale up just fine. I like to serve this as an opener to a summer luncheon, or as an elegant pass around hors d’oeuvres served in small shot glasses.

Makes about 4 cups

1 large English cucumber (about 1 pound), peeled and coarsely grated
1 bunch purslane, leaves picked
1 garlic clove, roughly chopped
2 tablespoons roughly chopped fresh mint leaves
1 tablespoon white wine vinegar
1 tablespoon olive oil
16 ounces fat-free Greek yogurt
Salt to taste
Mint leaves, chopped tomato, and a drizzle of olive oil, to garnish

  1. Place the grated cucumber in a colander set over a bowl. Let the cucumber drain for at least 2 hours then squeeze out any excess water in the cucumber. Reserve the cucumber water.
  2. Place the cucumber, purslane, garlic, mint, vinegar, and oil in the bowl of a food processor or a blender and process until smooth (the mixture will still have texture and a bit of crunch). Pour into a large bowl and mix through the yogurt until well combined. Stir in the reserved cucumber water a little at a time until you have achieved the consistency you desire. Season to taste with salt and chill for a few hours. Serve garnished with mint leaves, chopped tomato and a drizzle of oil.

Nutritional analysis based on 4 servings:
Calories 114, Fat 4g, Sodium 99mg, Carbohydrate12g , Fiber 1g, Sugar 10g, Protein 8g

Posted in appetizer, soup | Tagged , , , , | 1 Comment