Yellow Plum Friands

plum_friand

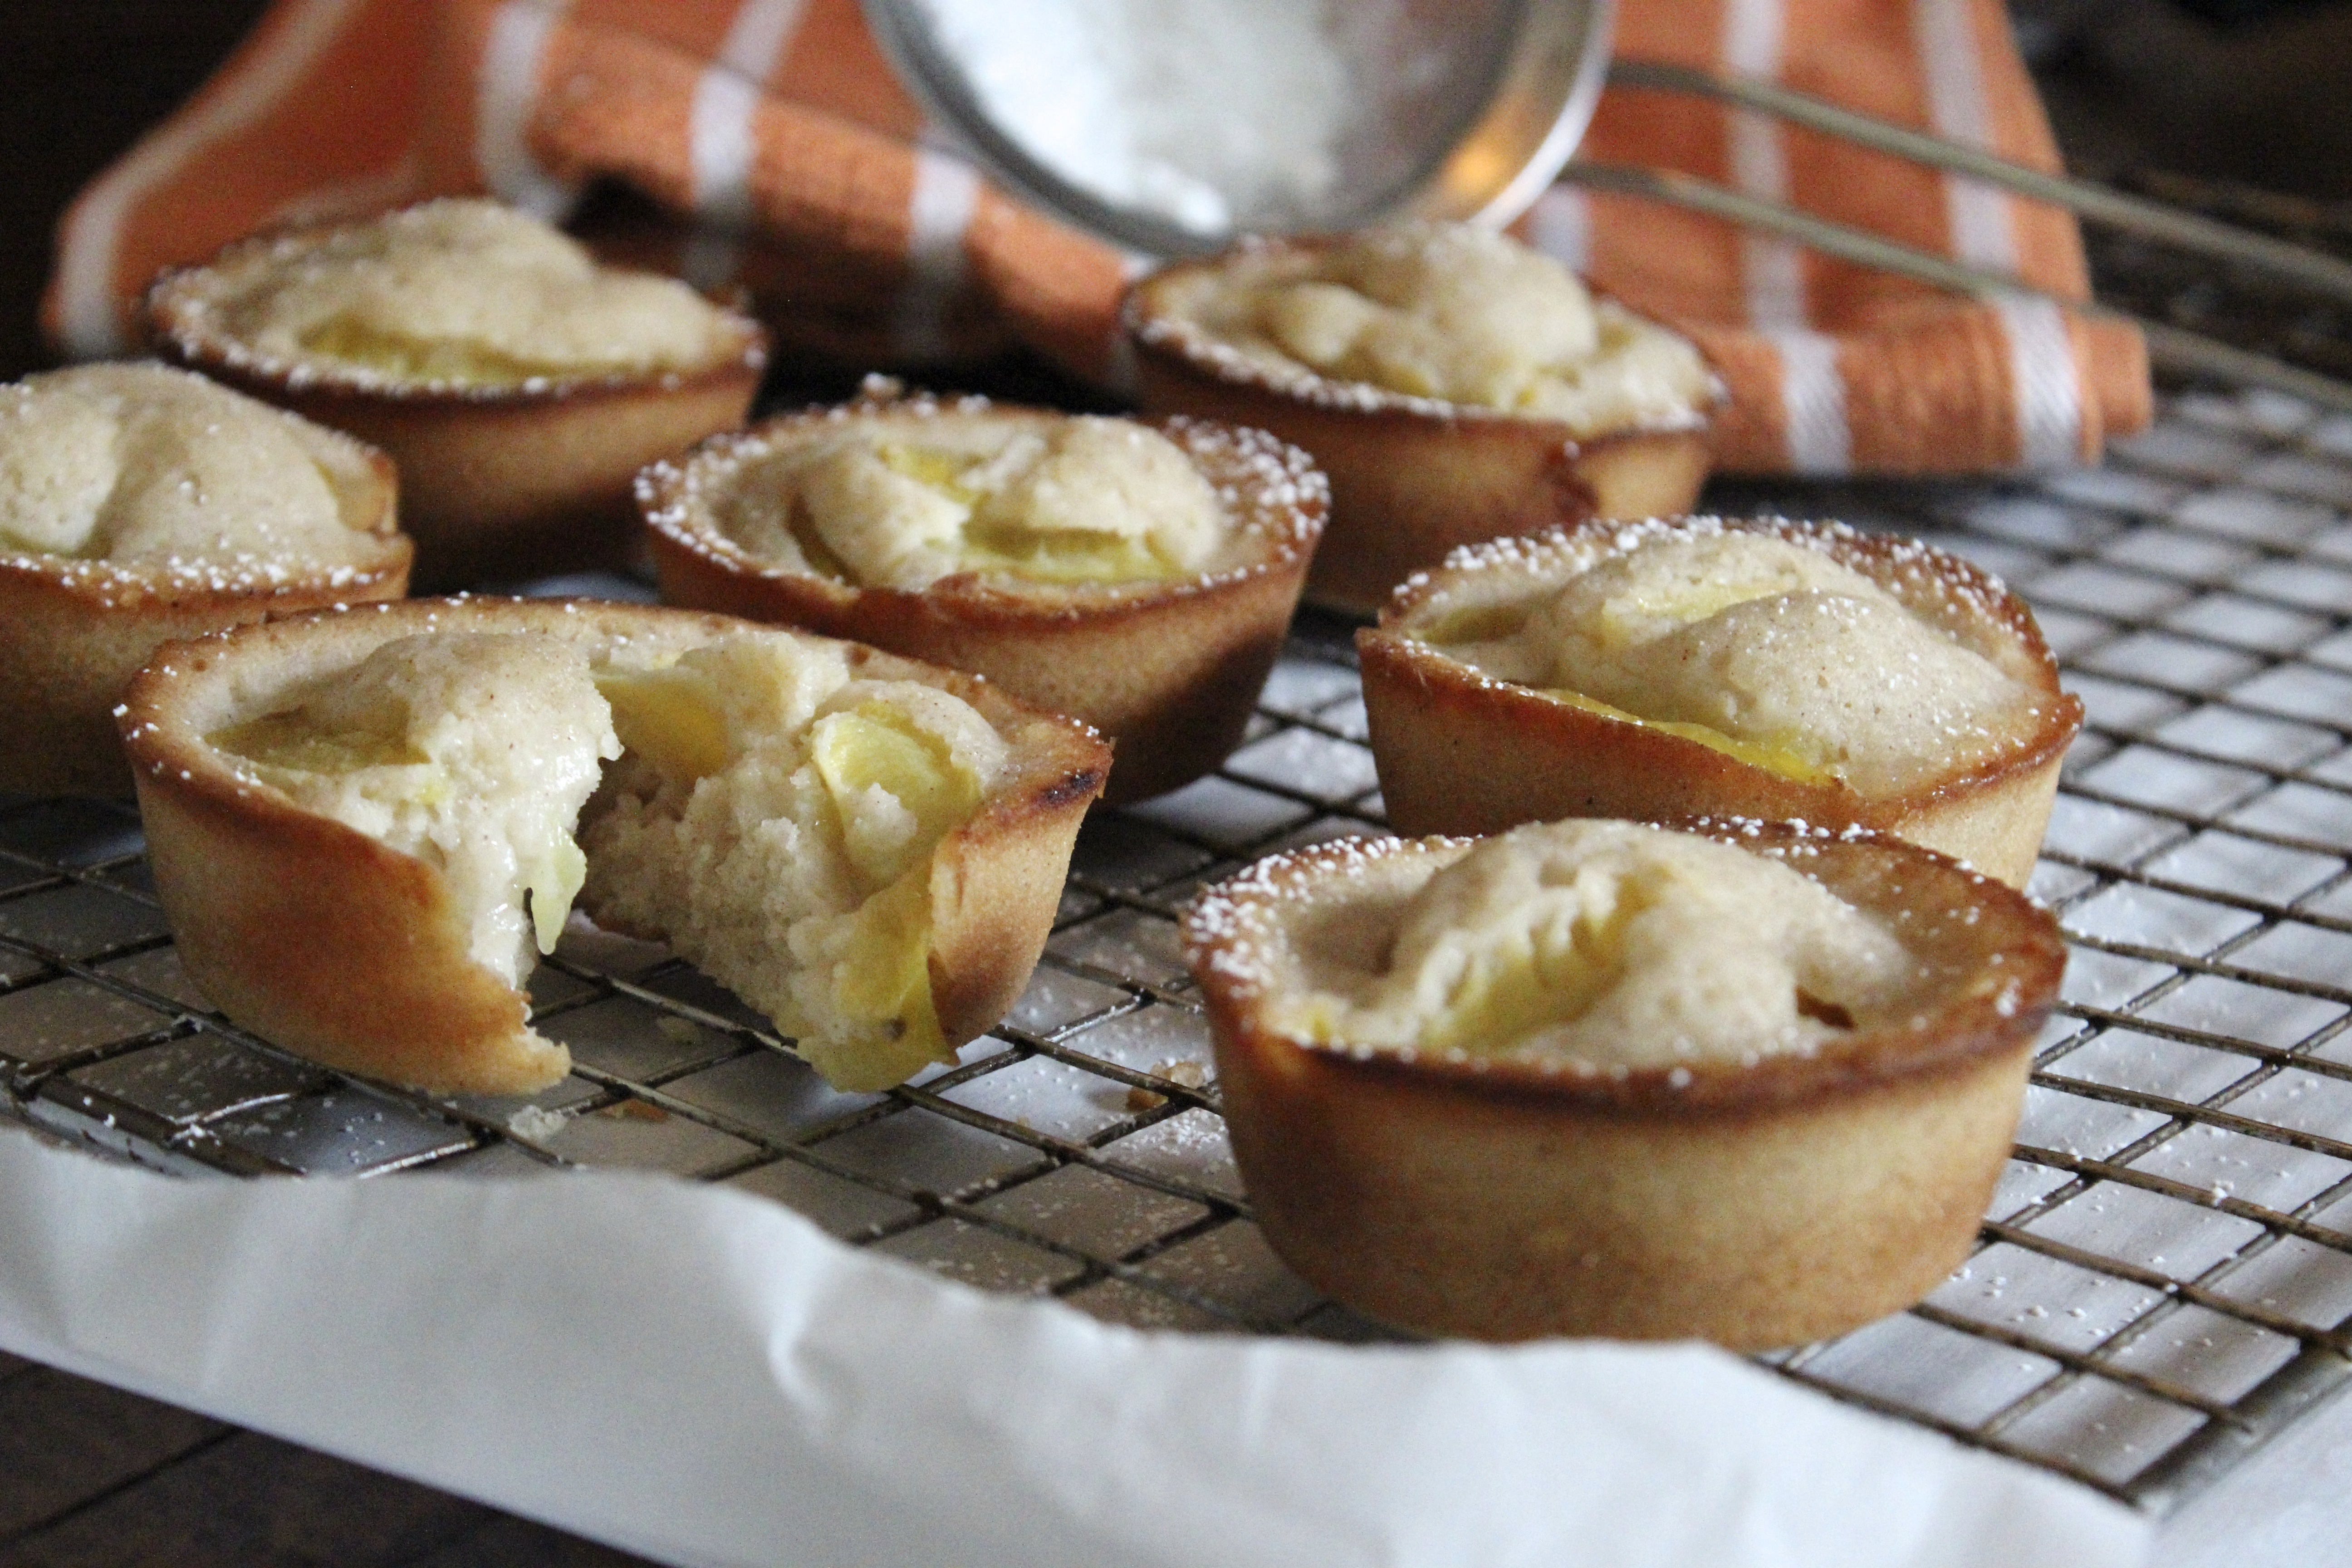
Friands cooling on a baking tray. photo Abigail Weber

yellow_plum

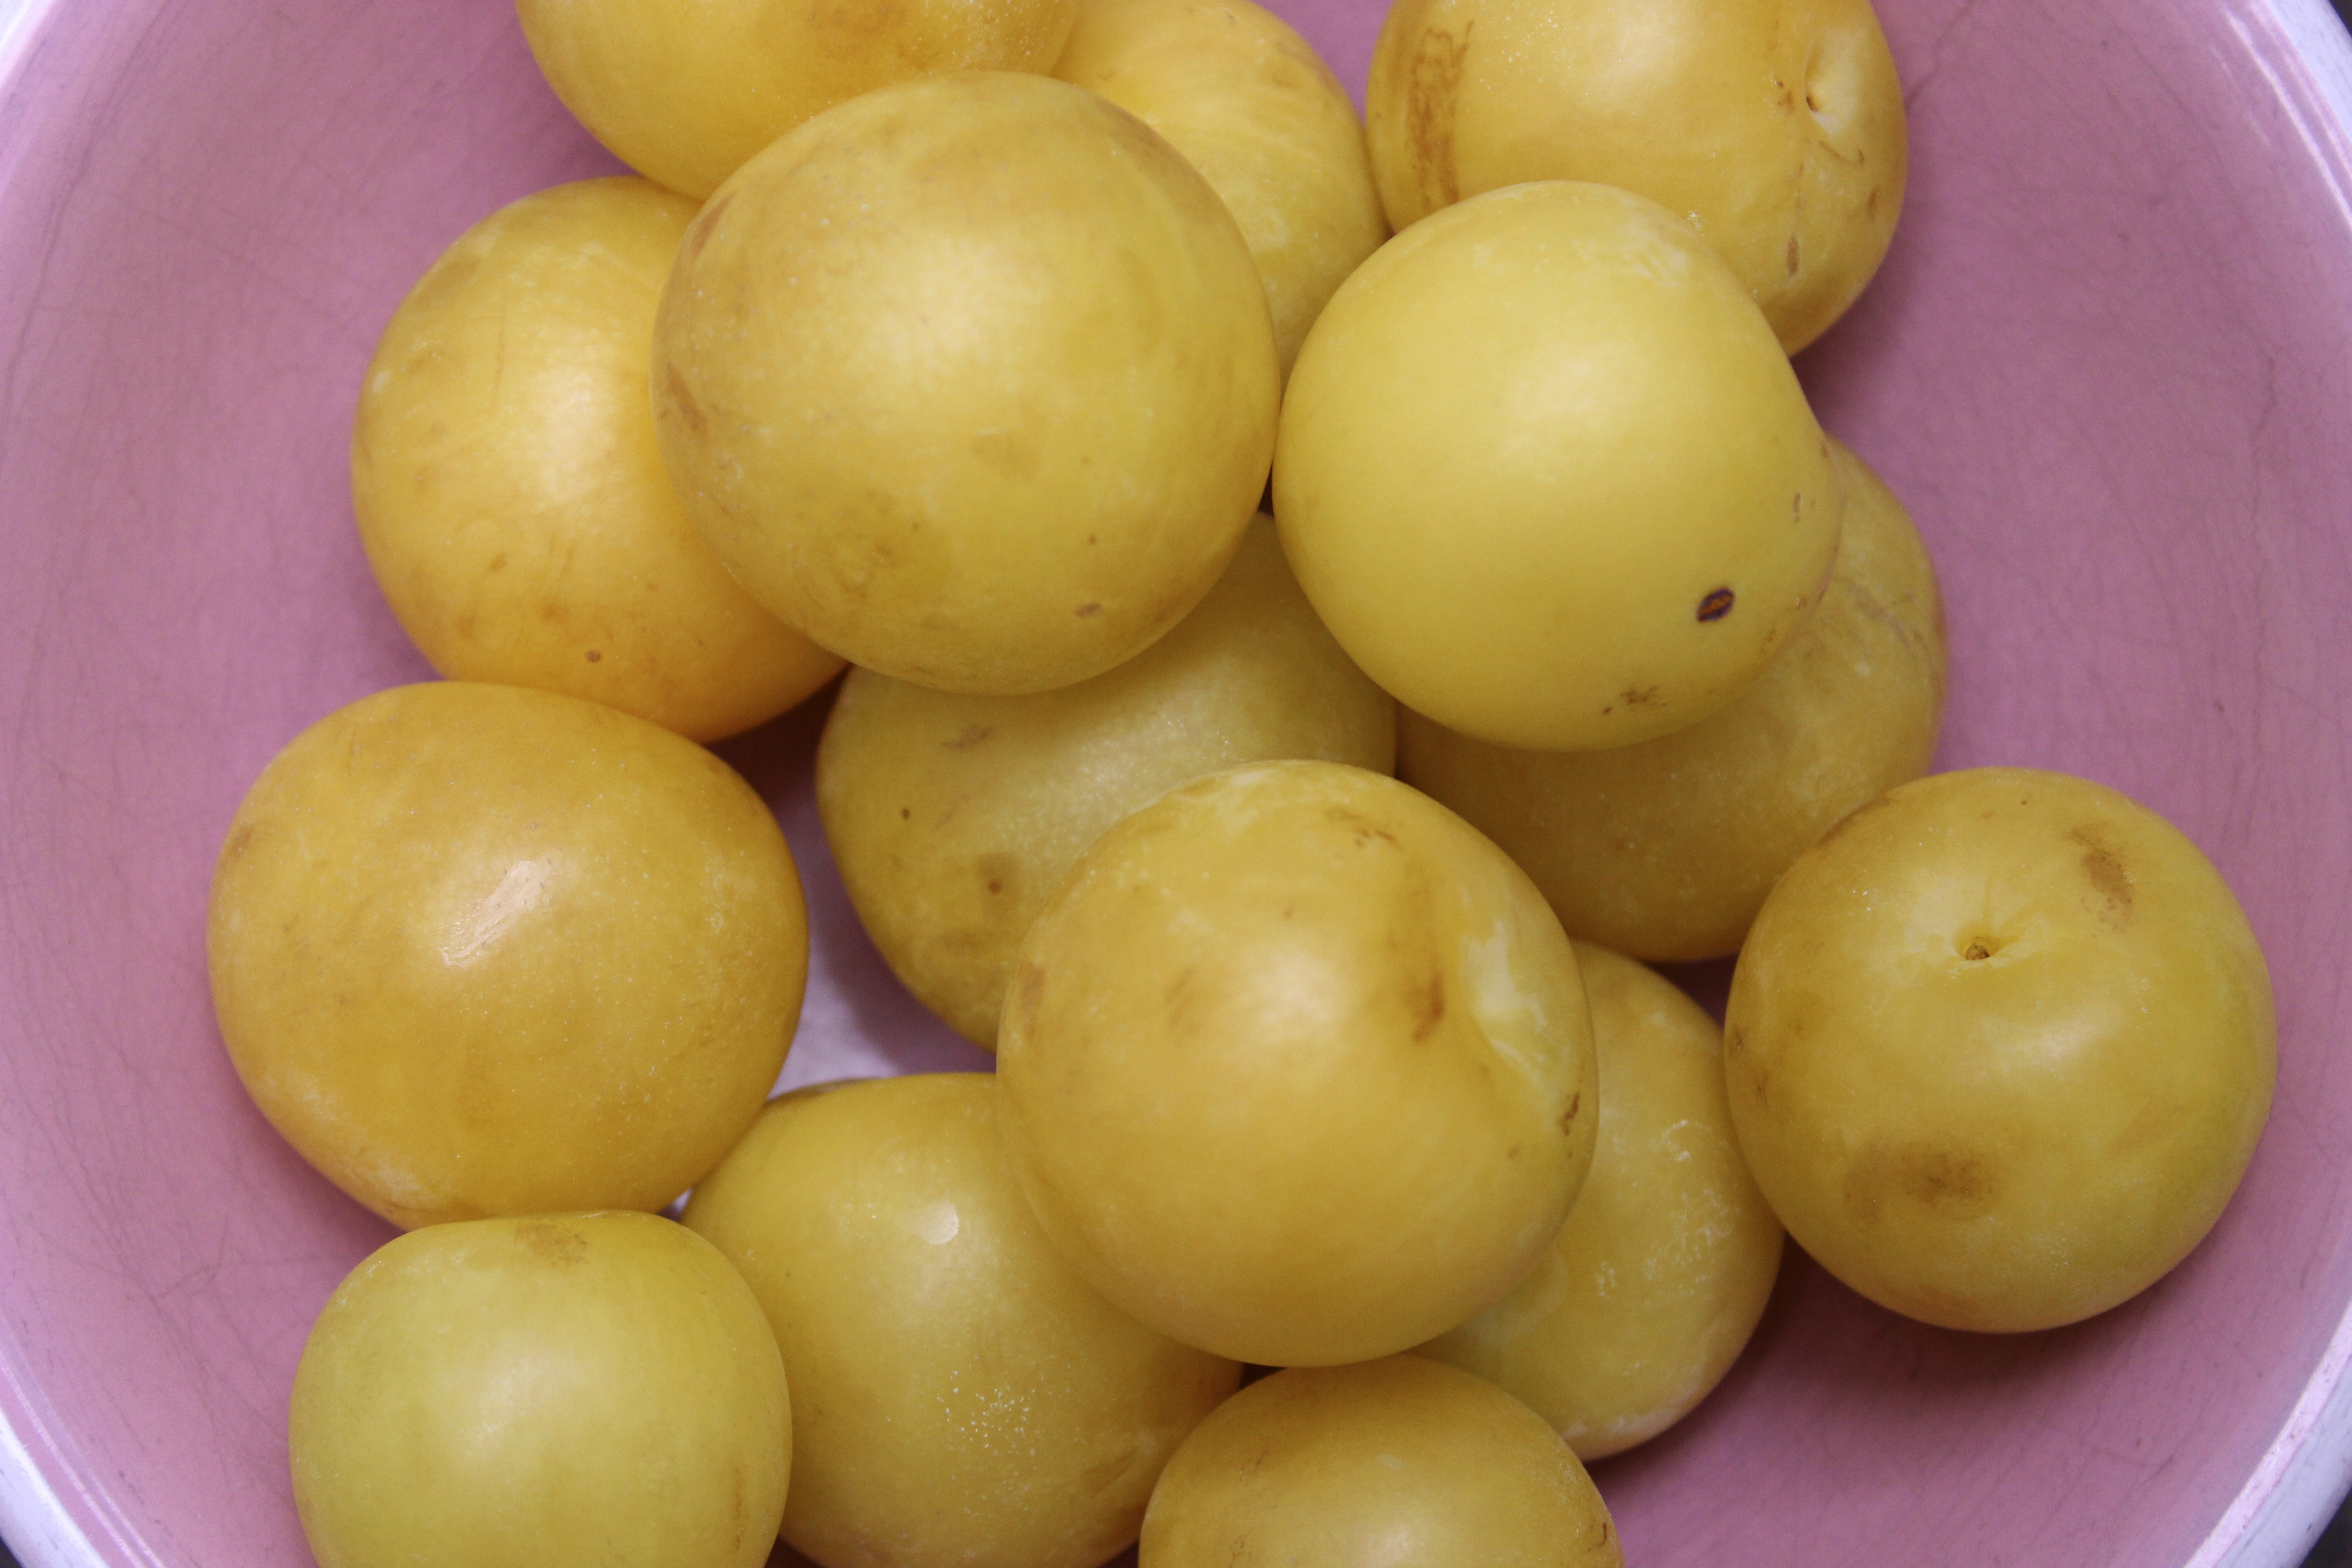
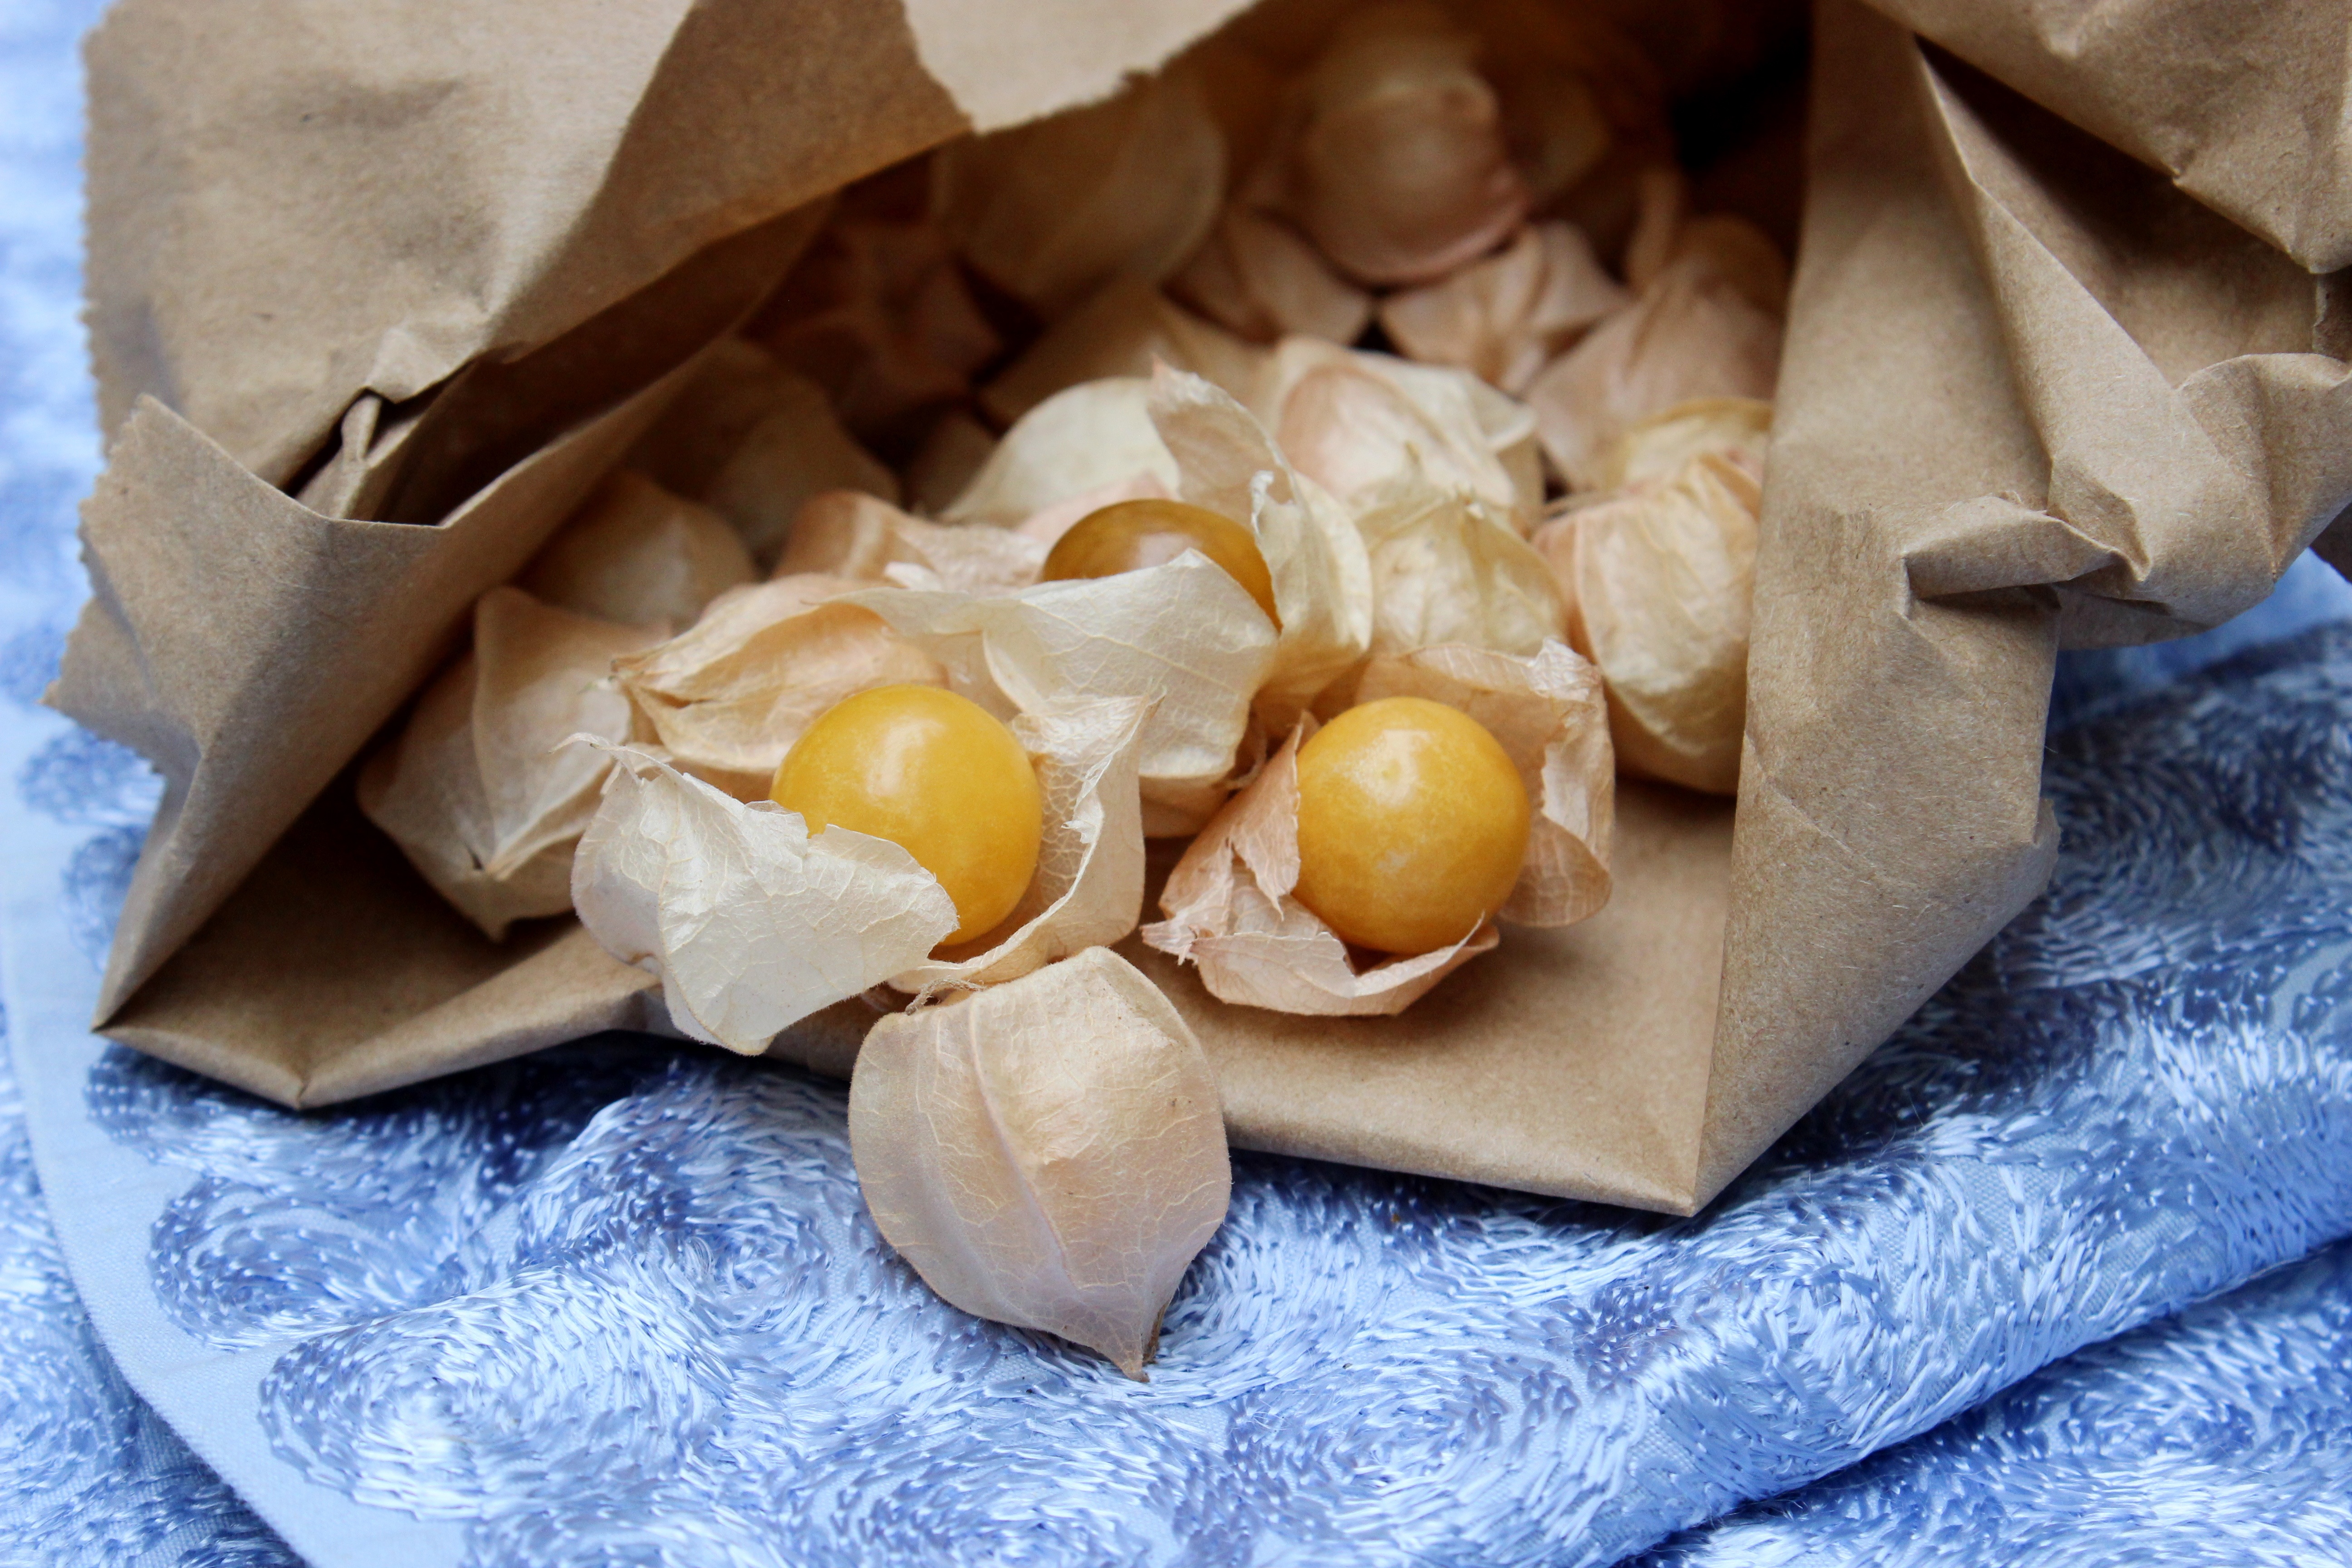
Tiny yellow plums. photo: Abigail Weber

These delicious cakey muffins scream Australian coffeehouse like no other sweet treat I know. I’d wager that most of you here in the United States have never heard of friands but if you’ve ever enjoyed a financier cake in France, you’ve got the right idea.

Made with almond meal, egg whites, and confectioners’ sugar, this cross between the muffin and the cupcake strikes the perfect balance between the two. They are light and fluffy and exceedingly moist, absolute perfection next to a latte (or a flat white for you Aussies out there). I’ve flavored these with yellow plums and a hint of cinnamon. On the day I made them, I kid you not, the full dozen was gone before 24 hours had passed.

Makes a dozen

1 1/2 cups confectioners’ sugar, plus more for dusting
1/2 cup all-purpose flour
1/2 teaspoon ground cinnamon
1 cup almond meal*
5 large egg whites, lightly beaten with a fork
1 1/2 sticks (3/4 cup) unsalted butter, melted and cooled
6 small yellow plums, halved and pitted

  1. Preheat the oven to 375°F. Grease a 12-cup muffin pan.
  2. Sift the confectioners’ sugar, flour, and cinnamon into a medium bowl. Stir in the almond meal. Make a well in the middle of the dry ingredients and add the eggs and butter. Stir to combine.
  3. Pour the batter evenly among the cups of the muffin pan.
  4. Cut each plum half into three thin slices. Lightly press three plum slices into each friand. Bake about 18 minutes**, until cooked through and lightly browned around the edges. Let cool in the pan for 5 minutes, then gently lift out to cool on a baking rack. Serve dusted with confectioners’ sugar.

*Almond meal is also called almond flour. You can easily make your own if you can’t find it in the markets. Simply grind unblanched almonds and sift. Keep opened almond meal containers in the fridge or freezer so they don’t spoil. The oils in the almonds turn rancid quickly after opening.

**I used a dark metal cupcake tray. Light metal trays may necessitate a slightly longer cooking time.

Posted in dessert, snack | Tagged , , , , , | Leave a comment

Ground Cherry Cous Cous Salad

ground_cherry

Ground cherries in a quick midweek side. photo Abigail Weber

ground_cherry_bag

Ground cherries have a paper husk similar to that of the tomatillo. photo: Abigail Weber

Ground cherry, gooseberry, husk tomato. They are all varietals on the same wonderful theme. If you live in England, gooseberries are the varietal you’re likely familiar with, and there they are most often baked into sweet confections. Here in the United States, ground cherries can be found in farmers’ markets or CSAs. Their taste might be described as the delicate offspring of the tomato and the pineapple, part sweetly juicy and part tart and tangy. Here I put their unusual flavor to good use as the sweet high note in a pearl cous cous side dish. Sure I could have chosen to use tomatoes or raisins instead, but ground cherries just seemed like more fun. This side works nicely with a simple piece of grilled chicken or paired with a green salad for a light yet satisfying lunch.

Serves 2

Salad
1 cup cooked tricolor pearl cous cous (also known as Israeli cous cous)
1/2 cup ground cherries, larger ones halved, smaller kept whole
1/4 cup thinly sliced lemon cucumber (about 1/2 a small cucumber)
1 scallion, dark green parts only, thinly sliced
2 tablespoons toasted pine nuts
A handful of fresh mint and flatleaf parsley, torn
Salt and cracked black pepper to taste
2 tablespoons crumbled feta

Dressing
1 tablespoon lemon juice
1 tablespoon olive oil
1/4 teaspoon ground cumin

  1. To assemble the salad: In a medium bowl, combine the cous cous, ground cherries, cucumber, scallion, pine nuts, mint, and parsley.
  2. In a screw-top jar, combine the lemon juice, oil, and cumin and shake well to combine.
  3. Pour the dressing over the salad and toss to coat. Season to taste with salt and pepper. Serve topped with feta cheese.

Nutritional analysis based on 2 servings:
Calories 545, Fat 20g, Sodium 170mg, Carbohydrate 76g, Fiber 6g, Sugar 2g, Protein 16g

Posted in salad, side | Tagged , , , , , , | 4 Comments

Blueberries and Greens Salad

blueberry_vanilla_salad

Blueberries and vanilla in a savory salad. photo: Abigail Weber

I love fruit in savory salads, so much so that when I was working as a food editor in Australia, at one point my boss had to tell me to knock it off with all the fruit in the salad. There’s just something about that burst of sweetly tart flavor that marries so well with vinegar and greens. Throw in nuts and cheese, and you’ve got a a dish I’m sure to love.

This is the simplest of summer salads and it’s an absolute delight. The vanilla dressing proved to be the crowning touch. I’d always had vanilla flavored dressings on beet salads so I figured the sweet blueberries would also work. Turned out to be a match made in summer heaven.

Serves 4

Dressing
1/2 shall shallot, finely chopped
1/2 teaspoon pure vanilla extract
2 tablespoons white balsamic vinegar
2 tablespoons olive oil

Salad
1 head red leaf lettuce, leaves torn
1 cup blueberries
1/2 cup toasted walnuts
Salt and cracked black pepper to taste
1/4 cup crumbled goat cheese

  1.  Make the dressing: In a screw-top jar, combine the shallot, vanilla, balsamic, and oil and shake vigorously to combine. I like to let the dressing sit for a bit so that the shallots can soften up and infuse the dressing with their flavor so feel free to make this a day ahead. Try to make it at least 30 minutes before you assemble the salad.
  2. Assemble the salad: In a large bowl, combine the lettuce, blueberries, and walnuts. Add the dressing and toss to coat the leaves. Season to taste with salt and pepper, sprinkle over the goat cheese, and serve immediately.

Nutritional analysis based on 4 servings (does not include salt and pepper to taste):
Calories 250, Fat 21g, Sodium 94mg, Carbohydrate 11g, Fiber 3g, Sugar 6g, Protein 7g

Posted in appetizer, lunch, salad, side, Uncategorized | Tagged , , , , , , | Leave a comment

Pickled Cucumber and Shrimp Salad with Red Shiso

shiso_salad

Kirby and Lebanese cucumbers can be pickled in an hour or less. photo: Abigail Weber

shiso_leaf

The red shiso leaf is also known as perilla. photo: Abigail Weber

This week we take a culinary trip to Japan thanks to the exotic, gorgeous, and fragrant red shiso that has arrived in my CSA box. You may not be familiar with this herb, but if you’ve eaten sushi, you’ve probably seen it before. It’s the pointy green or red leaf on which you’ll often find sushi or sashimi sitting atop. Chances are, you didn’t even know that it was edible! Oh but it is. And it is wildly popular in Japan. When I think of shiso, or perilla as it’s also known, I think of pickling. That’s what the Japanese like to do with this herbaceous leaf. Ever wonder how real pink pickled ginger gets its color? That’s right, red shiso leaves. (At least, that’s the way its done when it’s not processed in a big factory.)

This lovely salad of roasted shrimp and pickled cucumbers tossed with a quintessential Japanese soy-mirin-rice wine vinegar dressing is lovely with or without the shiso. So please don’t skip it if you can’t get your hands on some. But if you can, I promise you that this citrusy, anise flavored herb will add so much depth to the flavor of the salad. It sort of surprised me how much better it made the dish.

When I served this salad, I served it as a main course lunch and it was plenty filling. But I also think it would be nice to pair it with a collection of cold plates on a hot summer evening. I’m thinking cold sesame noodles, tuna tartare on crispy wontons, and green tea ice cream to finish. The way I look at it, if you can’t make the trip to Japan, you can always send your senses there instead.

Serves 4/Makes 1/4 cup Dressing

Pickled Cucumbers
1 tablespoon salt
1 tablespoon sugar
3 Kirby or Lebanese cucumbers, thinly sliced into rounds*
1 tablespoon rice wine vinegar

Roasted Shrimp
3/4 pound peeled and deveined large shrimp (about 30)
1/4 teaspoon ground ginger
Salt to taste
Spray cooking oil
1 tablespoon finely sliced red or green shiso leaf

Dressing
1 tablespoon soy sauce
2 tablespoons rice wine vinegar
1 tablespoon mirin
1 teaspoon sesame oil
2 tablespoons olive oil

Salad
4 cups mixed greens
1/4 cup finely sliced red or green shiso leaf
2 scallions, dark green parts only, finely sliced
Sesame seeds and togarashi (Japanese chili pepper) to garnish (optional)

  1. Pickle the cucumbers: In a small bowl, combine the salt and sugar. Place the cucumbers in a medium bowl and sprinkle over the salt and sugar and toss to combine and coat. Pour over the vinegar and toss to combine. Let sit at room temperature for 45 minutes to 1 hour, depending on how thinly you’ve sliced the cucumbers and how pickled you prefer them.
  2. Roast the shrimp: Meanwhile, preheat the oven to 450°F. Pat the shrimp dry with a paper towel and place on a rimmed baking sheet. Sprinkle with the ginger and salt to taste and toss to combine and coat. Spray the shrimp with cooking oil. Roast for 5 minutes, until just cooked through. Remove from the oven, place in a medium bowl and toss with the 1 tablespoon sliced shiso leaf.
  3. Make the dressing: In a jar, combine all the dressing ingredients and shake well to combine. Shake well again just before pouring over the salad and shrimp.
  4. Assemble the salad: Place the cucumbers in a colander in the sink, run water over them to rinse off the excess salt and sugar.
  5. Pour 1 tablespoon of the dressing over the shrimp.
  6. In a large bowl, combine the rinsed and dried cucumber with the mixed greens, shiso, and scallion. Pour the remaining 3 tablespoons of the dressing over the salad and toss to combine. Sprinkle with sesame seeds and togarashi, if you like and serve with the roasted shrimp.

Nutritional analysis based on 4 servings:
Calories 201, Fat 10g, Sodium 569mg, Carbohydrate 9g, Fiber 2g, Sugars 3g, Protein 20g

*These are the small cucumbers that are great for pickling.

Posted in lunch, main, salad | Tagged , , , , , , , , | Leave a comment

Apricot Clafoutis

apricot_clafoutis

The easiest baked dessert on earth! photo Abigail Weber

Let me preface this baking recipe by admitting that I am not much of a baker. Savory food is where it’s at for me. I like to toss my ingredients in the pan and see what kind of magic I can conjure up. Needless to say, the science of baking can be a real challenge for me. So when I started French cooking school, and the first baked dish we learned was clafoutis, it was like a revelation. A baked dessert that you create using a blender!? That’s my kind of patisserie. Clafoutis has stayed with me all these years as one of my favorite ways to put late summer fruit to good use. Classically it’s made with cherries. But we received apricots at the CSA this week, so there you go. This dessert could not be simpler. It’s basically a blended crepe batter that cooks around fresh fruit. The result is a delicate baked custard with slightly crisped edges and luscious fruit nestled in the middle. I recommend serving this warm, dusted with confectioners’ sugar, topped with a scoop of cold vanilla ice cream.

Serves 6

1/2 cup whole milk
1/2 cup heavy cream
2 large eggs
1/2 cup granulated sugar, plus 1 tablespoon
1 vanilla bean, split in half lengthwise, seeds scraped
1 teaspoon finely grated orange zest
Pinch of salt
1/2 cup all-purpose flour
2 tablespoons unsalted butter, melted
8-10 small apricots (a little over 3/4 lb), halved and pitted or 4 medium apricots, pitted and quartered.
2 tablespoons dessert white wine (such as a Sauternes)
Confectioners’ sugar and vanilla ice cream, for serving

  1. Preheat the oven to 350°F.
  2. In a blender, combine the milk, cream, eggs, 1/2 cup sugar, vanilla bean seeds, zest, and salt. Blend until combined. Add the flour and pulse just until combined.
  3. In a 10-inch round deep ovenproof frying pan pour in the melted butter and swirl it around to coat the pan. Place the apricots in the pan and coat them all over with the butter. If you are using apricot halves, arrange them skin-side up, sprinkle over the 1 tablespoon sugar, and pour over the dessert wine.
  4. Pour the batter over the apricots and bake until puffed and golden and a skewer inserted into the center of the clafoutis comes out clean, about 45 minutes. Let cool slightly for about 15 minutes. Serve warm, sprinkled with confectioners’ sugar and topped with vanilla ice cream, if you like.

Nutritional analysis based on 6 servings:
Calories 229, Fat 13g, Sodium 56mg, Carbohydrate 23g, Fiber 0g, Sugar 21g, Protein 3g

Posted in dessert | Tagged , , , , , | 2 Comments

Kale and White Beans on Roasted Eggplant

kale_bean_eggplant

A side for two or a hearty vegetarian main for one. photo: Abigail Weber

While I often serve kale raw, I also like to enjoy it warm from time to time. I don’t cook it to death, just long enough for it to slightly wilt and soak up the flavorings in the pan. In this case, lemon and garlic do the trick to infuse this hearty green with loads of flavor.

Whenever I have eggplant on hand, as I do this week, I try to get to it right away. I either grill it over the weekend while the barbecue is already going for other things or I take some time on Sunday night to roast up a big batch to have on hand for meals throughout the week. Having pre-roasted or grilled eggplant in the fridge makes this a pretty no fuss midweek meal. The kale and bean mixture takes 15 or 20 minutes (including chopping time) to prep. This dish is lovely all on its own or paired with roasted shrimp scattered over top.

Serves 2

2 medium Japanese eggplants, stem end trimmed, cut in half lengthwise
3 tablespoons olive oil
1 teaspoon salt, plus more to taste
3 garlic cloves, thinly sliced
1 bunch lacinato kale, tough inner stems removed, leaves shredded
Juice of one lemon
3/4 cup white beans, rinsed and drained
1 tablespoon finely shredded fresh lemon basil
Cracked black pepper to taste

  1. To roast the eggplant, using the tip of a small, sharp knife, cut a cross hatch pattern into the flesh side of the eggplant. Sprinkle each eggplant half with 1/4 teaspoon of salt. This will reduce the natural bitterness of the eggplant as well as the amount of oil the eggplant soaks up. Let the eggplant sit for about 20 minutes.
  2. Meanwhile, preheat the oven to 400°F.
  3. Using a paper towel, wipe off the excess salt and any moisture that has leached out of the eggplant. Place the eggplant halves on a rimmed baking tray and drizzle each half with 1 teaspoon of oil. Roast for 30 minutes, until the eggplant is creamy and golden.
  4. Meanwhile, make the kale and white bean topping. In a wide, shallow pan, heat the remaining 2 teaspoons of oil over medium-low heat. Add the garlic and cook, stirring, for about 1 minute, being careful not to burn the garlic. Add the kale and stir to coat with the garlic and oil. Quickly add the lemon juice and 1/4 cup water, cover, reduce the heat to low, and cook for about 3 minutes, until the kale is softened. Uncover and stir through the beans and lemon basil. Season to taste with salt and pepper.
  5. Serve the eggplant topped with the kale and bean mixture.

Nutritional analysis based on 2 serving:
Calories 389, Fat 22g, Sodium 625mg, Carbohydrate 45g, Fiber 17g, Sugar 9g, Protein 12g

Posted in main, side | Tagged , , , , , , | 1 Comment

Fairy Tale Eggplant Caponata

caponata

Pasta, fresh vegetables, cheese, and wine. Life is good. photo: Abigail Weber

Most cultures in the world can claim a version (or versions for that matter) of a vegetable stew featuring eggplant, pepper, onion, and tomato. Ratatouille from the South of France is undoubtedly the most famous, thanks in no small part to the animated movie of the same name. In my humble estimation, though, Italian caponata is the king of this genre. I’m especially drawn to the style that derives from Sicily, that exotic and wild island that shares almost as much culturally with Greece, Africa, and the Middle East as it does with its home country of Italy. This adaptation is faithful to the traditional in some ways. I’ve featured cocoa powder, pine nuts, and raisins as they do in Sicily. But I’ve also taken some liberties to make it my own. Most notably, I’ve skipped the celery (too overpowering in my book) and capers (not because I don’t like them, I just wasn’t feeling them today).

Caponata is as versatile as it is delicious. If you are having people over, serve it on crostini for a hearty appetizer. Or for dinner during the week, serve it with grilled fish (especially swordfish) or meat. For vegetarian nights, try it tossed through pasta, my favorite way to enjoy caponata. And when you have a little leftover from dinner, pile it into an omelette for breakfast the next morning or spread it on a sandwich at lunchtime. I love a recipe like this one that I can get lots of mileage out of. It makes me feel like the beginnings of my next meal are sitting in the refrigerator just waiting for me to put them to use.

fairy_tale_egg

Teeny little fairy tale eggplant. photo: Abigail Weber

Serves 4

3 tablespoons olive oil
2 medium frying peppers, sliced thinly
4 spring onions or 1 medium yellow onion, sliced thinly
8 ounces fairy tale eggplants (or substitute 2 medium Japanese eggplants), coarsely chopped
3 garlic cloves, finely chopped
1/4 cup tomato paste
1 teaspoon unsweetened cocoa powder
4 plum tomatoes (about 2 cups chopped), coarsely chopped
1/4 cup red wine vinegar
1/4 cup golden raisins
Salt and cracked black pepper to taste
1/4 cup toasted pine nuts
1/4 cup loosely packed thinly sliced fresh basil leaves

  1. In a wide, shallow pan, place 1 tablespoon of oil over low heat. Cook the peppers and onions, stirring, for about 5 minutes, until beginning to soften (you may need a little longer if you are using yellow onion).
  2. Add the remaining 2 tablespoons of oil with the eggplant and cook, stirring, for 4 more minutes. Add the garlic and cook for about 30 seconds, until fragrant. Stir in the tomato paste and cocoa powder and let caramelize for about 30 more seconds.
  3. Add the tomatoes, vinegar, and raisins with 1/4 cup water. Cover and lightly simmer for about 10 minutes, until the eggplant is tender and the tomatoes have broken down. Season with salt and pepper to taste.
  4. Remove from the heat and stir through the pine nuts and basil. Serve with crostini, meat, fish, pasta, eggs, or what ever else you may fancy.

Nutritional analysis based on 4 servings:
Calories 242, Fat 16g, Sodium 139mg, Carbohydrate 24g, Fiber 5g, Sugar 14g, Protein 4g

Posted in appetizer, condiment, main | Tagged , , , | 4 Comments

Cucumber Agua Refrescante

cucumber_water

Yet another delicious way to use cucumbers! photo: Abigail Weber

The cucumbers just keep on a-coming. So too then will the cucumber recipes. I try to steer away from sugary juices and sodas but, with this heat, a cooling drink of some sort is a necessity. Of course, there’s always water. But if you’re in the mood for something a little jazzier, I suggest a refreshing glass of cucumber water. Sometimes I keep it simple and just add cucumber slices to water and pour over ice. Other times, I doctor up my cucumber water with some lime and mint. I’ve got lemon cucumbers on hand this week so they went straight in. However, feel free to make this with any type of cucumber you happen to have in the fridge.

Makes 10 cups

2 lemon cucumbers
Juice of 1 lime, another lime sliced thinly
10 cups water
Sprigs of mint and plenty of ice, to serve

  1.  Slice off the ends of the cucumber and, using a peeler, remove strips of the skin so that you have alternating strips of bare cucumber and cucumber with skin. Slice the cucumber into rounds and place in a large pitcher. Add the lime juice, lime slices, and water. Refrigerate for at least 1 hour for the flavors to infuse.
  2. Serve with mint sprigs over ice.
Posted in beverage | Tagged , , , , | Leave a comment

Deconstructed Breakfast Parfait with Sweet and Salty Granola

Deconstructed breakfast parfait. Just before serving, I like to pour over about a 1/4 cup of milk to bring all of the ingredients together. photo: Abigail Weber

The classic breakfast parfait. If you’ve frequented a Starbucks in the last several years (or for that matter, a McDonalds), you know what I’m referring to here. It’s a simple layered dish of yogurt, fruit, and granola. And it’s a ubiquitous option on most breakfast menus. More upscale restaurants will serve it to you in one of those old fashioned sundae cups, while fast food establishments stick with the utilitarian plastic cup with lid. Simple as it is, though, for some reason, I rarely make parfaits for myself at home. Which is a shame, really, because a purchased parfait is usually loaded up with unnecessary sugar and is generally priced loads higher than it should be. And did I mention, it’s a super simple dish? When blueberries showed up in my CSA bag this week, for some reason, all I could think of was breakfast parfait.

At its heart, this recipe is a set of instructions for making your own granola, topped off with instructions for assembling the dish. But if you want to make this a quick assembly-only dish, buy a good quality granola and just put the parts together. I don’t have much of a sweet tooth, especially in the morning, so I like salted almonds in my granola. I love to taste a good hit of salt in all my sweet dishes (my heart belongs to salted caramel). If you are making the granola recipe, keep an eye on it in the oven. It tends to go from just perfectly toasted to burnt and bitter in the blink of an eye. And with that, I present you with, my ode to the humble yet decidedly delicious little treat that is the breakfast parfait.

Serves 4/Makes about 6 cups granola

granola_tray

Granola cooling on the tray.

Granola
4 tablespoons (1/2 stick) unsalted butter
2 teaspoons ground cinnamon
1/4 cup firmly packed light brown sugar
1/4 cup honey
2 cups old-fashioned oats (not instant)
1 cup sunflower seeds
1 1/2 cups whole salted almonds
3/4 cup torn dried papaya pieces
1/2 cup dried cranberries

Parfait
2 cups 2 % Greek yogurt
1 vanilla bean
1 1/3 cups granola
2 cups blueberries

  1. First, make the granola: Preheat the oven to 300°F. Spray a large rimmed baking sheet with cooking oil.
  2. In a medium saucepan over low heat, melt the butter with the cinnamon. Add the sugar and honey and cook, stirring and without boiling, until sugar and honey are dissolved. Remove from the heat.
  3. In a large bowl, combine the oats, sunflower seeds, and almonds. Pour in the butter mixture and mix until the dry ingredients are evenly coated. Spread the granola onto the prepared baking sheet so that it is in an even layer.
  4. Bake the granola for 20 minutes, stirring every once in a while and checking to make sure that it does not get too browned. Stir in the papaya and dried cranberries and bake for a further 5 minutes. Remove from the oven and let cool on the baking sheet. The granola will still be soft and wet at first but will harden and dry as it air cools.
  5. Plate the parfait: Place the yogurt in a medium bowl. Using a small, sharp knife, split the vanilla bean lengthwise down the center. Use the edge of the knife to gently scrape the seeds out of the bean, without taking the fibrous outer covering. Dump the seeds into the yogurt and stir to combine.
  6. Place four shallow bowls on your workspace. Fill each with 1/2 cup of yogurt next to 1/3 cup granola, and 1/2 cup blueberries. And serve.

Nutritional analysis based on 4 servings:
Calories 297, Fat 12g, Sodium 88mg, Carbohydrate 38g, Fiber 5g, Sugar 25g, Protein 11g


Posted in breakfast | Tagged , , , , | Leave a comment

Avocado, Tomato, and Corn Salad with Creamy Tomatillo Vinaigrette

A fresh summer salad that comes together in minutes. photo: Abigail Weber

Tomatillos arrived this week! My husband (who you may remember, hails from New Mexico) cannot be happier. So for his birthday this week, I’ve cooked up this roasty, toasty, creamy tomatillo vinaigrette. It’s a super versatile dressing that is lovely on just about anything, from grilled chicken to a simple green salad. Here I serve it on a fresh avocado, tomato, and corn salad. It’s my personal celebration of the flavors of summer. The hot and hazy season feels to be at its peak right now so a light refreshing salad like this one is just what the doctor ordered.

Serves 6/Makes about 1 cup vinaigrette

tomatillo_vinaigrette

This recipe makes more vinaigrette than you’ll need for this salad so you can use the dressing in dishes throughout the week. It will keep in the fridge for about a week. photo: Abigail Weber

Vinaigrette
3 tomatillos, husks removed, rinsed, and halved widthwise
3 medium shallots, halved
1 jalapeno, halved lengthwise
2 tablespoons olive oil
1 small garlic clove, roughly chopped
1/2 teaspoon ground cumin
2 tablespoons lime juice
1/3 cup firmly packed, roughly chopped cilantro (leaves and stems)
Salt to taste
2 tablespoons creme fraiche

Salad
1 ear corn, husked
2 medium avocados, halved, pitted, and sliced (sprinkle with a little lime juice to keep the avocado from browning)
4 small tomatoes, sliced
1/2 small head butter lettuce, leaves torn
Sprigs of cilantro, to garnish
Sea salt and cracked black pepper to taste

  1. First, make the vinaigrette: Preheat the oven to 400°F.
  2. In a small roasting pan, drizzle the tomatillos, shallots, and jalapeno with 1 tablespoon of the oil. Roast for 15 to 20 minutes, until everything is browned and softened.
  3. Remove from the oven and add 6 tablespoons of water to the pan, swirling it around to pick up all the liquid and cooked bits in the pan. Pour the contents of the roasting pan (along with the water and all the browned bits) into a blender with the remaining 1 tablespoon oil, garlic, cumin, lime juice, and cilantro. Blend until smooth. If you like, you can stop here and the dressing will have a lightly creamy texture from the tomatillos. Have a taste and season with salt. If you’d like a smoother, creamier texture, add the creme fraiche and blend again, just until combined.
  4. To make the salad: In a large pot of boiling salted water, cook the corn until tender, about 5 minutes. Drain the corn, cool slightly, and cut the kernels from the ears.
  5. On a large platter, layer the avocado and tomato in an alternating pattern. Tuck the torn pieces of lettuce into the layering, sprinkle over the corn, and garnish with cilantro sprigs. Sprinkle with sea salt and pepper to taste. Drizzle over 1/4 cup of the tomatillo vinaigrette and serve with more vinaigrette on the side for passing. Use leftover vinaigrette on grilled chicken, fish, or any other salad your imagination can dream up.

Nutritional analysis for salad based on 6 servings:
Calories 114, Fat 7g, Sodium 9mg, Carbohydrate 13g, Fiber 5g, Sugar 2g, Protein 3g

Nutritional analysis for dressing based on 2 tablespoon serving:
Calories 46, Fat 4g, Sodium 2mg, Carbohydrate 2g, Fiber 0g, Sugar 1g, Protein 0g

Posted in condiment, lunch, main, salad | Tagged , , , , , , , , | 3 Comments